Introduction
The web connects millions of people, each speaking their own language. For web designers, this represents an exciting challenge and an extraordinary opportunity. Webflow, with its brand-new Localization functionality, opens the way to creating tailor-made online experiences for a global audience.
In this comprehensive guide, we'll dive into the depths of Webflow Localization, exploring every aspect with meticulous attention to detail. From the translation of static content to design adaptation, CMS localization and the creation of a language selector, no detail will be overlooked!
Get ready to master the art of Localization on Webflow and propel your site to new international horizons. Let's get started!
Location on the web
Localization, a term increasingly present in the digital lexicon, plays a central role in creating tailor-made online experiences for a global audience. Let's start by taking a closer look at this notion.
What is localization?
Localization is much more than simply translating a text. It's a complete adaptation of a website to meet the cultural, linguistic and geographic specificities of its audience. It aims to offer a user experience that is as natural and relevant in a given language as it is in the site's original language.
But how do you localize your website? There are several options:
Option 1: Manual translation into subfolders
A first approach is to create sub-folders for each language and manually duplicate the base version in each folder for each language. Each language is treated as a separate entity, with its own pages and content, completely independent of each other.
This method, while offering total control over how translations are managed and displayed on the site, is 100% manual and therefore extremely time-consuming.
Plus points :
- Free of charge
- Total control
- No need for third-party tools
Minuses:
- Extremely time-consuming
- Complex internal project organization
- Difficult to maintain
- Not scalable
Option 2: Machine translation with a third-party tool
Another option for creating a multilingual website in Webflow is to use a third-party tool, such as Weglot.
These are today's most popular choices for website translation. These solutions facilitate rapid site translation, but may have limitations in terms of content customization and adaptation.
Plus points :
- Guided integration
- Centralized management
- Machine translation
Minuses:
- External to Webflow
- More complex integration for non-technical people
- Technically complex advanced features
Option 3: Webflow Localization - redefining localization standards
Finally, Webflow Localization represents a significant advance in the field. Integrated natively into Webflow, this functionality offers an ultra-complete and integrated approach to localization, covering all aspects of the process, from the translation of static content to the adaptation of design and CMS.
Plus points :
- Native integration
- Centralized management in Webflow
- Semi-automatic translation
- Advanced customization of design and content
- Advanced features
Minuses:
- Can only be used in Designer, more complex for non-technical users
The introduction of Webflow Localization opens up new possibilities for website localization on Webflow. In the sections to come, we'll dive into the details of Webflow Localization and explore every facet to help you localize your Webflow sites from A to Z.
Part 1: How to activate Webflow Localization on your site
To start with, in this section we show you how to activate Localization on your Webflow site and how to add new languages to offer an ever richer and more personalized user experience to your audience.
To activate Webflow Localization, go to your project's Designer and follow the steps below:
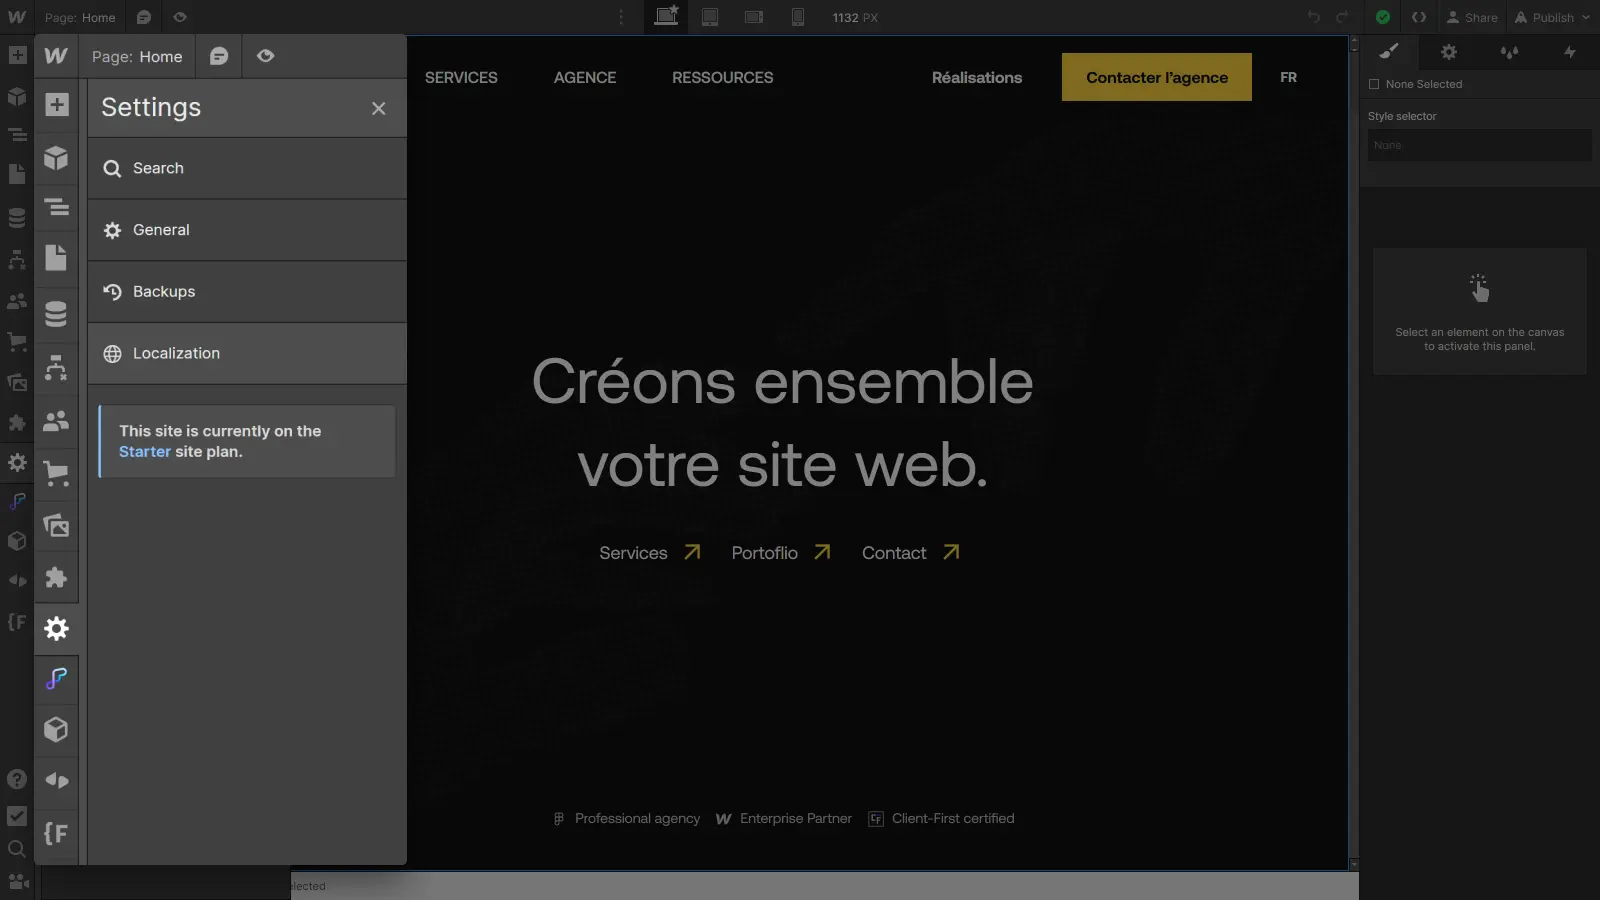
Step 1: Access project parameters
In Designer, click on the "Settings" icon in the left-hand sidebar to access your project configuration options.
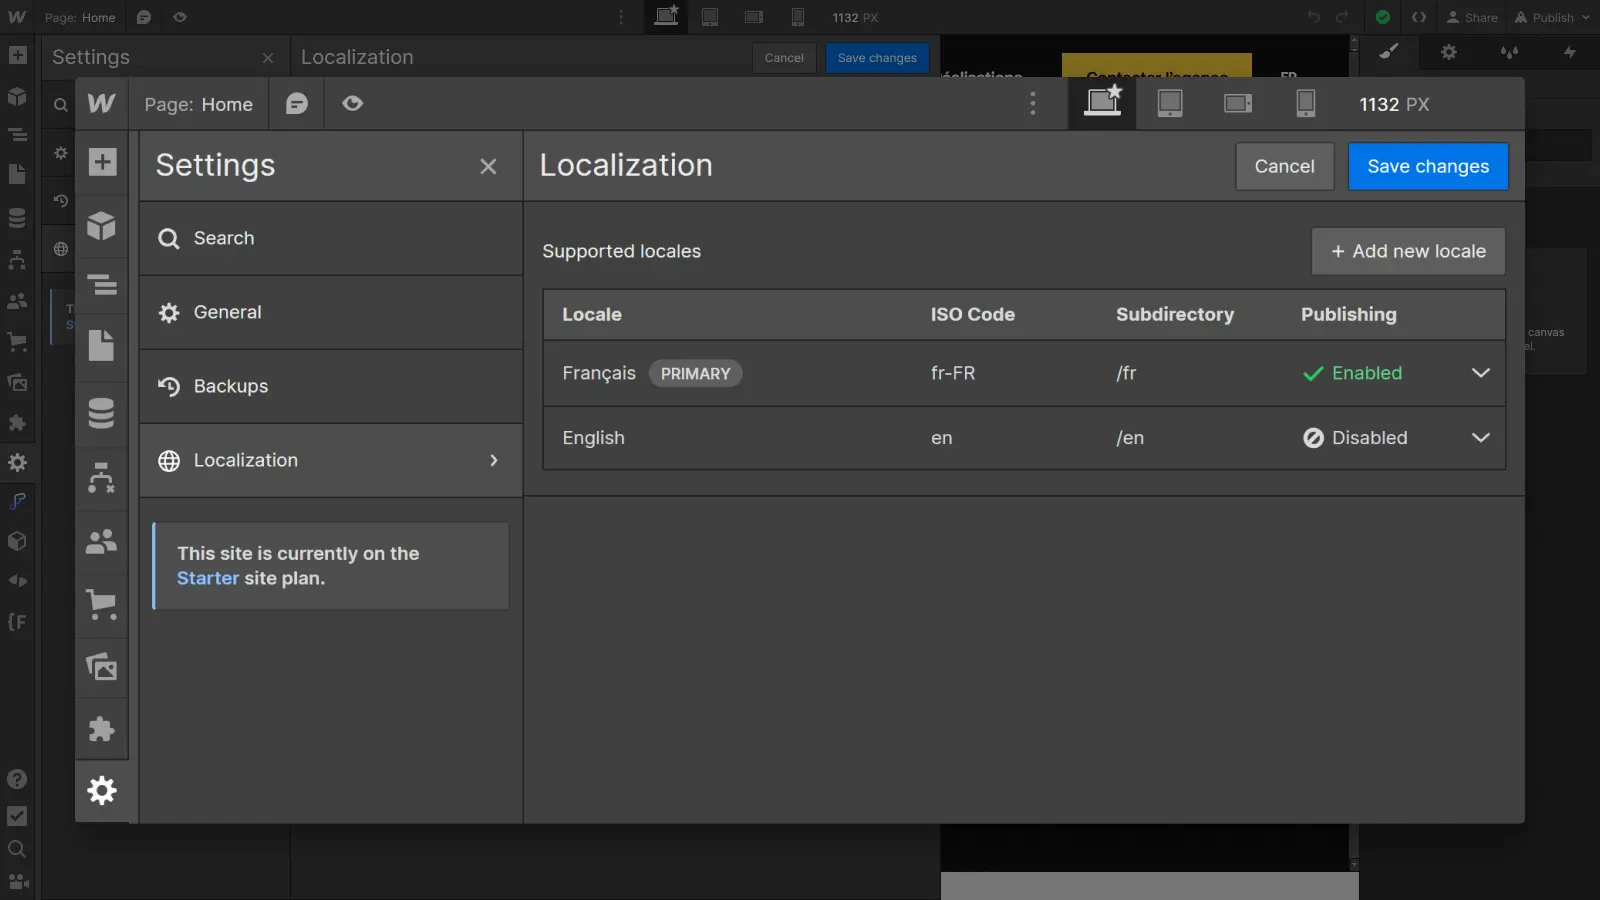
Step 2: Access Webflow Localization
In the project parameters, you'll now find a Localization tab. Click on this tab to open the feature parameters. You can now set the default (Local) language for your site, and add the (Local) languages into which you wish to translate the project.
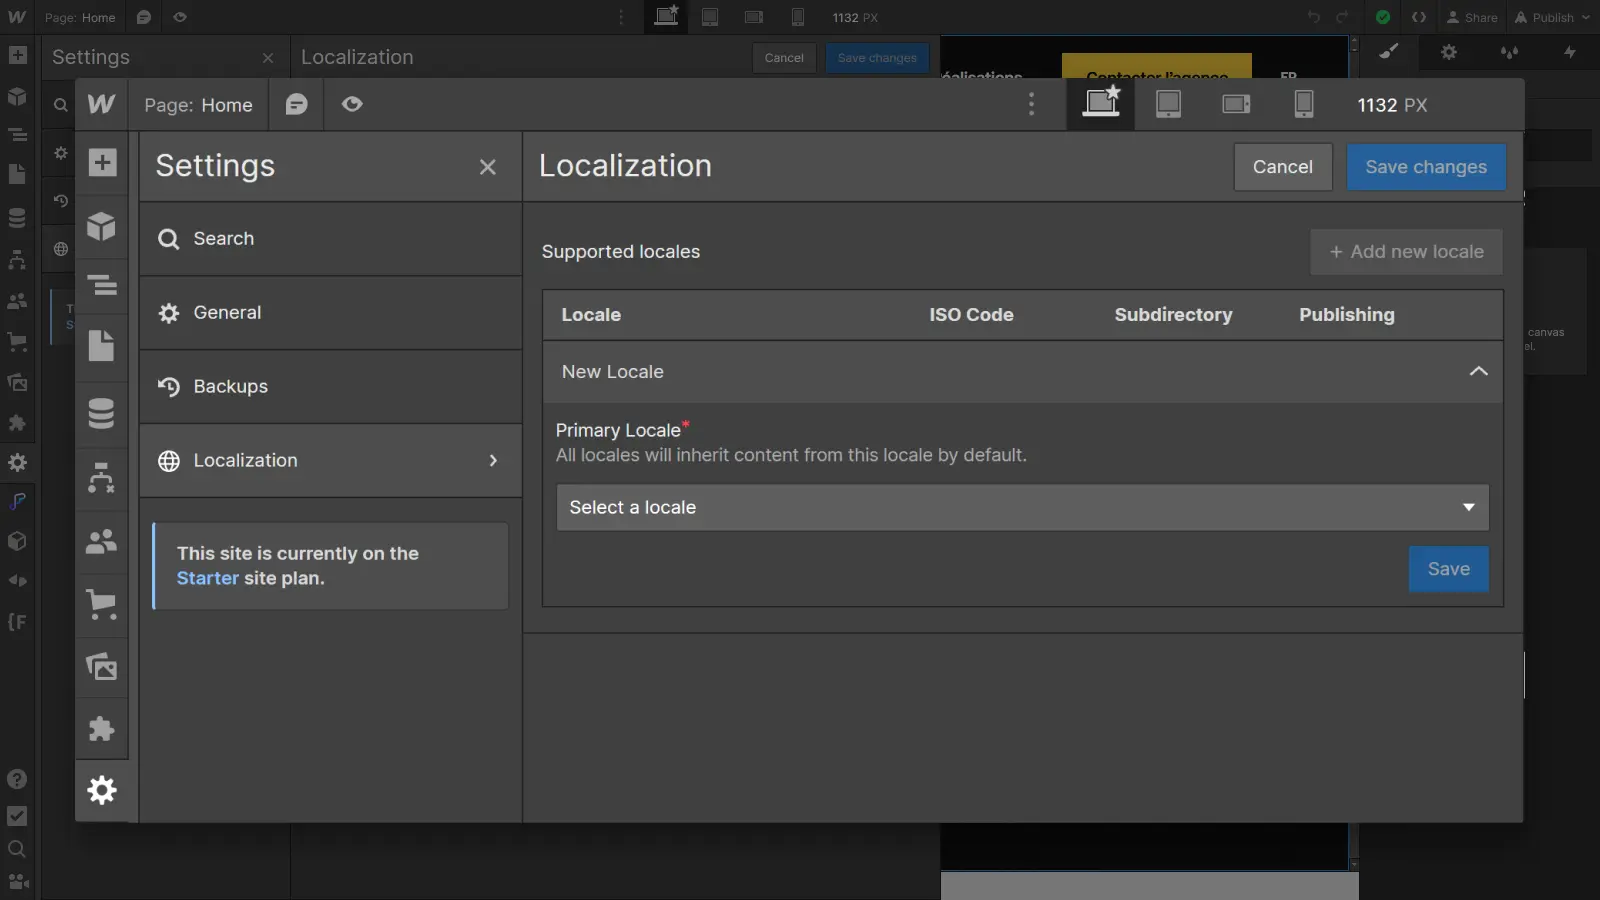
Step 3: Set your main language
To begin, select your default language (Primary Locale) from the drop-down list. This will be the language for the basic version of the site, the version on which all other languages (Locales) will be based.
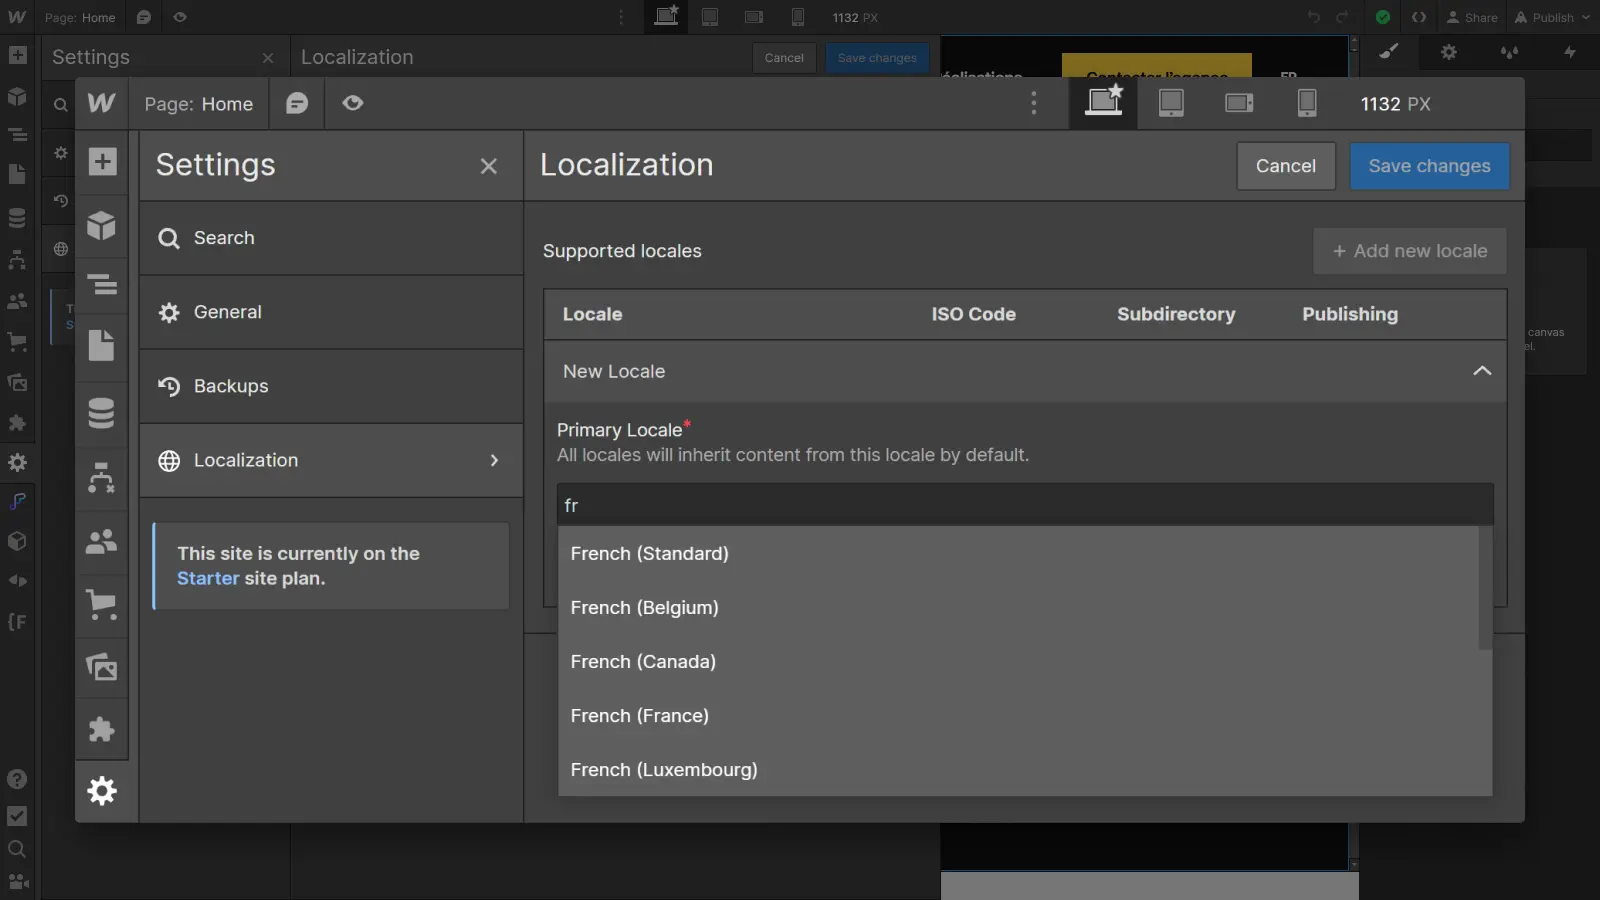
The localization system works in cascade, rather like the breakpoints system. In Webflow, when you make changes on the largest screen size (desktop), these changes are applied downwards on the smallest screen sizes (tablets and mobile). On the other hand, if you make changes on a smaller screen size (mobile), these changes only apply to that size, without going back beyond the top breakpoint.
It works in a similar way to Localization: when you make changes to the base version, they apply downwards to all versions. On the other hand, when you make changes to a secondary version, they apply only to that version.
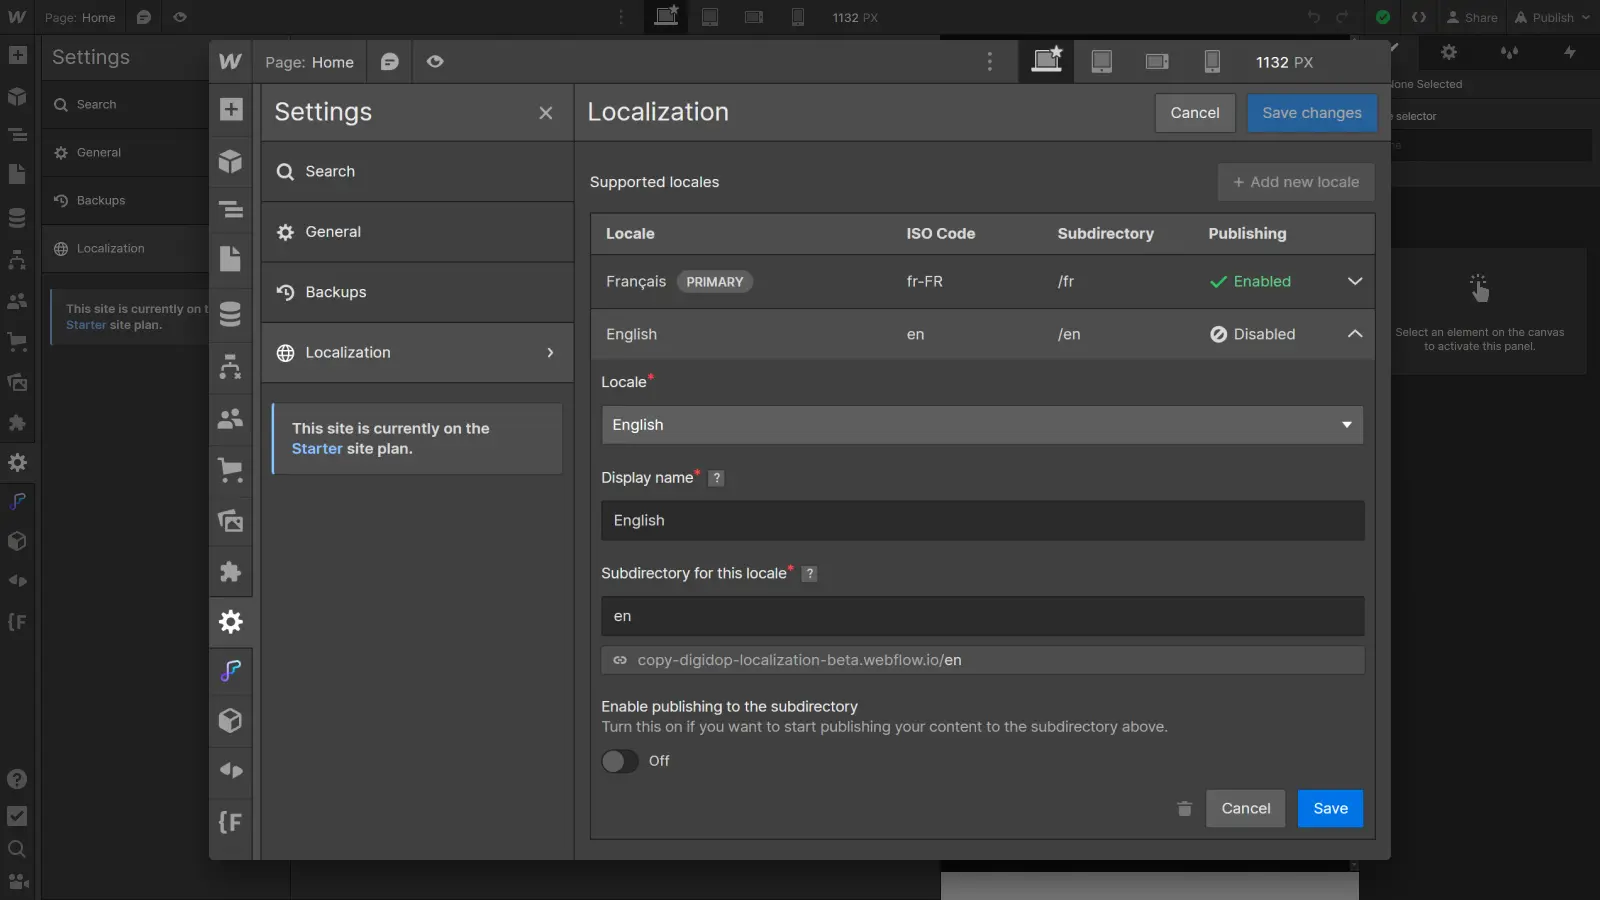
Step 4: Set your main language
Once selected, configure the language options:
- Display name: This is the name that will be displayed for this language in the language selector (example: French).
- Subdirectory for this locale: This is the URL of the subfolder, which will appear in the URL of every page in this version (example: digidop.fr/en/blog).
- Enable publishing for the subdirectory: This option determines whether or not the version will go online the next time the site is published, allowing you to take the time to fully localize each new version without running the risk of it being published before being finalized.

Step 5: Add new languages
To add new languages, simply click on "Add new locale".
A list of supported languages will appear: choose the new language you wish to include on your site and configure its options as in the previous step. Repeat the operation for any new languages you wish to add.
Step 6: Save changes
Finally, don't forget to save your localization settings by clicking on "Save changes" at the top of the Localization panel.
Congratulations! You've just activated Webflow Localization on your Webflow site.
The first step in localizing your Webflow site is now complete! The next step is to localize every version of your site, starting with translation. Let's find out how in the next section.
Part 2: How to translate page content
In this section, we take a more concrete approach and show you how to translate and manage the different localized versions of your site.
Understanding Localization's interface and operation
First of all, to fully understand how localization works in Webflow, it's essential to understand the principle of the Locale view in the Designer and the inheritance principle for each language.
1. Local view
The Local view lets you see your Webflow site through the eyes of your international visitors, allowing you to :
- Select language: Once you've activated localization and added languages to your project, you can use the Local view to select and display in the Designer the language you wish to customize. Simply select a language and you'll instantly enter that language's mode.
- Language-specific customization: When you switch to a specific local language, all elements of your site are instantly displayed in that language. This includes text, images, buttons, etc. You can then make changes specific to that language without affecting other versions.
- Preview in real time: The Locale view lets you preview your site in real time in the selected language, which means you can see exactly what your visitors will see, making it easier to adjust design and content to meet their expectations.
2. Locales default content
Now that the Locale view principle has been integrated, it's essential to understand how default content interacts with local languages.
The localization system works in cascade, in the same way as the breakpoints system. In Webflow, when you make changes on the largest screen size (desktop), these changes are applied downwards to the smallest screen sizes (tablets and mobile). On the other hand, if you make changes on a smaller screen size (mobile), these changes only apply to that size, without going back beyond the breakpoint for that screen size.
It works in a similar way to Localization: when you make changes to the base version of your site, they apply downwards to all versions . On the other hand, when you make changes to a specific version, these changes apply only to that version, without affecting the base version or other versions.
For example, if you have a French site (main language) and you add an English version, all elements not customized in English will use French content by default (until you modify them specifically for the English version).
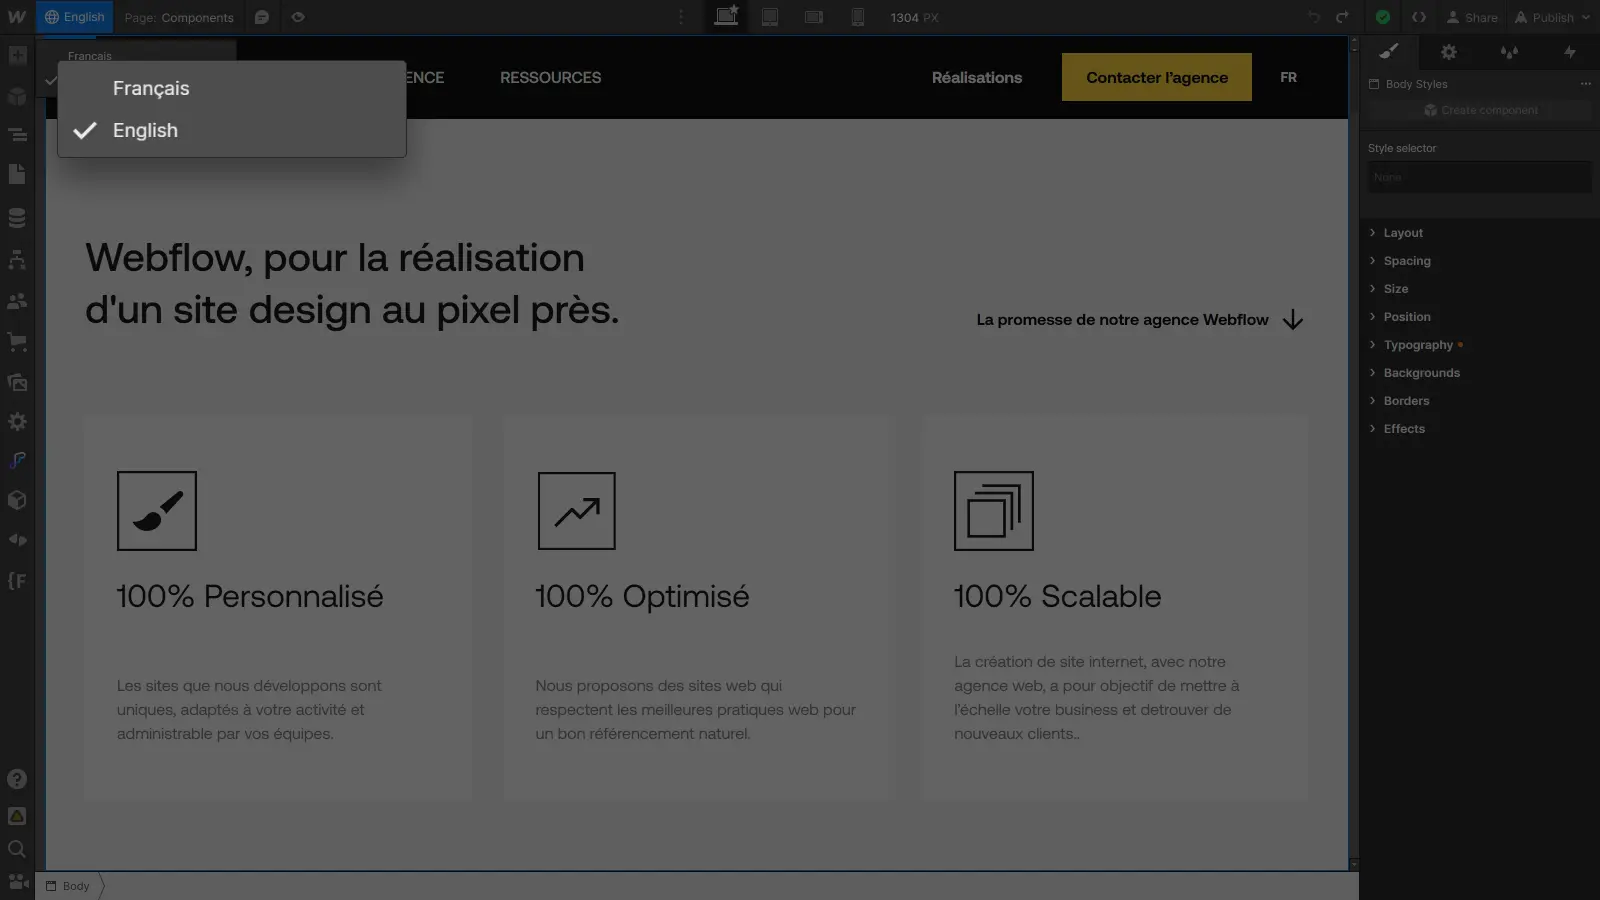
Navigate between language versions
Once you've set up several languages, you can easily switch between them using the Locale view. Select the desired language in the language selector and your site will instantly be displayed in that language.

The Locale view then allows you to easily customize each language of your site, directly from the Webflow Designer. In the following sections of this article, we'll explore in detail the customization of content, media, styles and much more for each language you've activated.
How to translate page content
Now that you've mastered the Locale view, it's time to dive into the process of localizing (or translating) your site. Whether you want to customize text, images, styles or anything else, the principle remains the same:
1. Select a language version
To begin, select a language version in the Locale view, for example, the English version. Once you've switched to this version, any changes you make will affect only that specific version.
2. Translate
There are two ways to translate page content:
- Translate each text manually,
- Translate the whole page (or a section of the page) at once.
To translate text manually: simply select the text element and change its content as you would in any other situation.
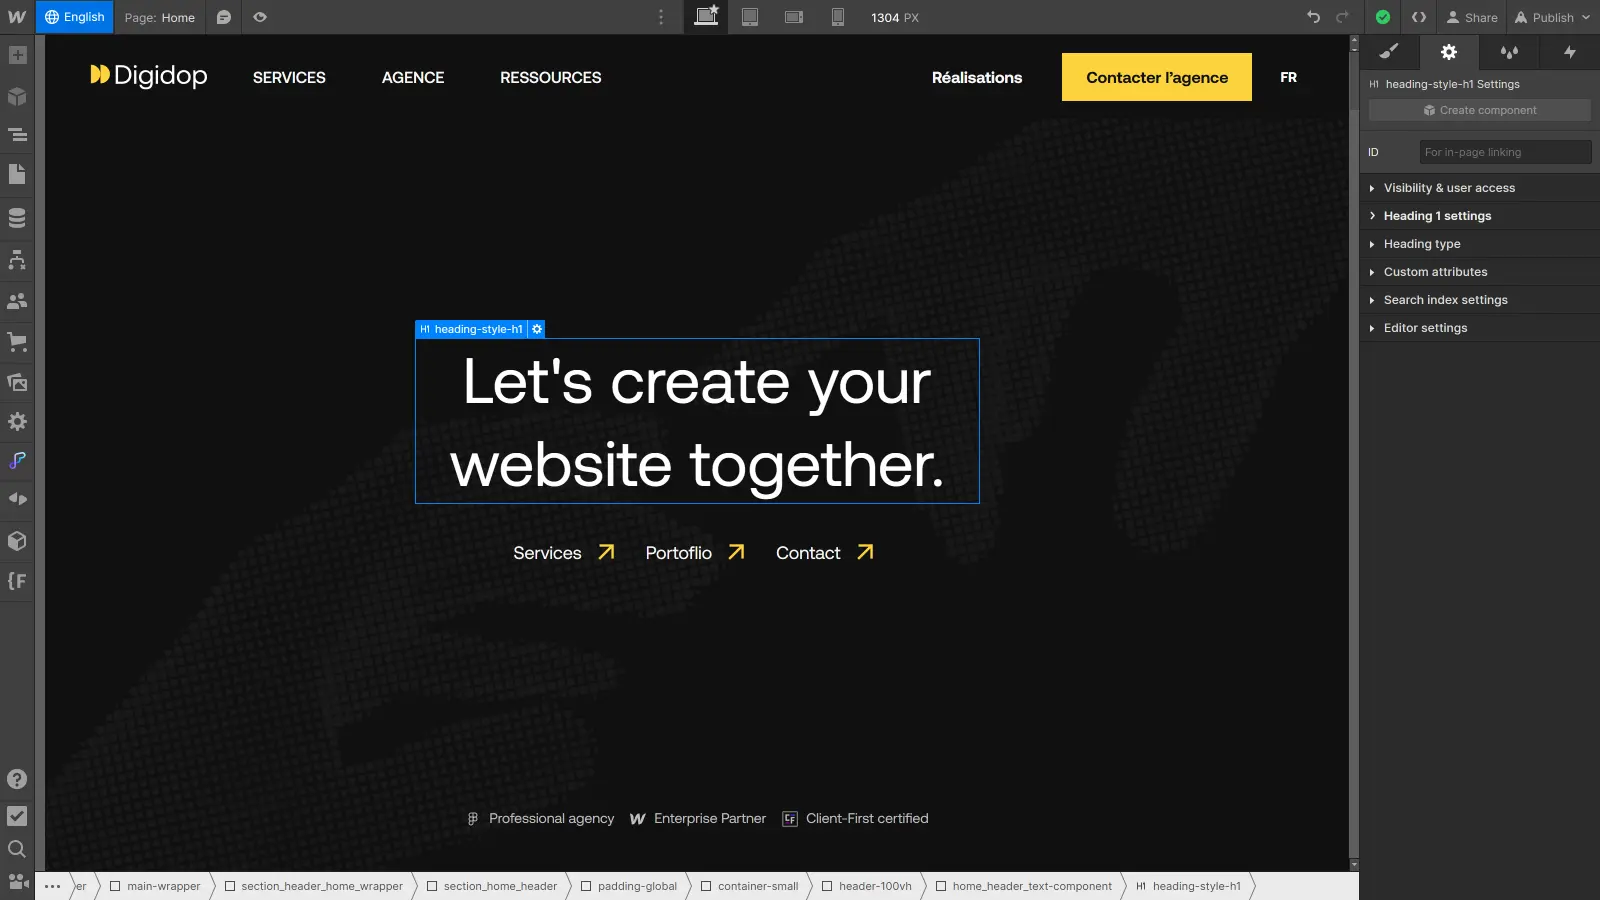
To translate the whole page at once: select the Body element in the browser, then right-click on the blue label that appears in the Designer. You'll now see a "Translate to English" option, allowing you to translate the entire content of the Body element. You can perform the same operation on any element to translate a specific section.
In just a few clicks, your page is translated into the selected version, and you can preview the design live from the Webflow Designer and make any necessary adjustments just as quickly.
How to translate a component
Now that you know how to translate the content of your pages, let's take a look at the components.
If you translate your entire page by selecting the Body element, the components present on the page will only be translated on one condition: if you have created properties for them. For example, if you have a text property for a small call-to-action component.
In this case, the component will be translated as an instance, specific to this page. In other words, the same component present on other pages will not be translated.
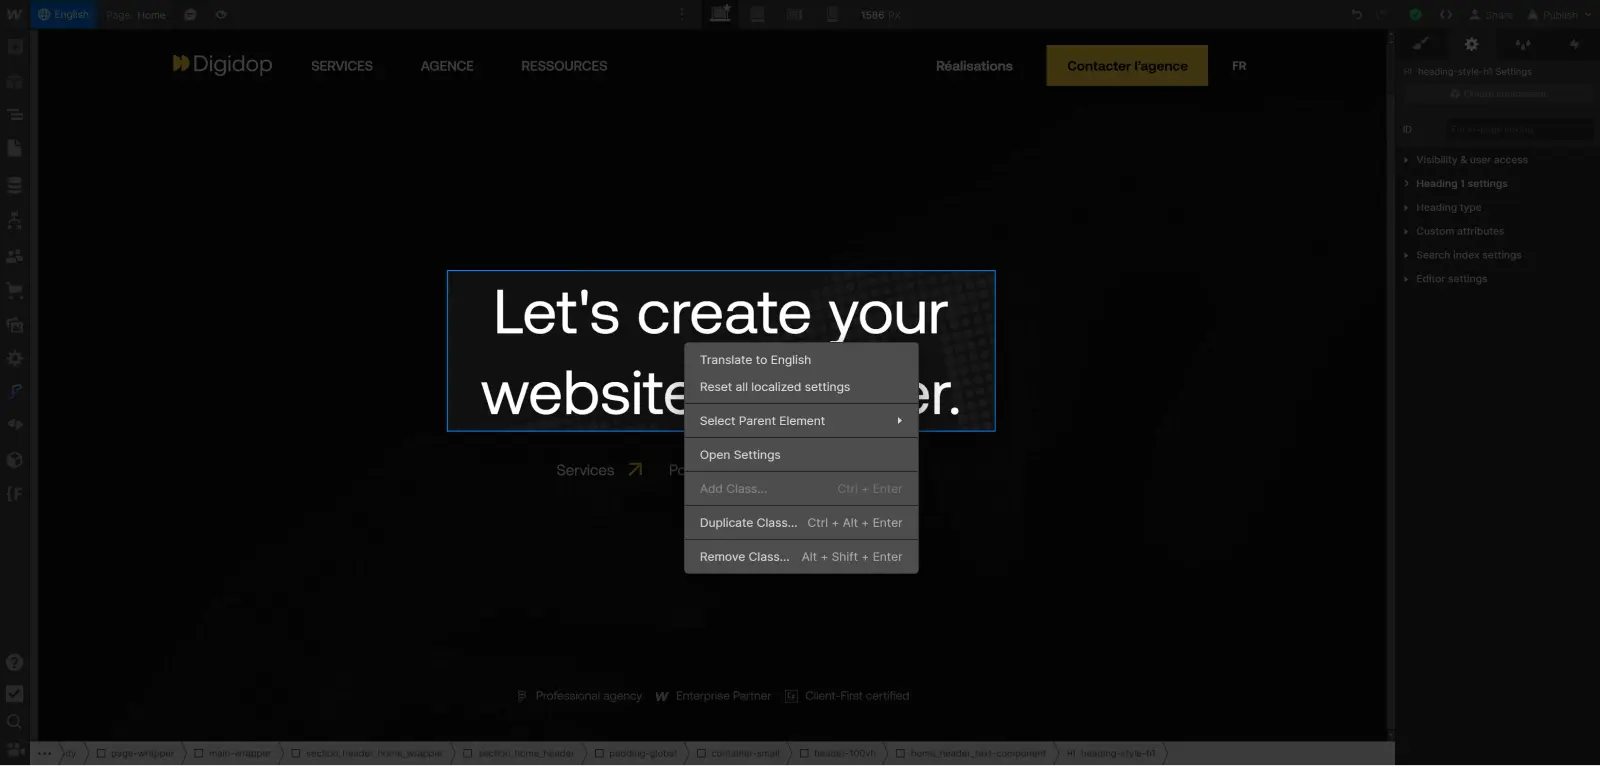
To translate the global version of the component, and not create an instance, here's how to do it:
- Select the relevant component.
- Right-click on the blue label that appears in the Designer.
- Click on Translate.
If you prefer to translate it manually, you can simply open it and edit the content as you normally would.
How to find out which items have been located (and reset them)
Once you've started localizing the content of your site in different languages, it can be useful to know what has already been localized and, if necessary, how to reset an element to its basic version. Here's how to do it:
Identify what has been located
To find out which elements have been localized on a page, start by accessing the relevant version: make sure you're in the Local view of the language you want to check.
Then pull down the Browser. You'll see all the elements on the page. Elements that have been localized will have a globe icon next to them, allowing you to quickly identify which elements have been customized for the current language.

Reset localized items
If you have localized an element and wish to reset it so that it inherits the content of the main language again, follow these steps:
- Select the element and right-click.
- Select "Reset all localized settings" to reset the element to its basic version.
Please note that resetting an item will only affect that item in the current language. Other languages will not be affected, and each language can have its own elements localized and reset to suit your needs.
By following the steps outlined in this section, you now have the keys to effectively translating and managing the various localized versions of your Webflow site. But translating textual content is only the first and most obvious step. You can go even further and localize a whole range of things: translate the CMS, translate page parameters, adapt the design and much more.
The next step is to adapt the design of your pages to each language. Let's find out how in the next section.
How to adapt your page design to different languages
In the previous sections, we covered the basics of Webflow Localization, from activation to content translation. Now we'll explore how you can fine-tune your design for each international audience. Whether you want to adjust styles, visual elements or even assets such as images, Webflow has you covered.
Locate images by language
When it comes to creating a localized website, every detail counts. This includes the images and graphics that bring your site to life. They play a crucial role in making your audience, wherever they may be, feel connected to your content.
The good news is that, thanks to Localization, you can customize these visual elements according to language, to provide a truly tailored experience for every visitor. Here's how you can do it:
1. Change image according to language
Let's say you have an image that contains text. Rather than keeping this text in each version of the site, you can adapt the image to the user's language:
- In Designer, select the language you wish to customize.
- Then select the relevant image.
- In the settings panel on the right, edit the image as usual to select a new image, this time adapted to the chosen language. The new image applied will now be specific to that language.
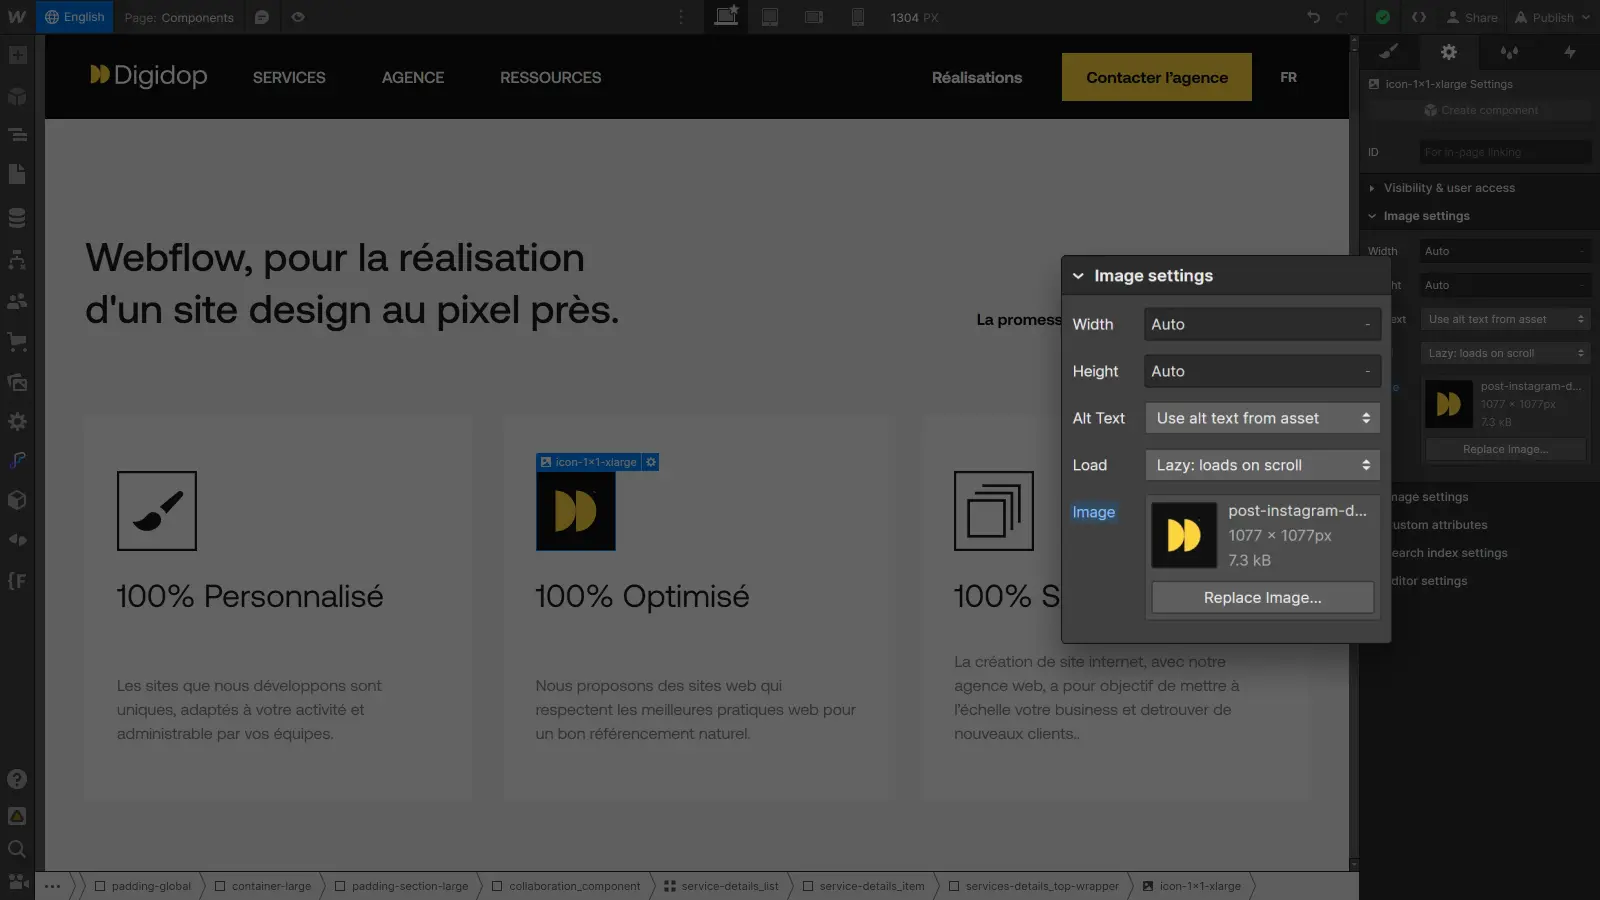
It's a simple and effective way of visually adapting your site to the different languages on offer.
2. Modifying the Alt attribute of images
The Alt attribute of images is important for making your site accessible to everyone. To make it specific to a given language, here's how to do it:
- In Designer, choose the language you wish to customize.
- Select the image for which you wish to modify the Alt attribute.
- In the parameters panel on the right, translate the attribute to match the chosen language.
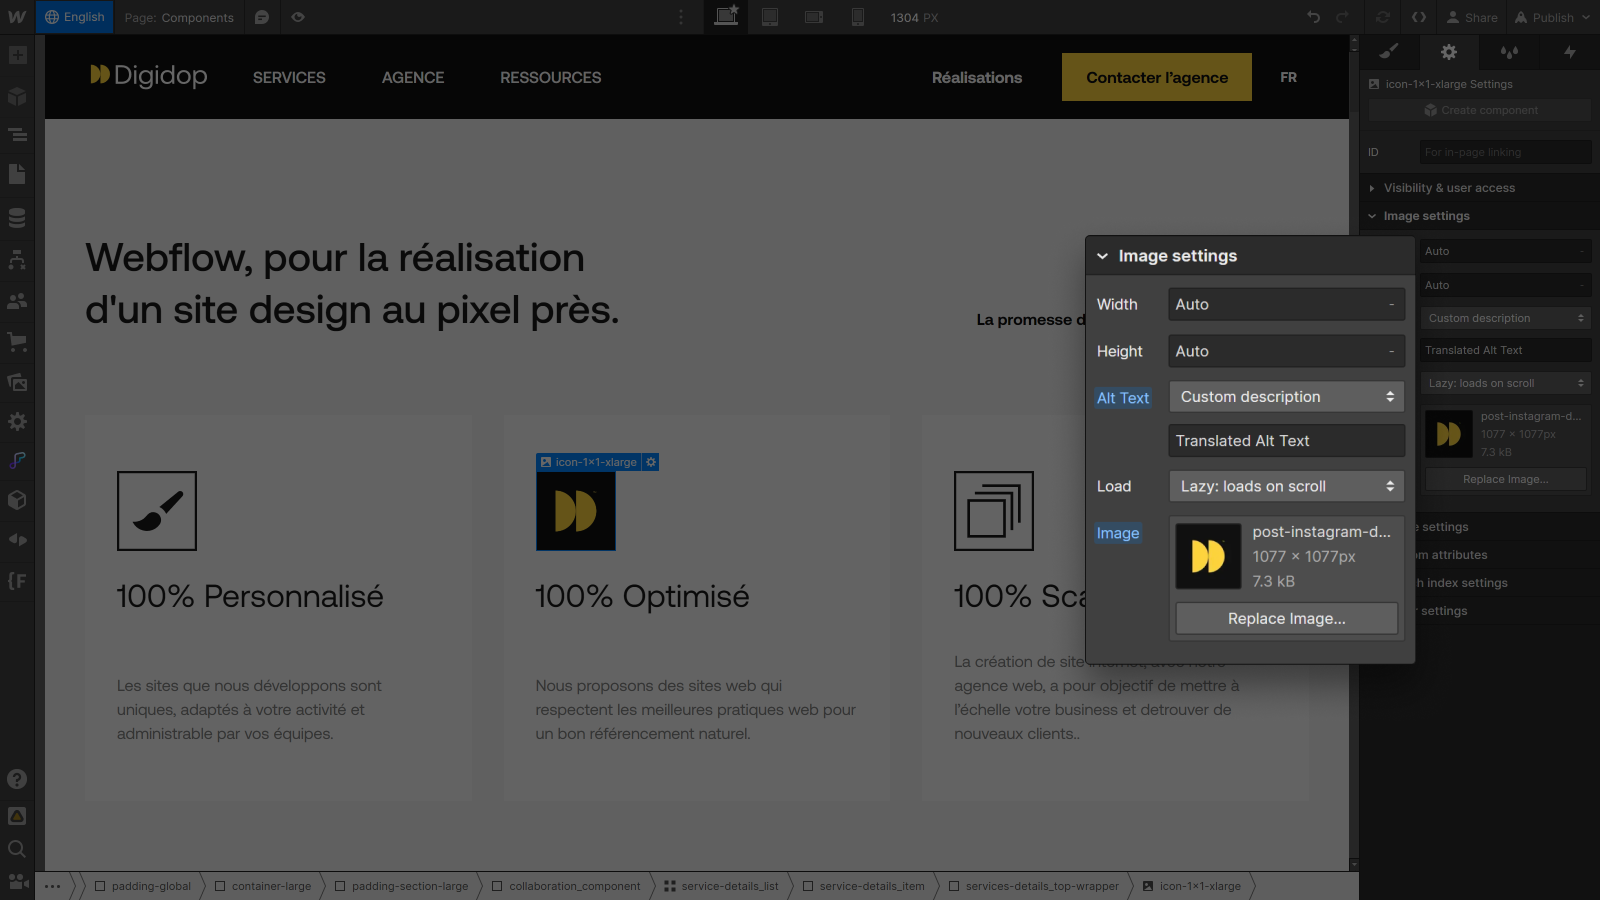
This way, when visitors use this language, they'll get an appropriate description for the image, which can really enhance the user experience.
By following these simple steps, you can customize your assets for each language to deliver a truly tailored experience for your audience.
Now let's move on to customizing the visibility of elements according to language, to take your design even further.
Hide or show language-dependent elements
Now, let's dive a little deeper into customization by talking about element visibility.
Imagine: you've got a website with a ton of content, but some elements are only relevant to certain languages. Instead of showing everyone things that aren't relevant to them, you can localize the visibility of these elements:
- In Designer, select the language you wish to customize.
- Select the element to be hidden: an image, a button, or even an entire section.
- Open the element parameters in the right-hand panel
- Select the desired visibility: Visible or Hidden, depending on the language selected.
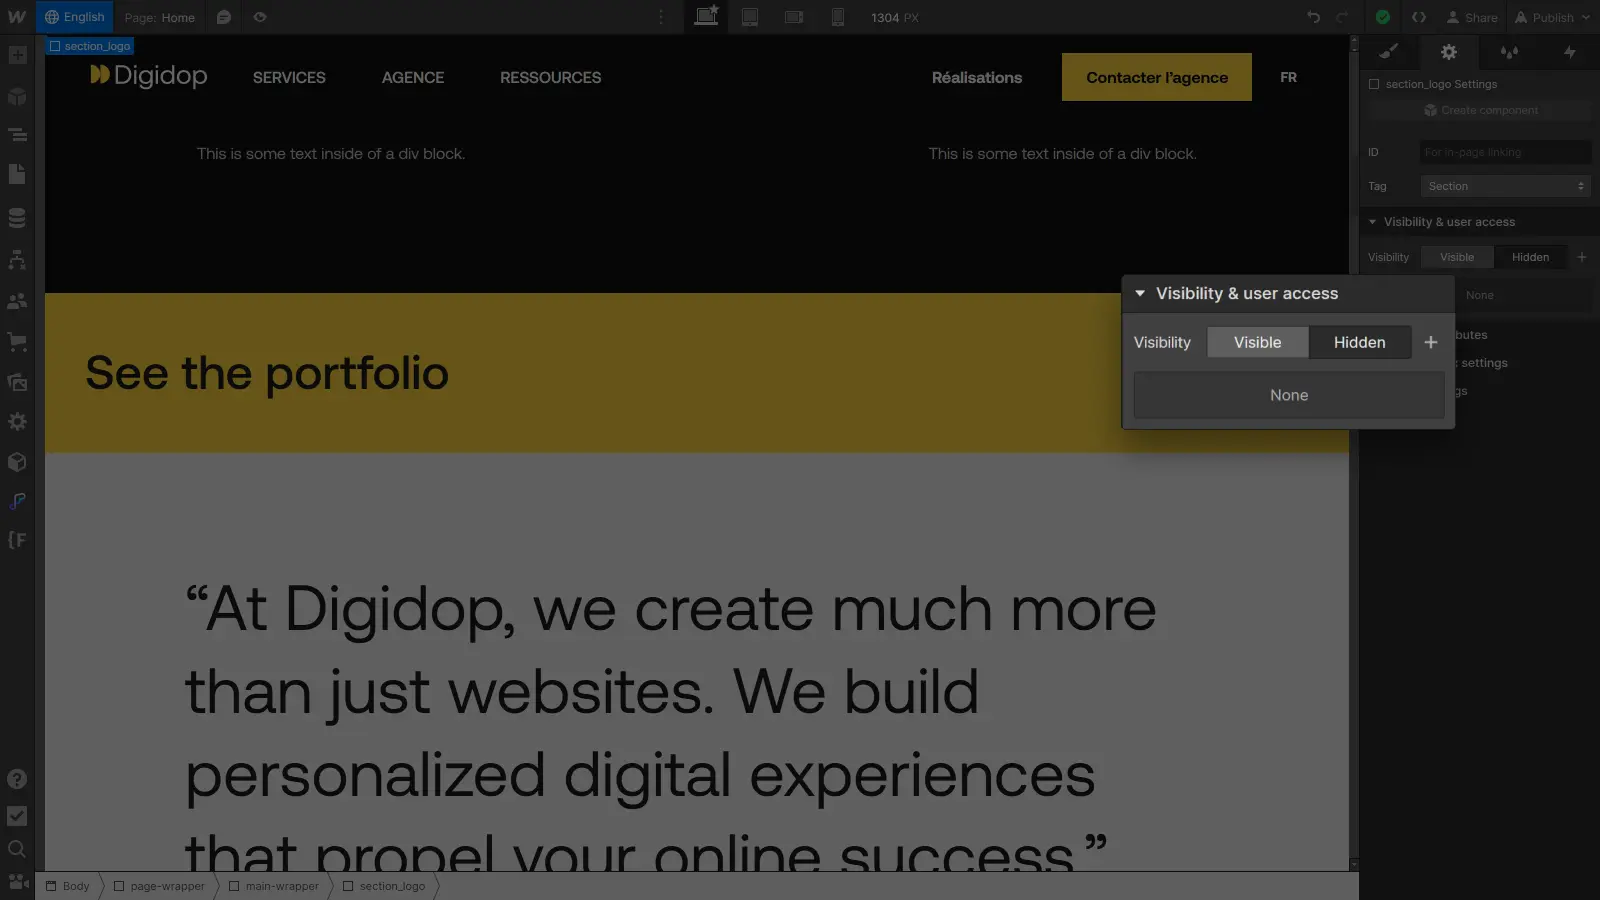
Combine this trick with content translation and visual asset customization, and you've got a website that speaks your visitors' language, shows them the right images and offers language-appropriate info. It's the kind of personalization that makes all the difference.
What's next? Let's talk about language-dependent style customization. This is where things get really interesting!
Adaptingstyles to language for a tailor-made design
Now that you've understood how to localize your visual assets and manage element visibility according to language, it's time to dive into style localization.
Let's say you have a website with a well-established design, but each language has its own preferences in terms of layout or size, for example. That's where language-dependent style customization comes in.
- Start by selecting the language.
- Select the item to be customized.
- Select "Current Locale" from the class status list (if not already selected).
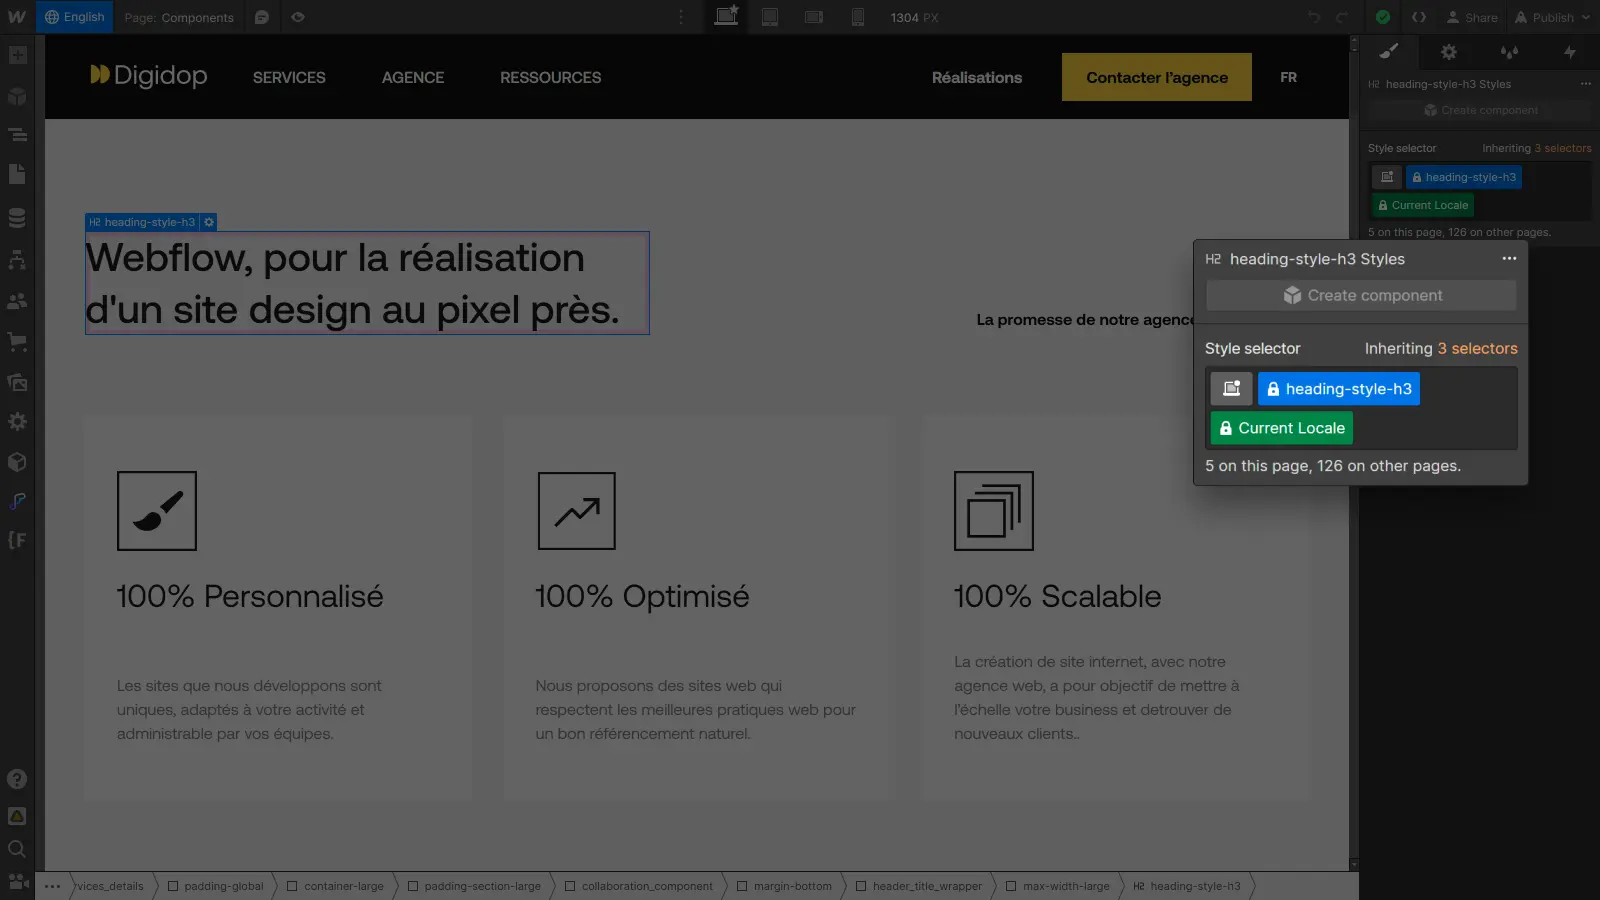
- Customize the element as you normally would.
You can change colors to match cultural preferences, adjust fonts to make them more readable in a specific language, or even rearrange elements for a more suitable layout. The changes you make will be specific to the language selected.
Style localization lets you create a unique experience for each language version of your site. You now have all the tools you need to customize and adapt the design of your Webflow site to different languages and cultures.
The next step is now to localize your page settings to ensure high SEO performance in all languages. Find out how in the next section.
How to translate SEO options for a well-referenced multilingual site
In previous sections, we've looked at how to activate Localization and translate your site's content. Now we're going to explore an essential facet of website localization: search engine optimization of all language versions.
In this section, we'll guide you through the essential steps for optimizing the SEO of your multilingual site in all its languages.
Translation of page options
To begin this section, let's dive into the translation of page parameters, titles and meta-descriptions among others, to boost your visibility on search engines. In a multilingual context, it's essential to translate these elements so that any user, whatever their language, can find you on search engines.
To locate the parameters of your pages, access them by clicking on the cogwheel icon of the page you wish to locate in the list of pages (P).
In the General tab
- Translate the page slug (URL) and, optionally, the page name.
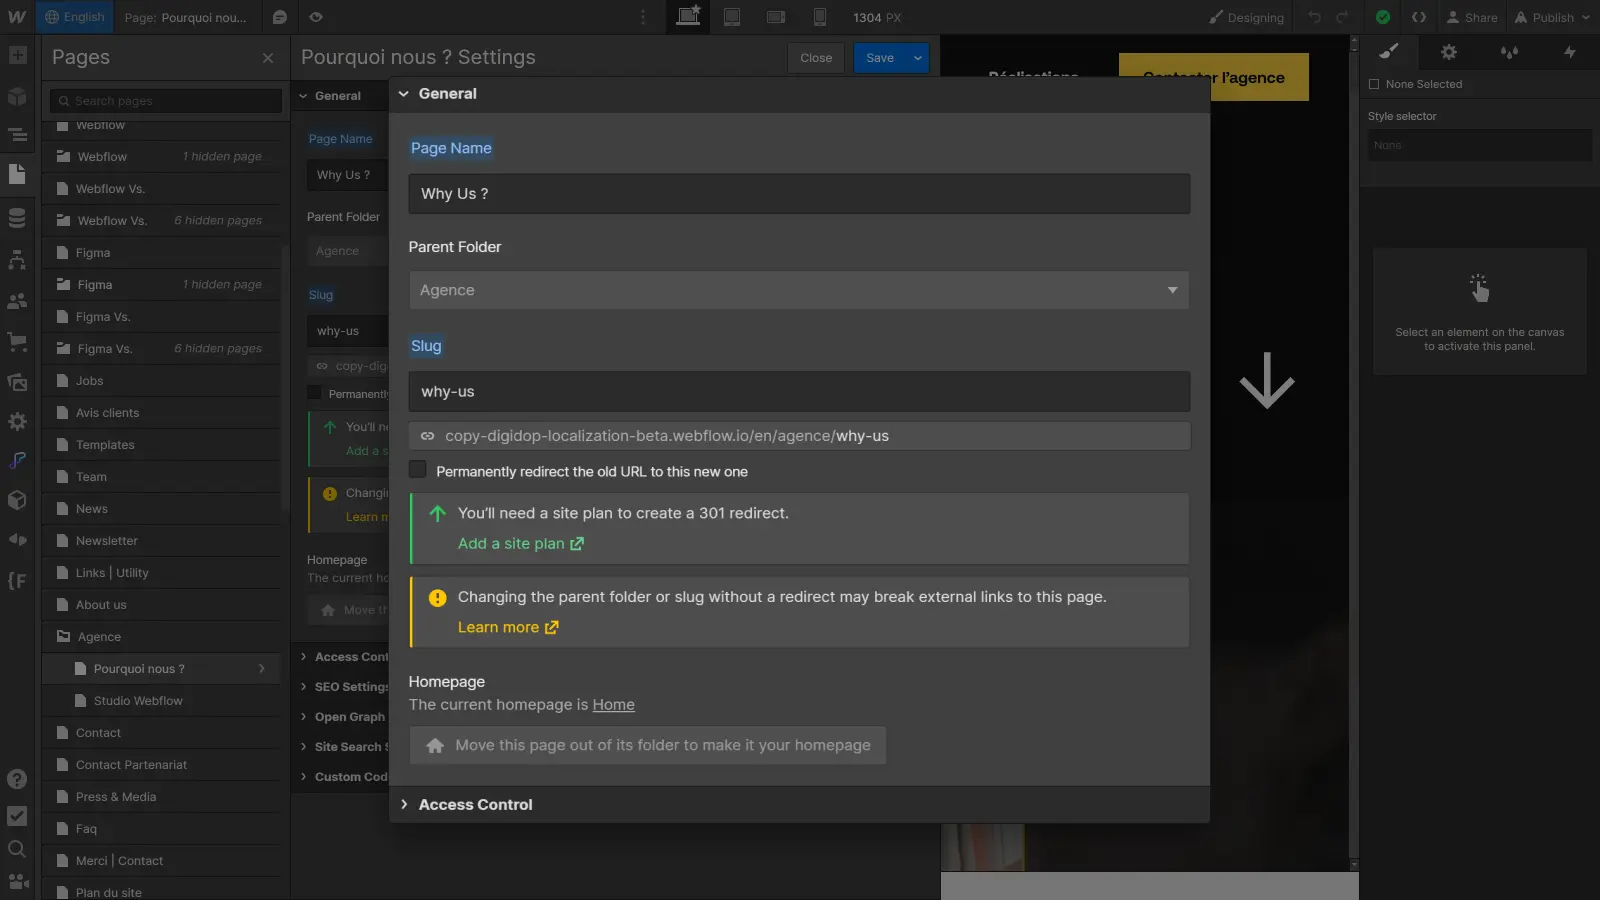
As with all other localizable parameters, the label of each field will be highlighted in blue once localized.
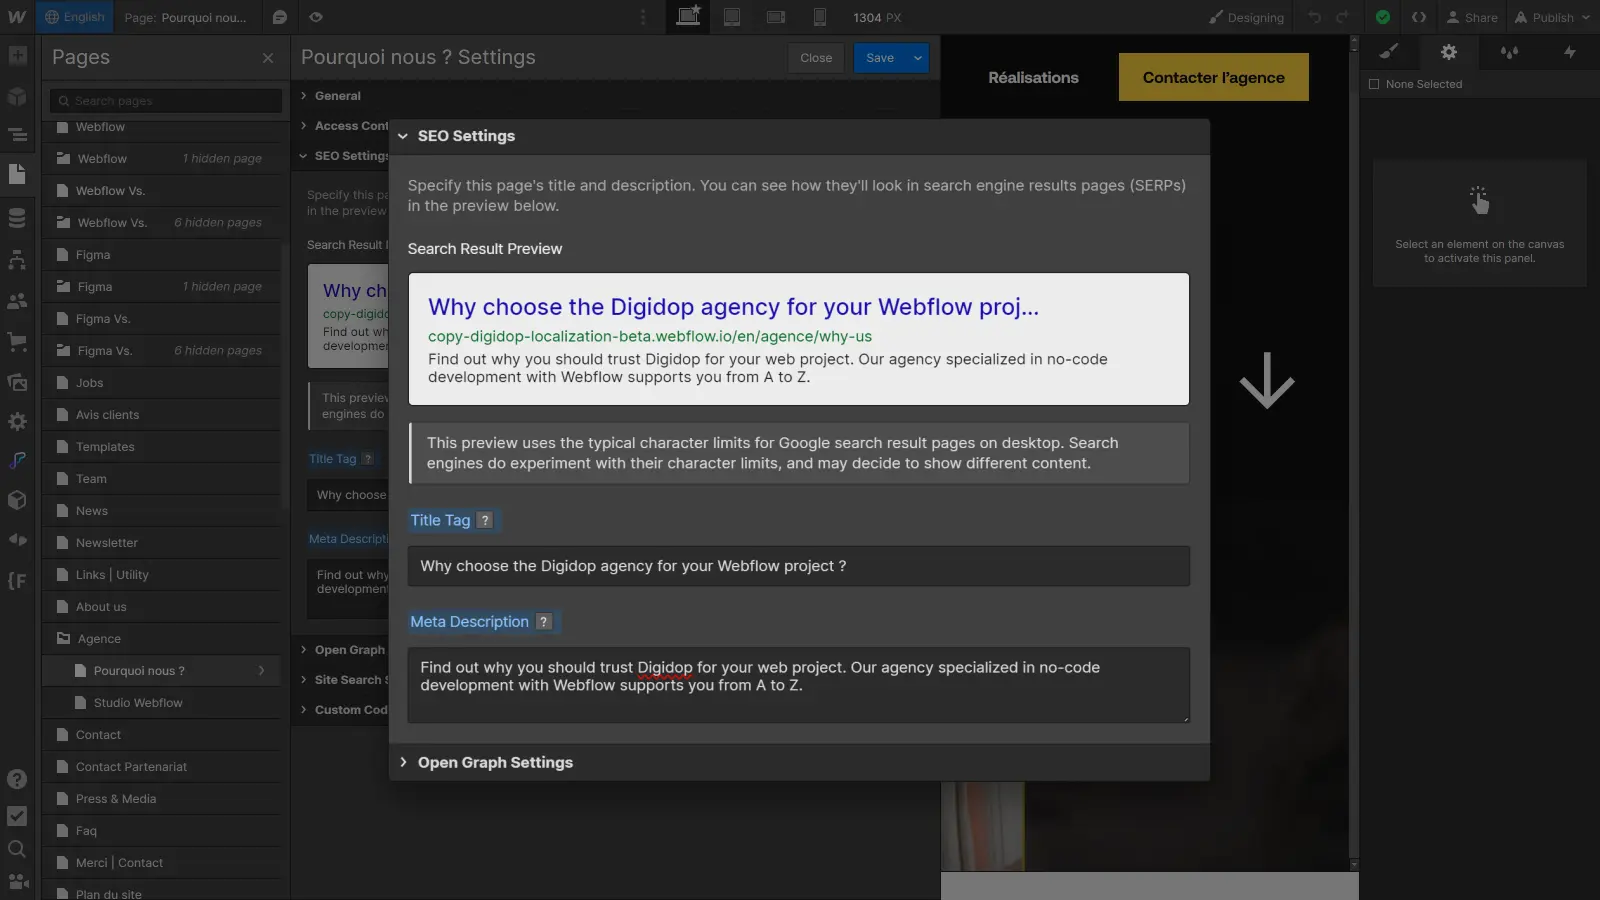
In the SEO settings tab
- Translate the title and meta-description.
In the Open graph settings tab
To replace the Open graph image with a localized version :
- Save and close the page settings.
- Open the assets panel (J) and find the image you wish to substitute for the basic Open graph.
- Click on the cogwheel icon above the image to open its parameters.
- Click on the link icon to copy the image URL.
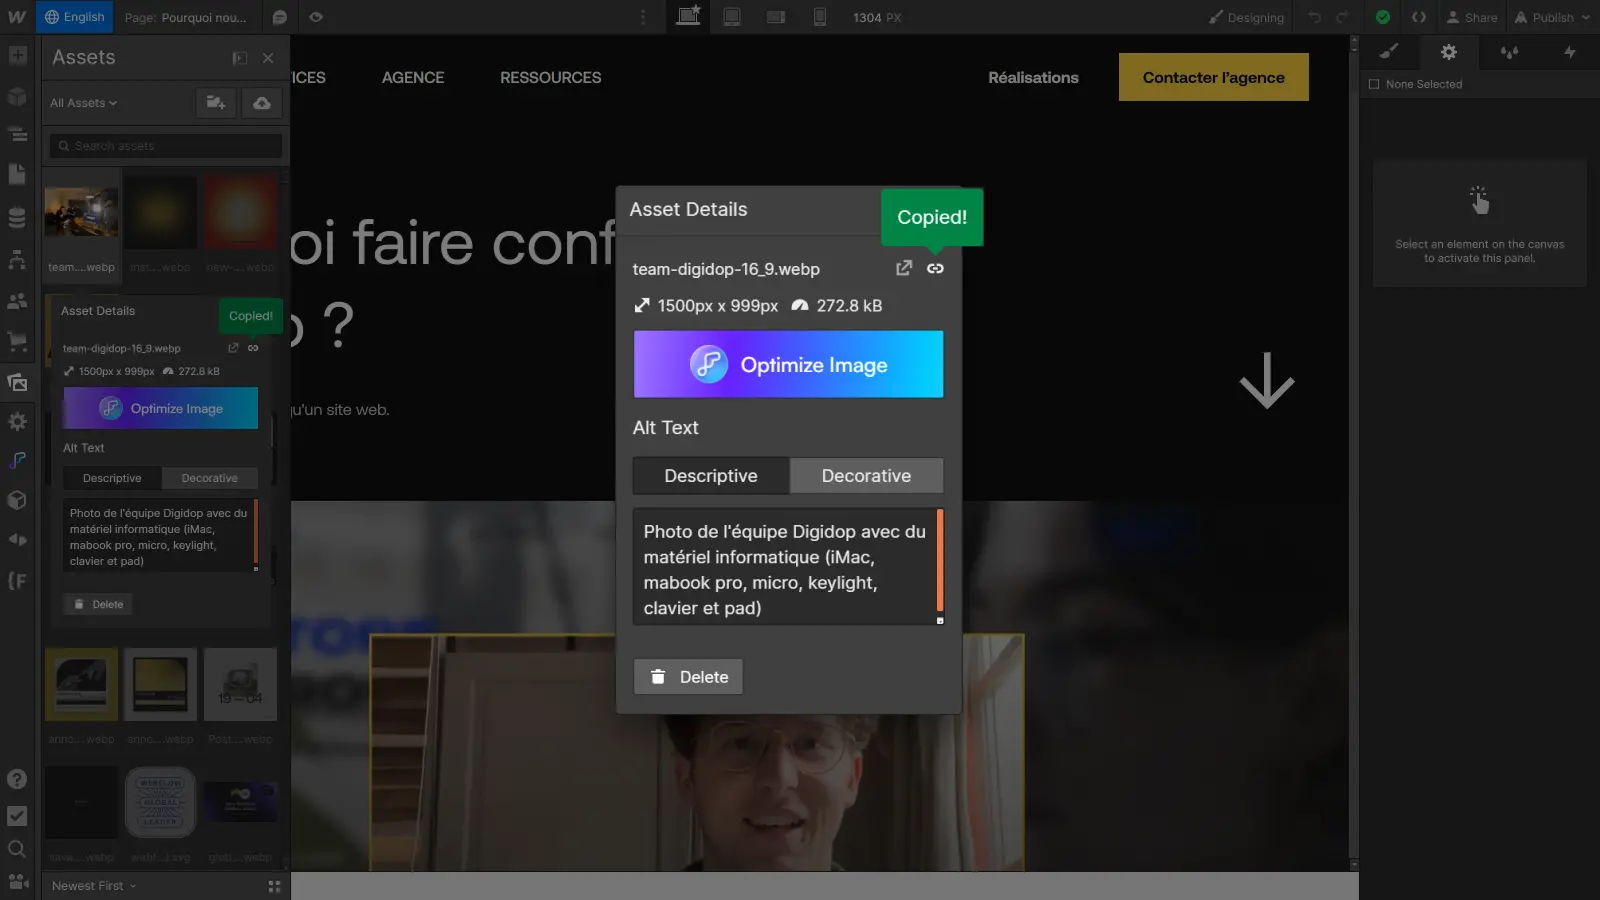
- Go back to your page settings and paste the link into the Open graph field.
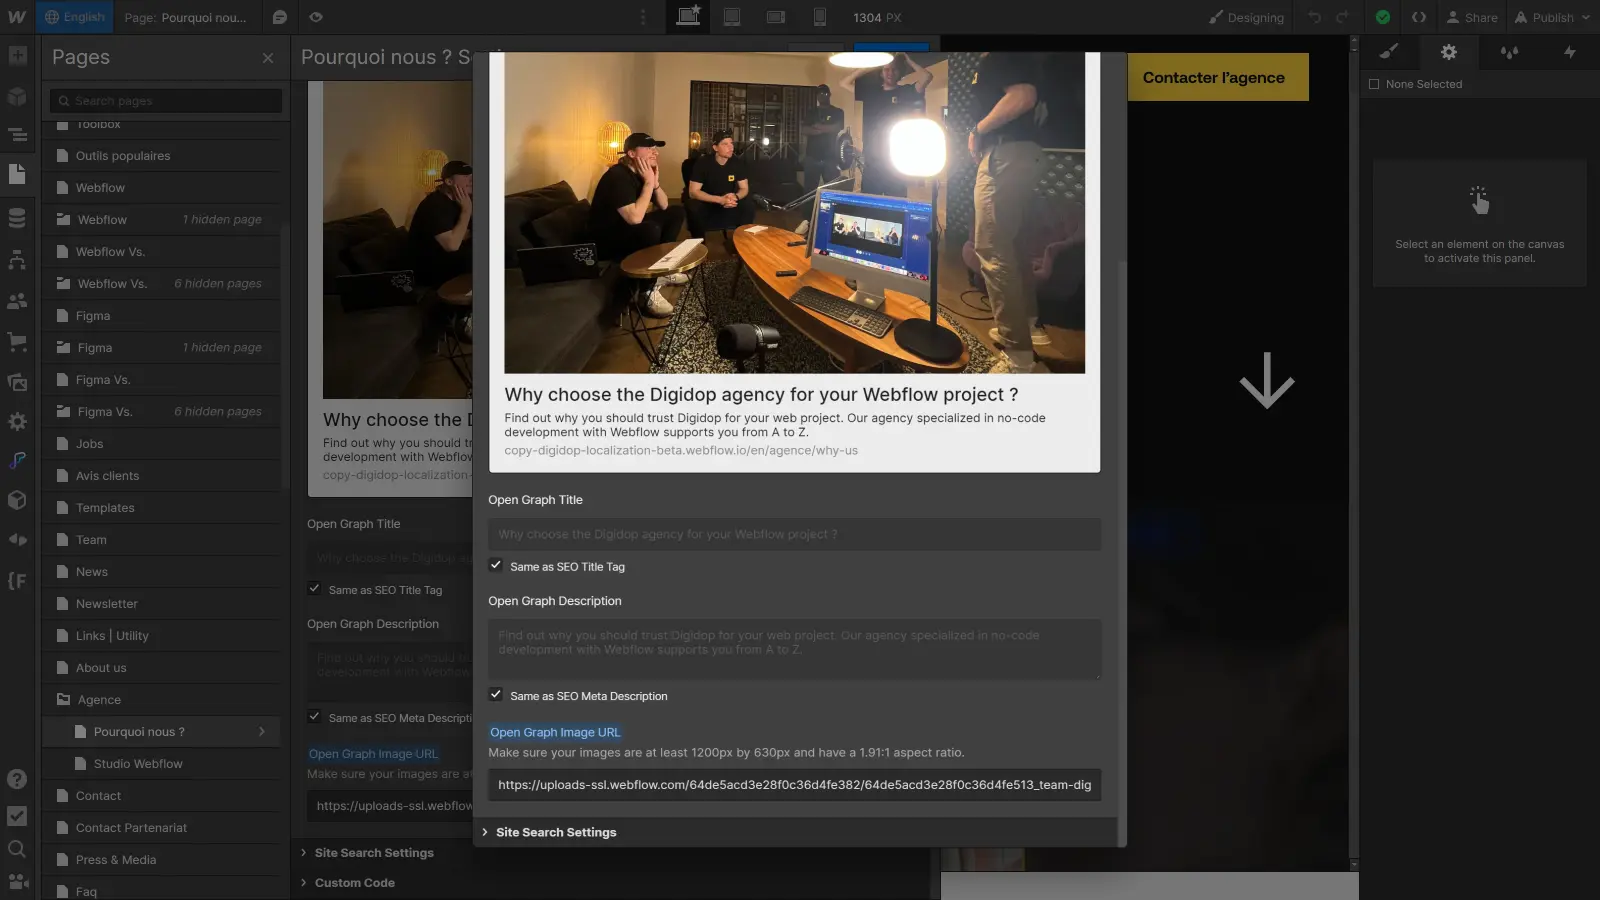
- Finally, don't forget to save and close the page settings.
Your page settings are now localized and adapted to the target language. All that remains is to repeat the operation for the other pages, and the other languages. Remember to use relevant and engaging terms in your titles and meta descriptions. Look for appropriate keywords for each language, and use the terms that users use to search for the information you provide on each page.
Congratulations, you now know how to make your multilingual site visible to search engines in all languages. In the next part, we'll look at another key question in the localization process: how do you localize your CMS?
How to locate the CMS of your Webflow site?
In previous sections, we explored the translation of static content, the adaptation of design and the localization of SEO data. Now let's delve into what is often the very heart of your site: the CMS.
In this section, we'll guide you through the localization of the CMS with Webflow, enabling you to create and manage a high-performance multilingual website.
General operation of the CMS localization
CMS localization in Webflow works in much the same way as static content localization, albeit with a few specific features.
Unlike static content, where a single page can be translated into several languages, CMS brings an important nuance. Collections, and the fields that go with them, are shared between all languages, ensuring consistency in terms of structure. However, the difference lies in the items within these collections.
Each language has its own distinct items. Think of each item as an independent instance of your collection, tailored to a specific language. You can then customize the fields for each item to meet the specific needs of each language version of your site.
This approach enables fine-tuned management of content by language, offering both global uniformity (thanks to collections that remain common) and the flexibility needed to respond to linguistic particularities (thanks to items that are distinct for each language).
In the next section, we take a deeper dive into collection localization to understand how this functionality is deployed in practice.
Location of collections
When it comes to locating collections in Webflow, you'll quickly get the hang of it.
The slug (URL) of a collection can be localized to suit each language. So instead of having a universal URL, you can have localized slugs, making navigation easier for your users in their preferred language. For example, translate "testimonials" into "témoignages" for the English version.
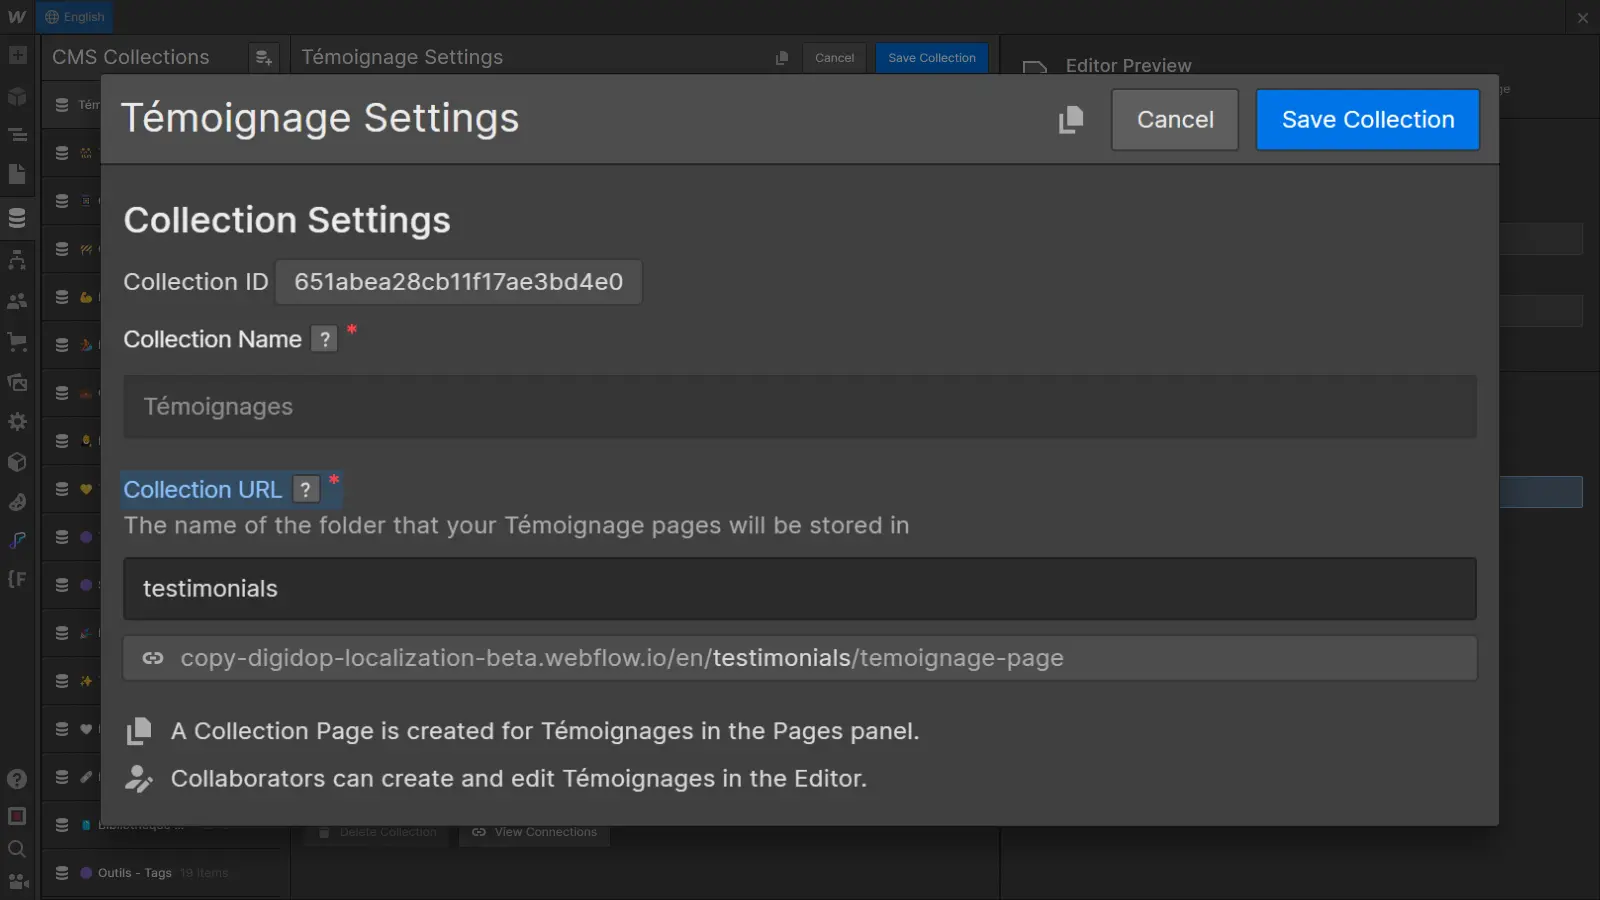
However, other collection options cannot be localized. Field names, help texts and other parameters will remain common to all languages. The fundamental structure of the collections is therefore shared to ensure maximum consistency.
In the next step, we'll see how to create localized items within these collections to contribute to a seamless multilingual user experience.
How do I locate items?
Item localization in the Webflow CMS offers a flexible approach to customizing content for each language. Let's dive into the process of creating, customizing and managing localized items.
Creating localized items
When you create a new item in a collection, by default it is generated for all the languages supported on your site. Each modification made to the basic version of this new item is automatically applied to all language versions.
This process guarantees a consistent base, but what if you want to customize certain fields for a specific language? Let's move on to item customization.
Customize localized items
To customize a specific item for a given language (e.g. translate a testimonial), follow these steps:
- Start by creating a new item in your main (local) language, as you would normally do. When you modify the fields of this item in your main language, the changes are applied by default to all languages.
- To localize a specific field (e.g. testimonial), switch to the desired language from the language switch option at the top left of the Webflow Designer. Alternatively, you can select the desired language from the Locales list at the bottom of the item edit page.
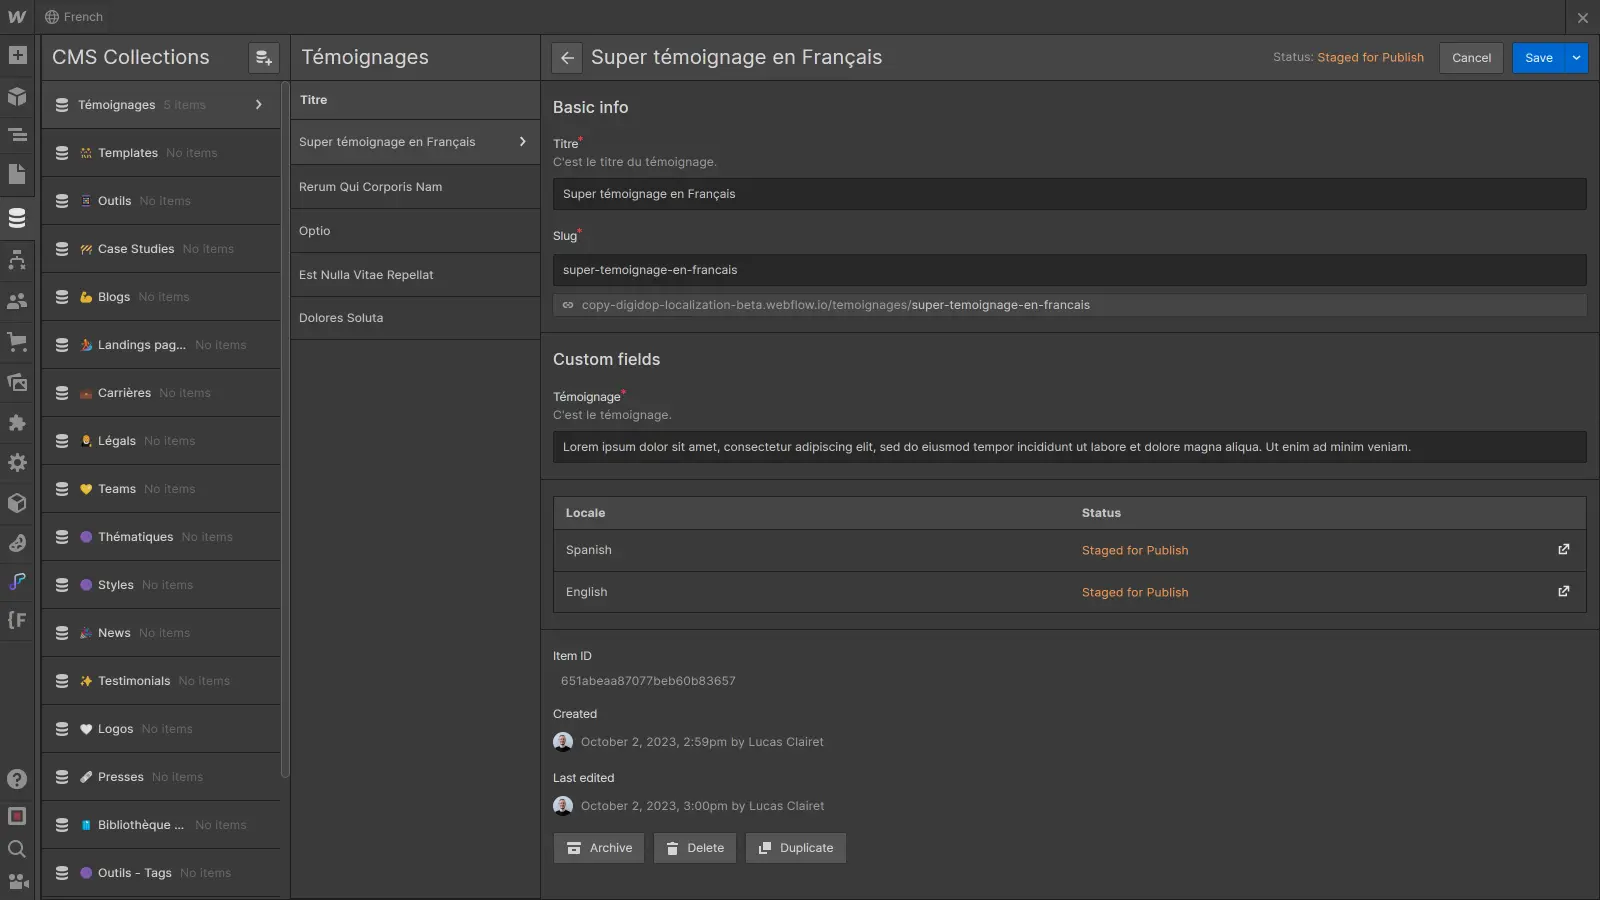
- Modifythe desired fields according to the specific needs of this language (for example, translate your title).
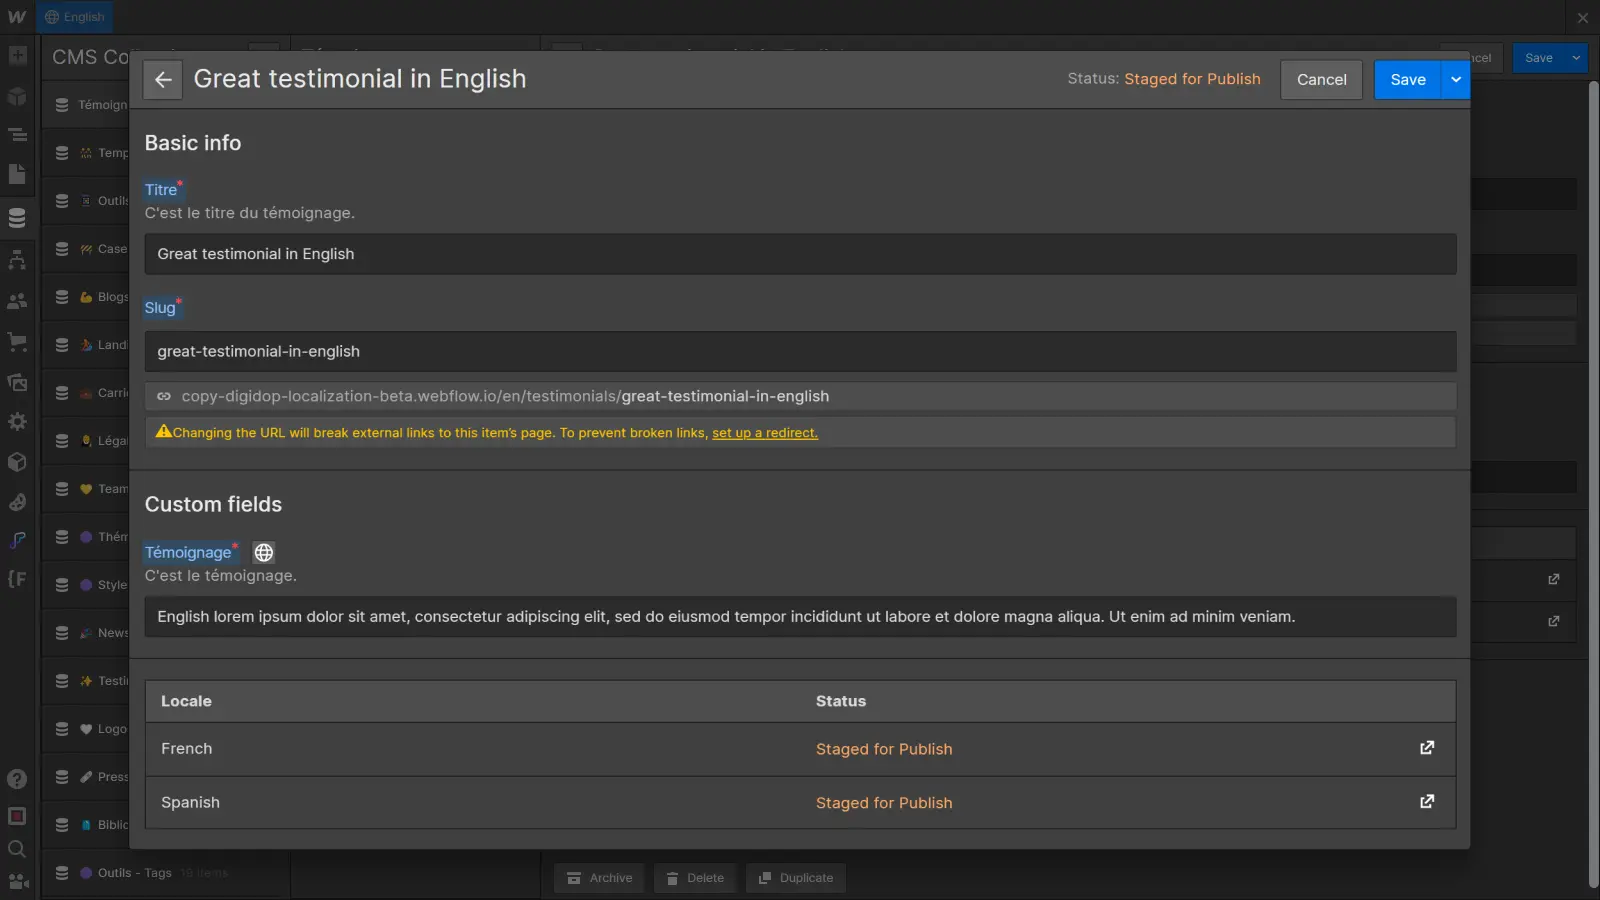
- Save changes. Once a field has been localized, it will be specific to that language. Other fields, which have not been modified in the secondary language, will continue to inherit their values from the main language.
- Separate item management
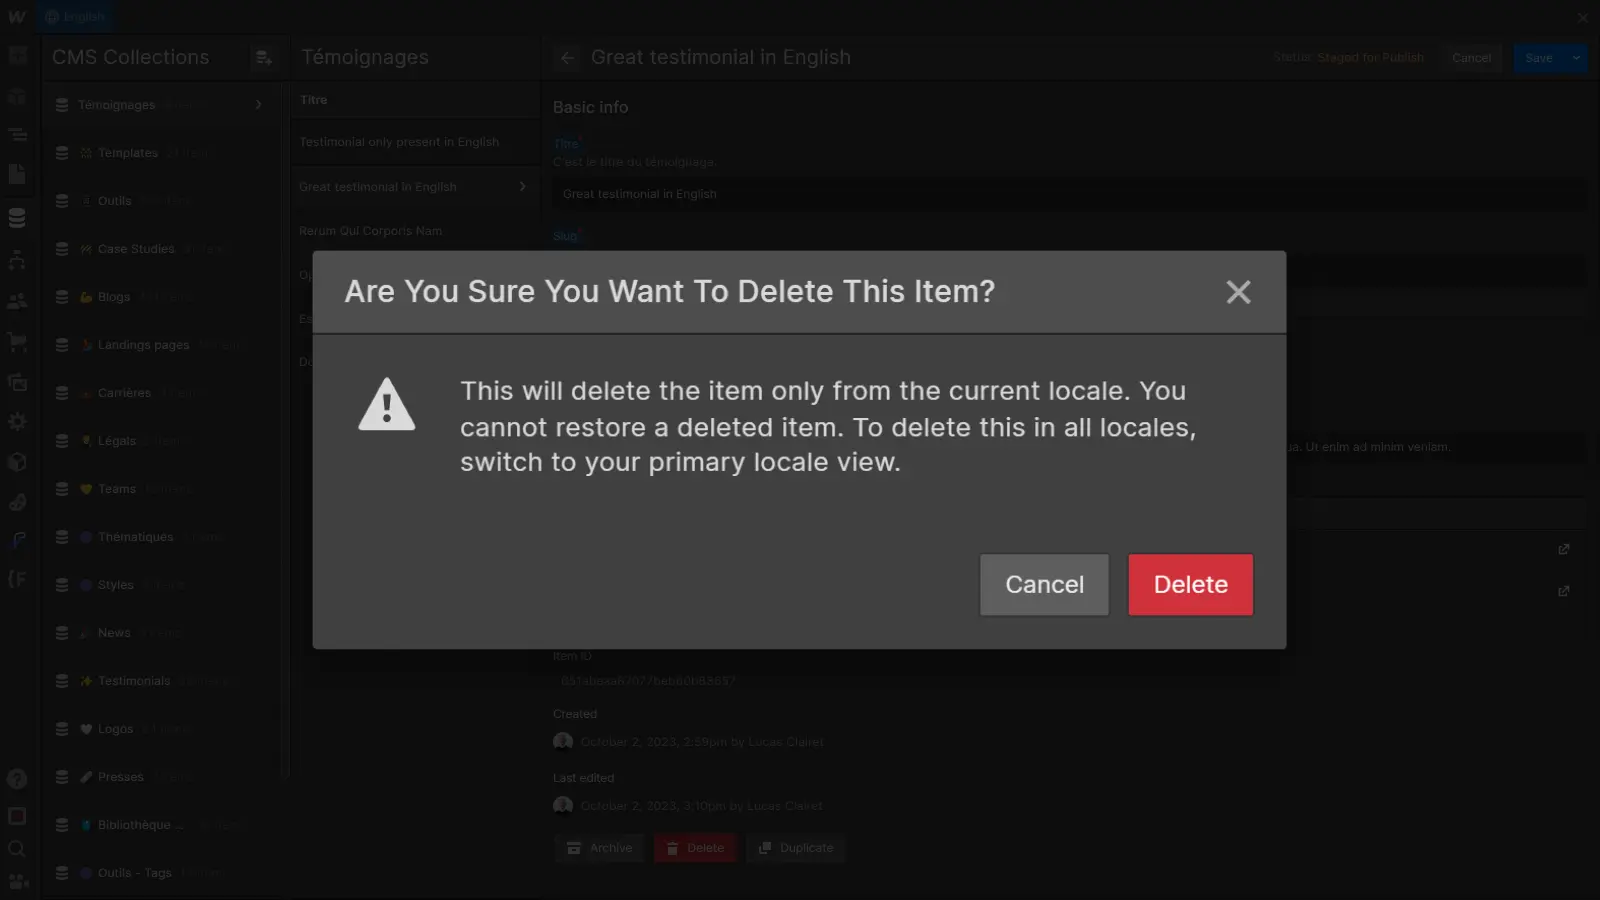
Finally, you may sometimes needitems that are specific to one language, i.e. that don't need to exist in other languages (for example, a blog post dedicated to a regional event). There are two approaches you can take:
- Delete item in specific languages: In the item view, navigate to the language(s) not concerned. Select the item and delete it. This approach is useful when you want certain items not to exist in certain languages.
- Item creation directly from a secondary language: If you know that an item must exist in a single, specific language, create the item directly from the view for that language. The item will then exist only in that specific language.
Item management within the Webflow CMS therefore offers a high level of customization, while ensuring the overall consistency of your content. In the next section, we'll look at how to use these localized collections on your Webflow pages.
Using localized collections
Once you've configured and localized your collections in Webflow CMS, it's time to integrate them seamlessly into your pages. This section explores how to make the most of localized collections for a smooth, consistent user experience.
Collection Lists adapted
When you add a Collection List to a page, Webflow automatically retrieves the appropriate items according to the page's language. Automating this process ensures that visitors see content adapted to their preferred language.
In Designer, you can create your Collection Lists as usual. Your collections are automatically localized.
Customizing collection template pages
Customization of collection template pages can be carried out in the same way as for static content. By accessing a collection's template page, you can localize the page's static content, adapt its design and even localize SEO data according to language.
- Customize static content from within the Designer: use the localization functions to translate static texts present in collections' template pages.
- Language-dependent template design localization: thanks to Webflow style localization, you can adapt the design of your template pages according to language.Discover the Webflow Localization article: adapting your page design according to language
- Localization of template SEO data by language: to maximize search engine visibility in each language, you can also localize SEO data such as titles and meta-descriptions within the template pages of collections.Discover the Webflow Localization article: SEO translation for a well-referenced multilingual site.
By combining these elements, you create a seamless user experience, from the translation of textual content to visual adjustments and SEO information optimized for each language.
In short, mastering CMS localization means fine-tuning the management of shared and language-specific content, offering both global consistency and local flexibility.
Finally, in the next section, we take a closer look at the creation of a language selector to enable your users to navigate intuitively from one language to another.
Create a language switcher
To switch intuitively from one language to another, the creation of a suitable language selector is essential for any good multilingual site. And with the release of Localization, Webflow now makes this possible with a brand-new element: the Locales List.
In this final section, we explore the steps involved in creating an effective language selector.
Introducing the new Locales List element
The Locales List element introduced by Webflow is a new nugget for multilingual site designers. This component, integrated directly into the Designer, simplifies the creation of a dynamic, customizable language selector.
Key features:
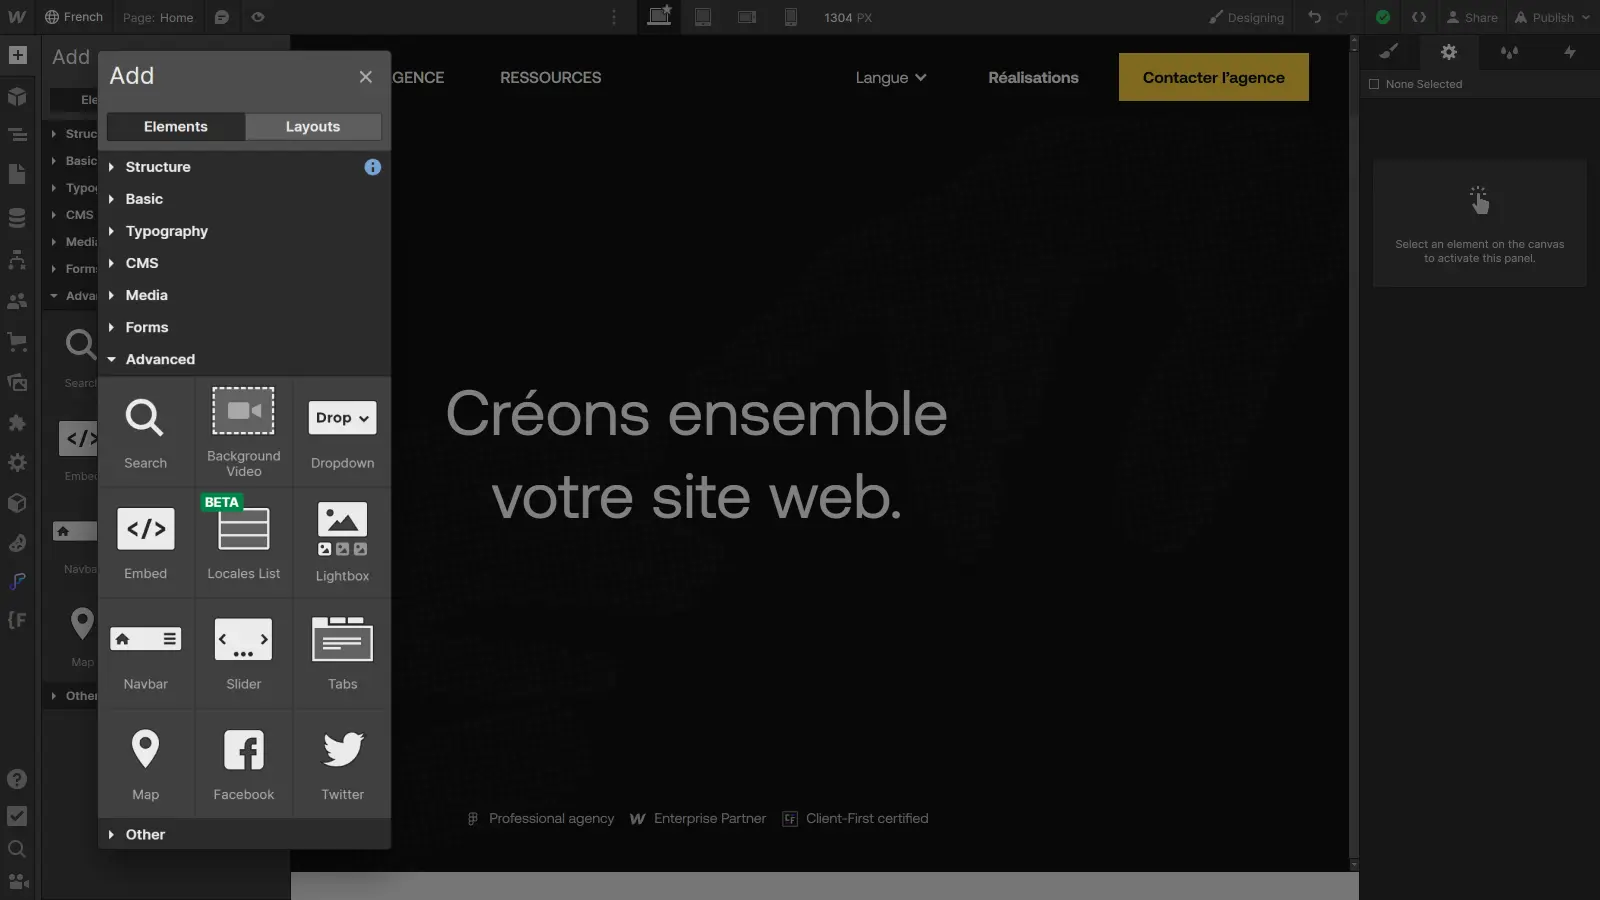
- Easy integration:simply navigate to the elements panel in the Designer and drag the "Locales List" element where you want it to appear on your page.
- Customizable flexibility:In the same way as a Collection List, the Locales List element acts as a container for all the elements of a collection (in this case, the languages activated on your site).
- Dynamic link to localization:The element connects to your localization settings and will automatically display all languages activated on the site.
Why use it:
- Accessibility:Offer your visitors an intuitive way to switch from one language to another, enhancing their experience on your site.
- Harmonious design: Customize the appearance of the Locales List to fit in perfectly with your overall design.
- Ease of implementation: No need to juggle complex scripts, the element is there, ready to be integrated and customized to your needs.
The Locales List is therefore an excellent tool for making your Webflow site truly multilingual. In the next section, we'll look at how to integrate this element into a functional language selector within a navigation bar.
Preparing the language selector
But before we dive into creating the language selector, let's start by setting the scene.
For an efficient and intuitive language selector, the addition of the Locales List element will have to wait. A better solution is tointegrate the element into a dropdown. A dropdown element offers a more accessible solution for integrating a language selector.
More precisely, here is a structure to follow:
- Add a Dropdown element inside your navbar.
- Inside the Dropdown List element, add your Locales List.
Now that the basic structure is ready, let's move on to the integration of the Locales List element to understand how to create a dynamic language selector.
Language selector creation
Once your structure is in place, customize the Locales List according to your preferences.
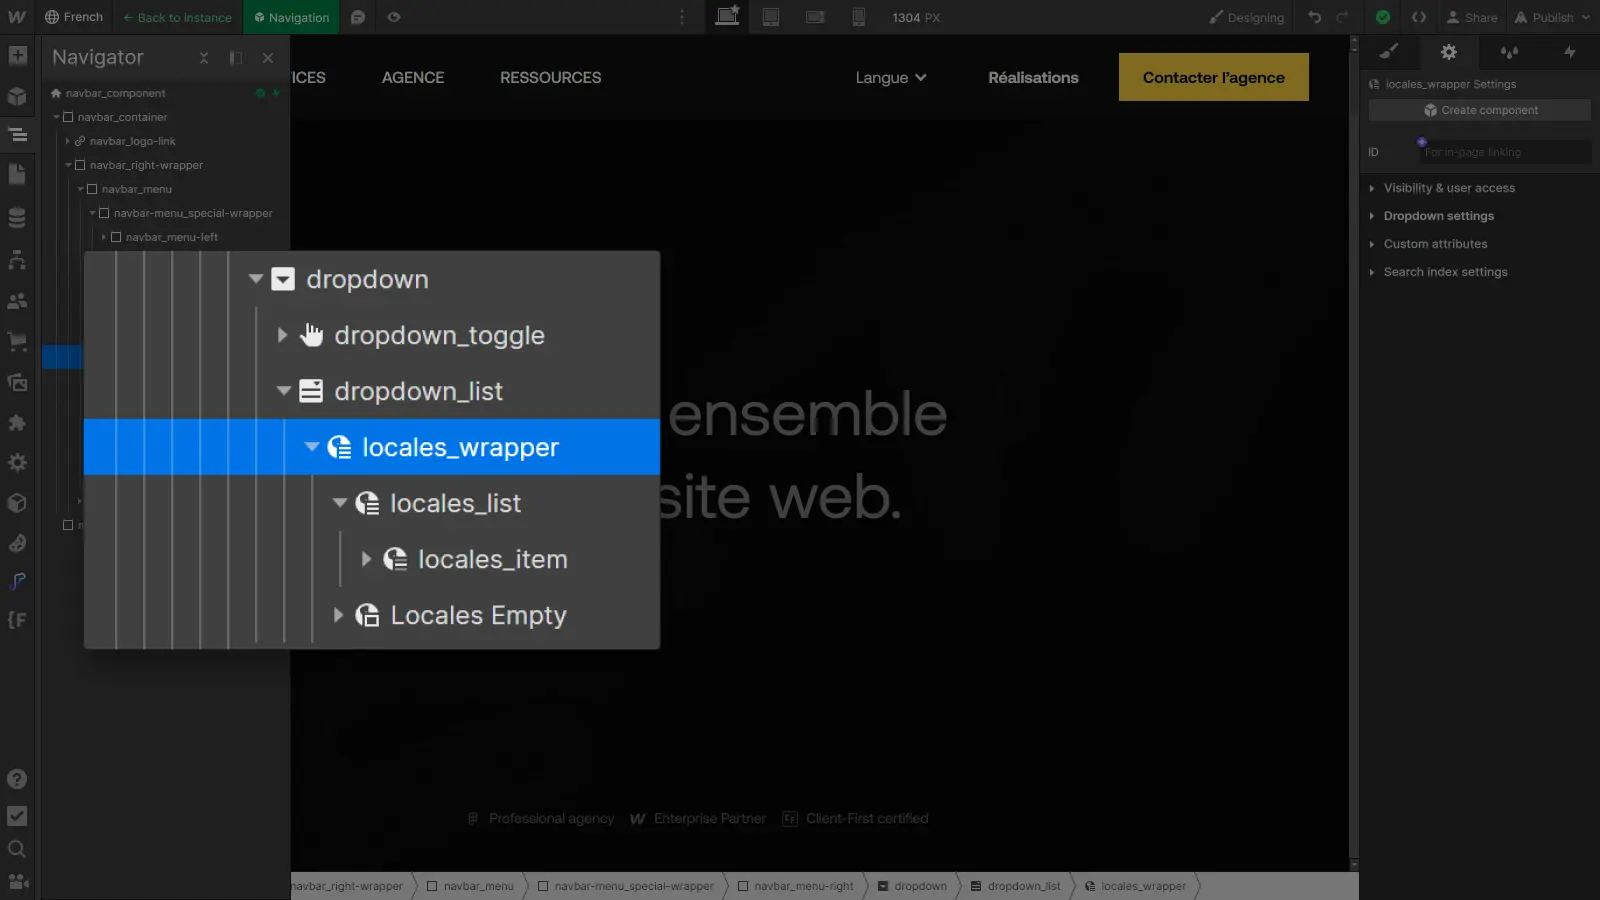
The Locales List element functions like a Collection List. The Locales Wrapper, Locales List and Locales Item elements are comparable to the Collection List Wrapper, Collection List and Collection Item elements.
- Customize the Locales Wrapper element to personalize the component container, for example, with a background and some padding.
- Customize the Locales List element to adjust the distribution of elements, for example in vertical flexboxes with a 1rem gap.
- Customize the Locales Item to modify elements.
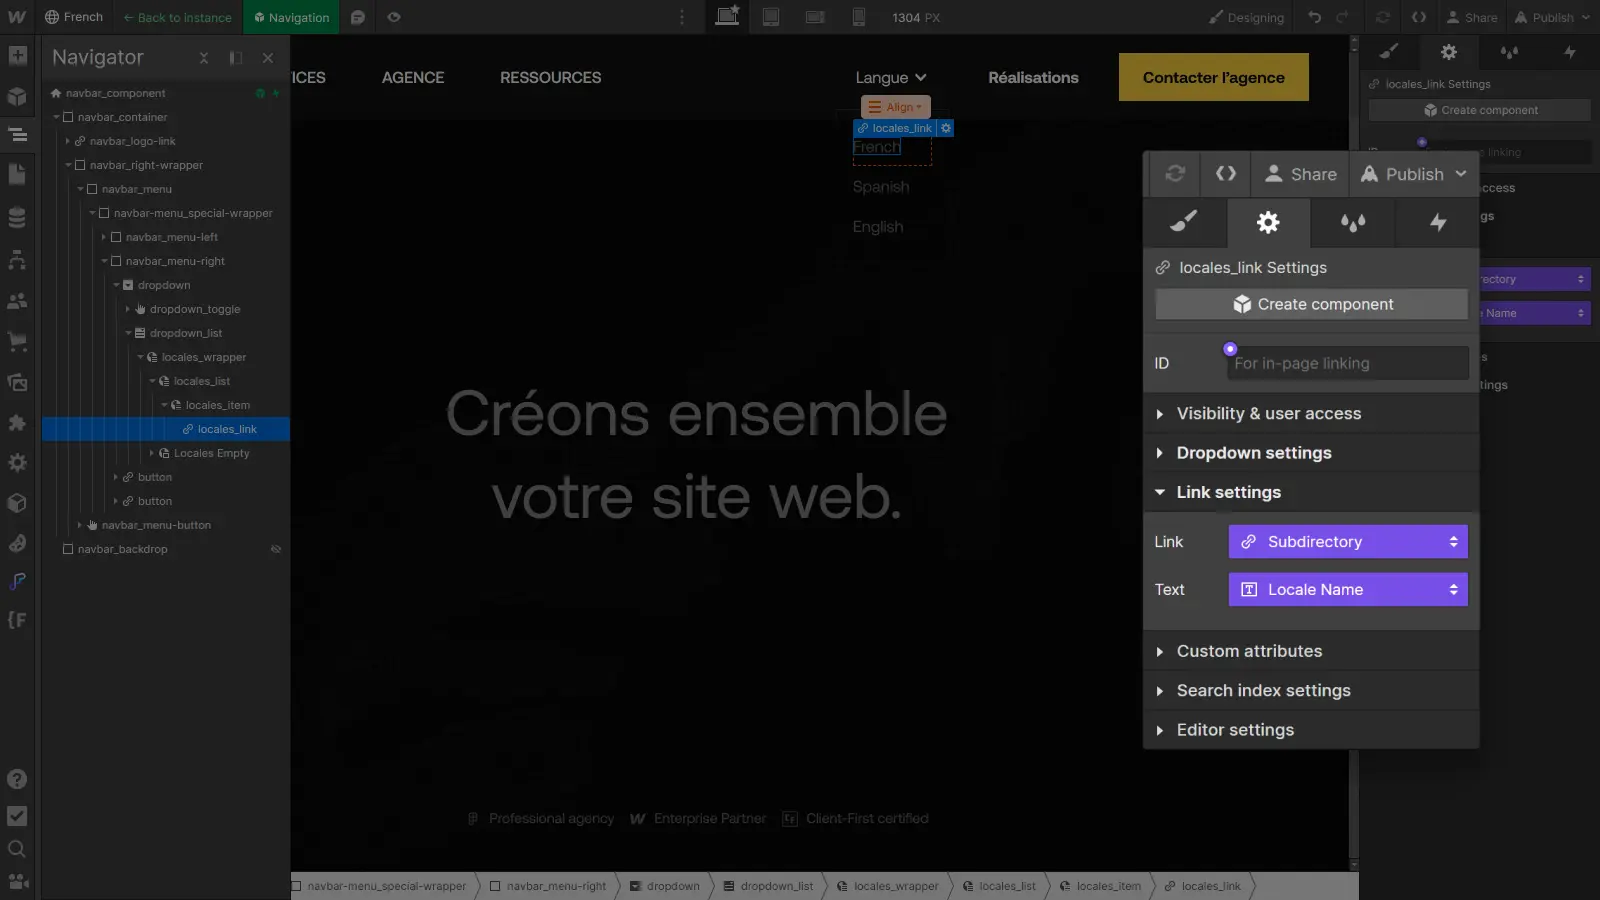
In addition to this, in the link options inside the Locales Item, you can choose to display the display name chosen for the language (French) or its ISO code (FR), depending on which best suits your design.
In short, make sure the appearance of the Locales List matches the overall design of your navbar: play with styles, colors and text styles for perfect integration. By following these steps, you'll now have a language selector ready for use on your site.
Conclusion
Congratulations, you now have the keys to unlock the doors to globality with Webflow Localization. From meticulous translation of static content to dynamic design customization and multilingual SEO optimization, we've explored every nook and cranny of this new feature.
Remember, the key to success lies in understanding your audience. The better you understand your audience's needs and preferences, the better you can customize your site to create an exceptional user experience, whatever the language.
Webflow Localization is then an excellent tool for harnessing this understanding to its full potential and creating multilingual experiences without compromise!
To deepen your understanding of Webflow Localization, here are some additional resources to explore:
- Webflow Localization: how to activate it to translate your site
- Webflow Localization: translate the content of your website pages
- Webflow Localization: adapt the design of your pages according to language
- Webflow Localization: how to localize your Webflow CMS?
- Webflow Localization: translating SEO options for a multilingual, SEO-friendly site
Ready to take your website to the next level?
Improve your online visibility thanks to Digidop's experience, excellence and reactivity!


.webp)
.webp)

