Introduction
You know how important it is to reach a global audience, don't you? Translating your website is great, but it doesn't stop there. Imagine being able to customize the look and feel of your site for each user, depending on their location. Well, that's exactly what you can do with Localization, Webflow's new feature.
In our previous articles, we've already covered the basics of Webflow Localization, from activation to content translation. Now we're going to explore how you can fine-tune your design for each international audience. Whether you want to adjust styles, visual elements or even assets such as images, Webflow has you covered.
Get ready to make your site even more personal to every visitor, wherever they are in the world. We're off.
Locate images by language
When it comes to creating a localized website, every detail counts. This includes the images and graphics that bring your site to life. They play a crucial role in making your audience, wherever they may be, feel connected to your content.
The good news is that, thanks to Localization, you can customize these visual elements according to language, to provide a truly tailored experience for every visitor. Here's how you can do it:
1. Change image according to language
Let's say you have an image that contains text. Rather than keeping this text in each version of the site, you can adapt the image to the user's language:
- In Designer, select the language you wish to customize.
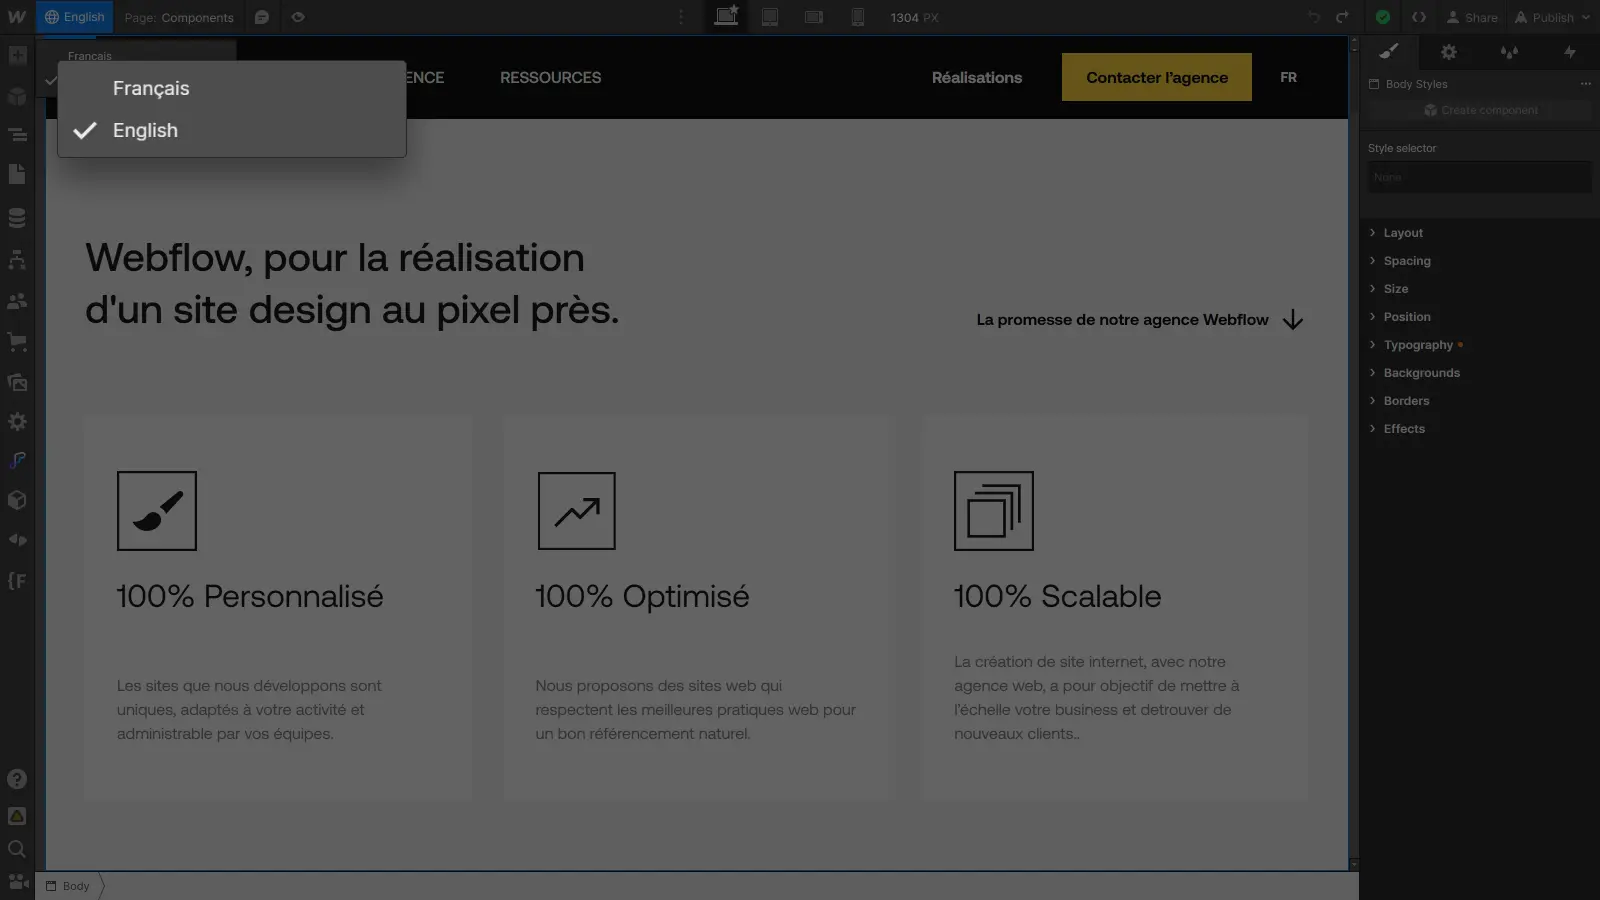
- Then select the relevant image .
- In the settings panel on the right, edit the image as usual to select a new image, this time adapted to the chosen language. The new image applied will now be specific to that language.
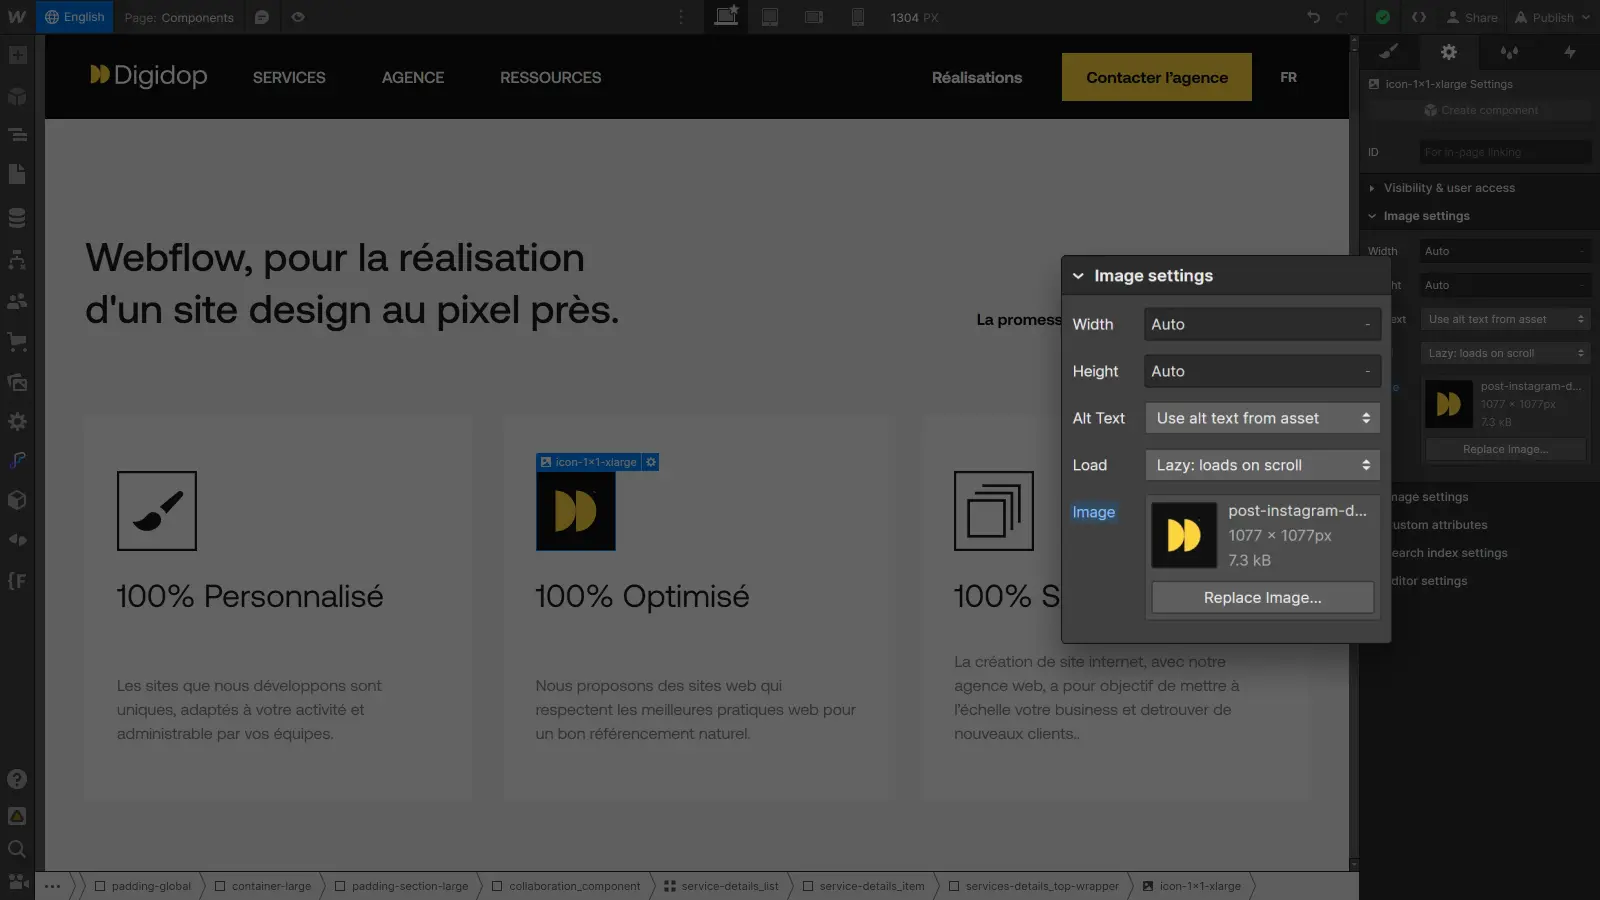
It's a simple and effective way of visually adapting your site to the different languages on offer.
2. Modifying the Alt attribute of images
The Alt attribute of images is important for making your site accessible to everyone. To make it specific to a given language, here's how to do it:
- In Designer, choose the language you wish to customize.
- Select the image for which you wish to modify the Alt attribute.
- In the parameters panel on the right, translate the attribute to match the chosen language.
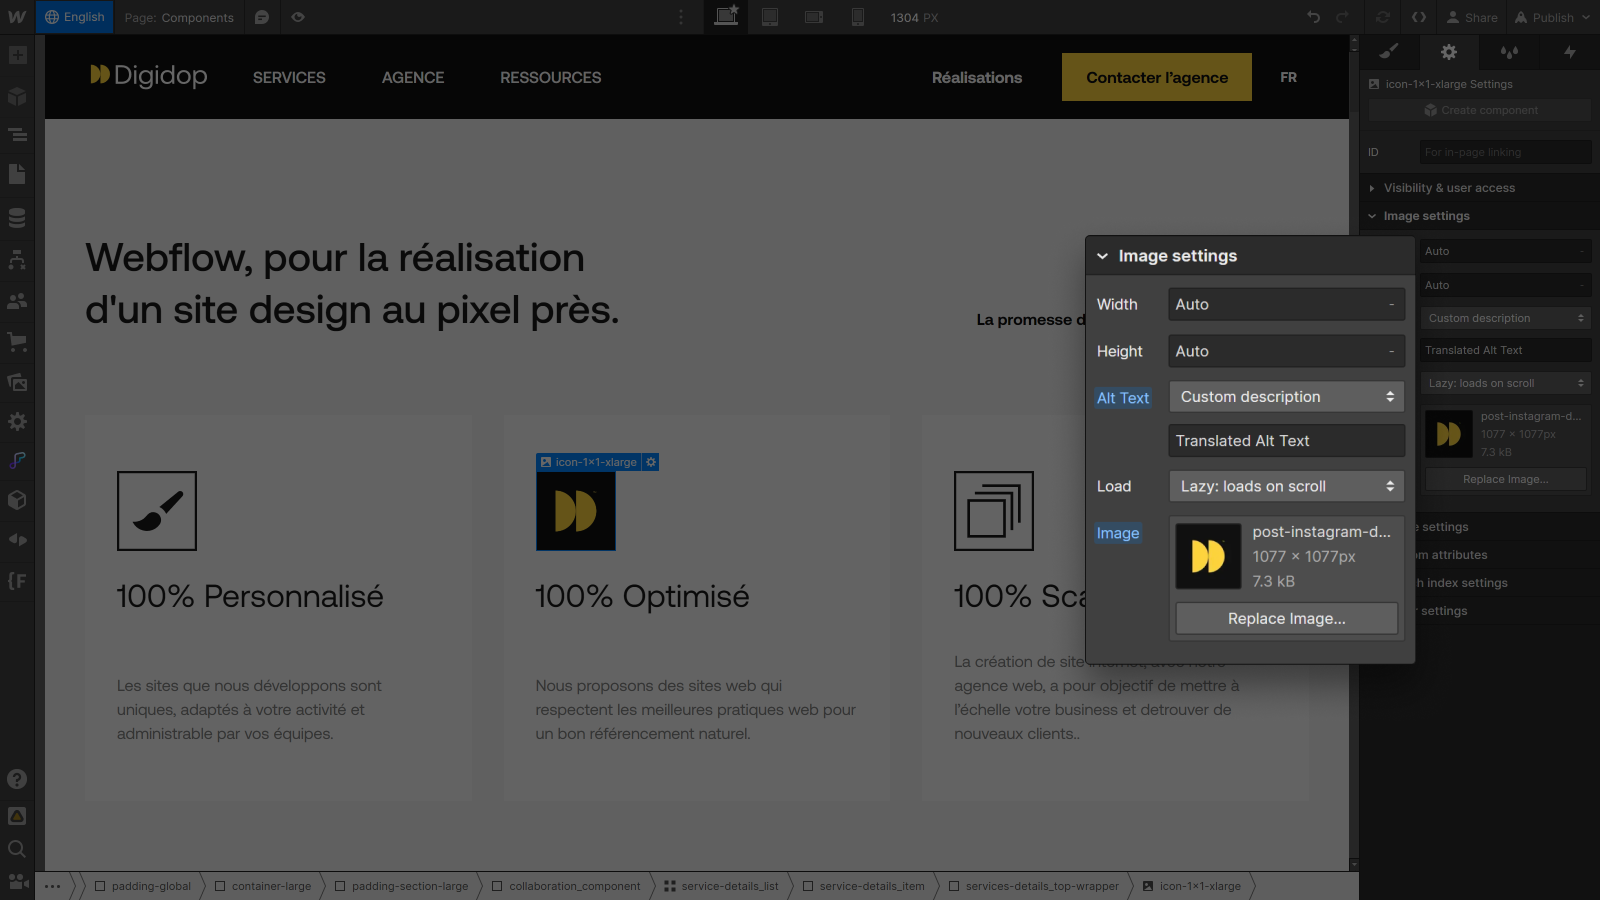
This way, when visitors use this language, they'll get an appropriate description for the image, which can really enhance the user experience.
By following these simple steps, you can customize your assets for each language to deliver a truly tailored experience for your audience.
Now let's move on to customizing the visibility of elements according to language, to take your design even further.
Hide or show language-dependent elements
Now, let's dive a little deeper into customization by talking about element visibility.
Imagine: you've got a website with a ton of content, but some elements are only relevant to certain languages. Instead of showing everyone things that aren't relevant to them, you can localize the visibility of these elements:
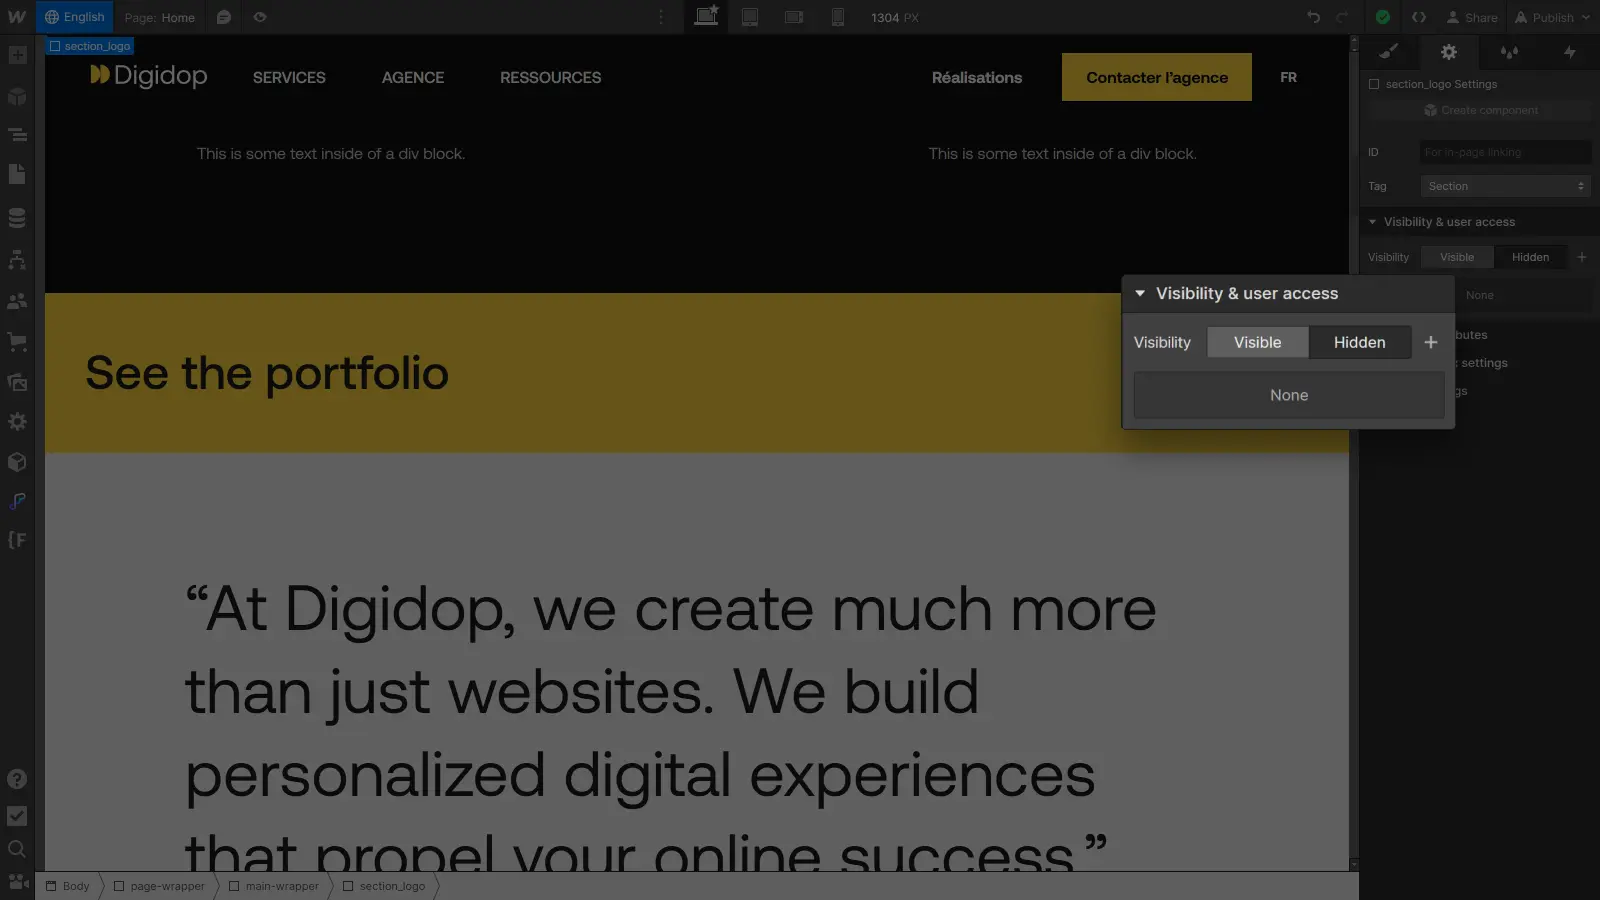
- In Designer, select the language you wish to customize.
- Select the element to be hidden: an image, a button, or even an entire section.
- Open the element parameters in the right-hand panel
- Select the desired visibility: Visible or Hidden, depending on the language selected.
Combine this trick with content translation and visual asset customization, and you've got a website that speaks your visitors' language, shows them the right images and offers language-appropriate info. It's the kind of personalization that makes all the difference.
What's next? Let's talk about language-dependent style customization. This is where things get really interesting!
Adaptingstyles to language for a tailor-made design
Now that you've understood how to localize your visual assets and manage element visibility according to language, it's time to dive into style localization.
Let's say you have a website with a well-established design, but each language has its own preferences in terms of layout or size, for example. That's where language-dependent style customization comes in.
- Start by selecting the language.
- Select the item to be customized.
- Select "Current Locale" from the class status list (if not already selected).
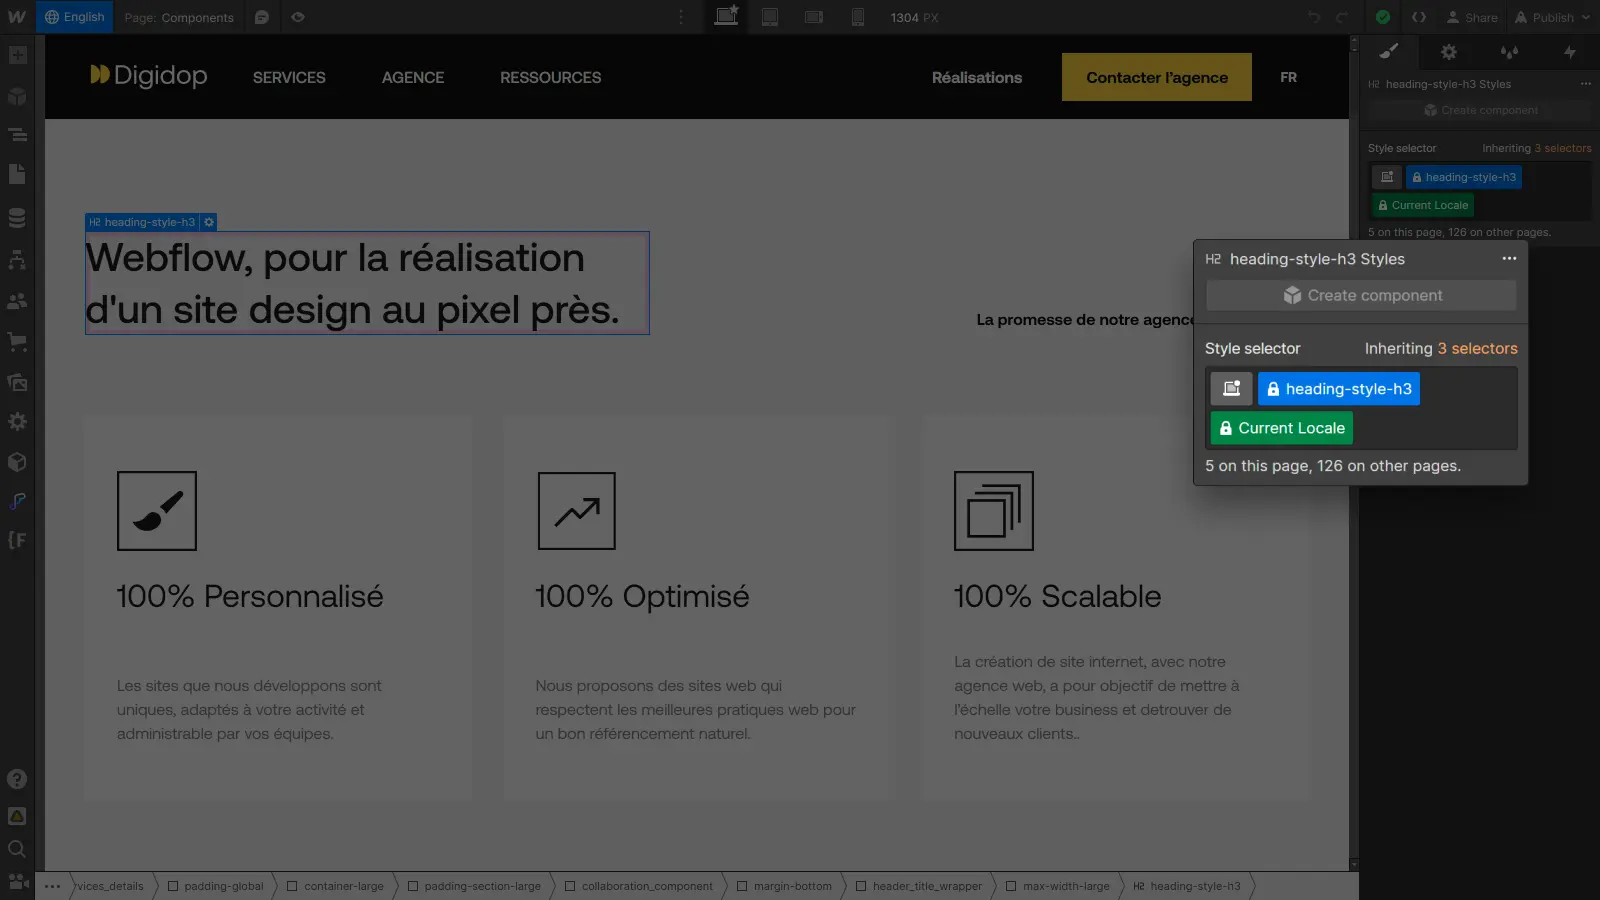
- Customize the element as you normally would.
You can change colors to match cultural preferences, adjust fonts to make them more readable in a specific language, or even rearrange elements for a more suitable layout. The changes you make will be specific to the language selected.
Style localization allows you to create a unique experience for each language version of your website, and goes far beyond simple text translation.
Conclusion
So now you have all the tools you need to customize and adapt the design of your Webflow site to different languages and cultures, whether by localizing styles, choosing specific visual assets, or even playing with the visibility of elements.
Remember, the key to successful localization is understanding your audience. The better you understand your audience's needs and preferences, the better you can customize your site to create an optimal user experience.
To go further in managing your multilingual site with Webflow Localization, consult our ultimate guide on the subject :
Ready to take your website to the next level?
Improve your online visibility thanks to Digidop's experience, excellence and reactivity!


.webp)
.webp)

