If you have ever used Webflow, you will know this problem:
- Text block 6
- Div Block 54
- Image 2
- Heading 37
- Etc, etc...
If you have never used Webflow, but intend to create a website with Webflow, read this tutorial. It can save you a lot of time in your future development in Webflow.
The problem is simple, a class with a "default" name is not understandable. So? Not reusable. But Webflow is designed in a dynamic way, the objective is to create quickly thanks to classes and"combo-classes".
Creating in Webflow: classes
Webflow is a no-code design tool for creating websites. It is an advanced tool, which is in fact the only tool to visually edit code. It works on the HTML and CSS principle.
Chaque élément "classe" à donc une valeur CSS qui donne les informations de <style> au navigateur web.
Tips on how to use the classes
Our experience in Webflow has seen us navigate through different projects. Each has its own way of creating in Webflow and it can therefore be - often - simply not to understand the development methodology used by the developer before you.
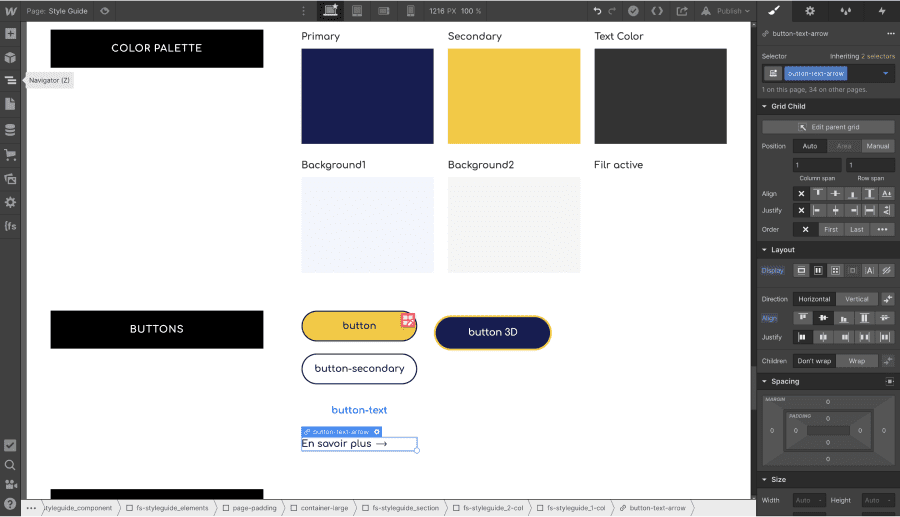
Using a guide style
- Add or clone a style guide page
- Put the → "Draft"
- Design your elements - HTML Tag - and - CSS classes - from this central page of your project
Pro Tips: start the structure of your styleguide on your Figma template to save time and facilitate the transfer of the design from the Figma template to Webflow.
Using class combos
Class combos allow you to assign a style to elements that you will use several times in your project. For example, at Digidop we often use class combos for :
- Grid with 2 columns
- Background <color>
- Text colour
- Container
- Alignment and size of texts
- Buttons
Be careful! Not everything in Webflow must be global. Some elements must have their own class. Because when you make a modification on a class which is used on other pages of your Webflow site, the modification will be done on all the pages. And an error of style is quickly made (responsif, size, etc...)
It should be remembered that the Webflow designer is not easy to use. More powerful, but more complex than Wordpress for example.
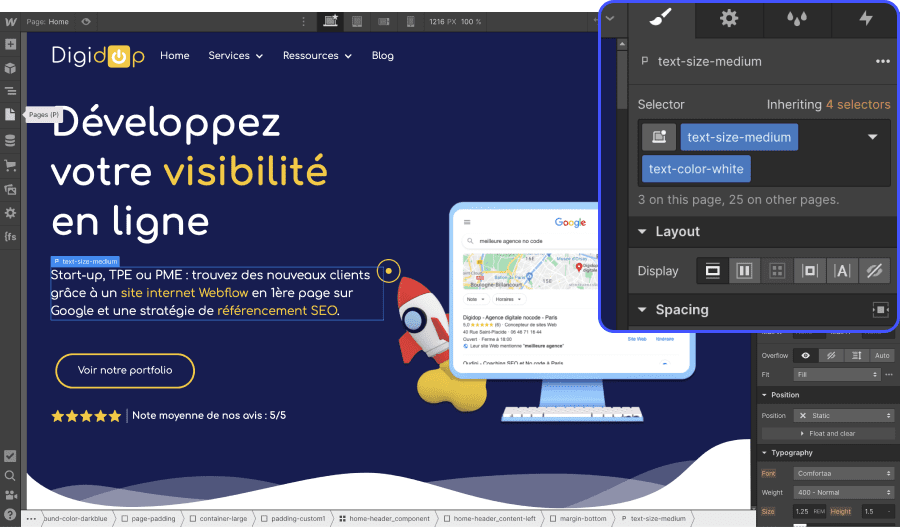
Name your classes explicitly
If we had to choose only one rule, we would choose this one. Name your classes explicitly. Since we've been using the Client-First development methodology, we've adopted this philosophy and it's a joy. Having a name that defines the CSS style of the class has many advantages:

- Faster development
- A Webflow site that always stays organised
- Anyone can understand and develop in our Webflow sites
To conclude, apply these three tips and in our opinion an optimised way of using Webflow's no-code solution. The tool is full of functionality, but a mistake can happen quickly, so it is essential to be organised and structured in the complete development of your web project.
Ready to take your website to the next level?
Improve your online visibility thanks to Digidop's experience, excellence and reactivity!


.webp)
.webp)

