Are you looking to integrate a HubSpot form on your website, but are running into customization and style limitations? Don't worry, because there is a simple and effective way to integrate and customize your HubSpot forms in Webflow, without having to write a single line of code.
While HubSpot offers powerful marketing and contact management features, when it comes to visual personalization, its options are often limited. That's where Webflow comes in. With Webflow, an intuitive website creation platform, you can take full advantage of the customization possibilities by using CSS classes.
In this tutorial, we will guide you step by step to integrate and customize a HubSpot form in Webflow. You'll discover how to leverage Webflow's functionality with CSS classes to create forms that perfectly match your brand identity and optimize the user experience.
Step 1: Create a form in Hubspot
The first step, if you haven't already done so, is to log into your Hubspot account, go to Forms (in the"Marketing" drop-down menu) and create a new form.
You can choose integrated form and start with a template or not.
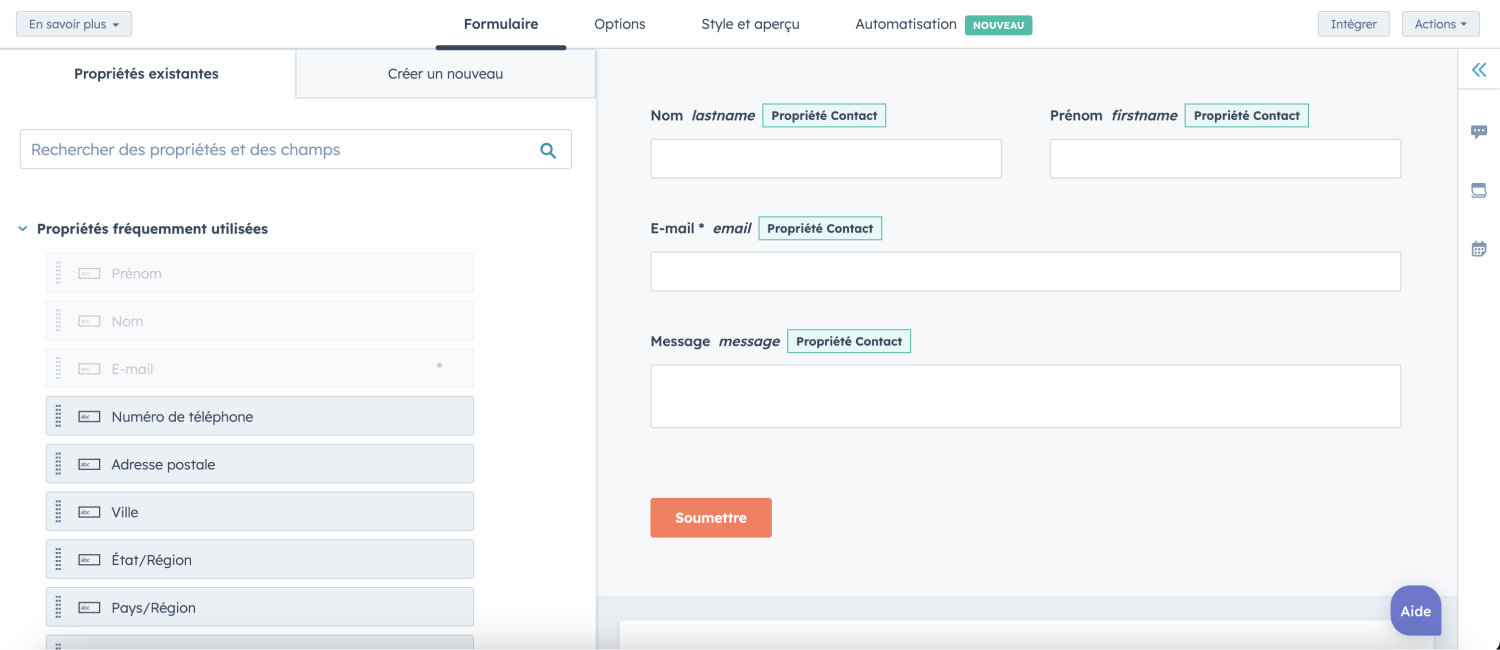
Then, in the"Form" tab, you can create the form adapted to your needs by adding the fields (properties) proposed by the tool.
Step 2: Enable the"Set as raw HTML form" option.
Once you have finished setting up your Hubspot form, you can go directly to the"Style and Preview" tab.
In this dashboard, you will find a"Set as raw HTML form" button that you will need to check. When we convert the HubSpot form to HTML, we will remove the default HubSpot style. This means that we will be able to integrate our own CSS code to this form from Webflow.
Please note that a minimum of one Marketing Hub Pro plan is required to activate this essential option.
You should also remember to click on the"Update" button in Hubspot to make sure that the form takes into account the changes.
Step 3: Retrieve and copy the form integration code
Then, you will have to click on the"Integrate" button in the upper right corner.
A pop-up will appear and you will have to go to the"Integrate code" tab and click on the"Copy" button.
Step 4: Embed the code in an Embed Webflow element
Now you can go to your Webflow project.
Once in the Designer, you will need to :
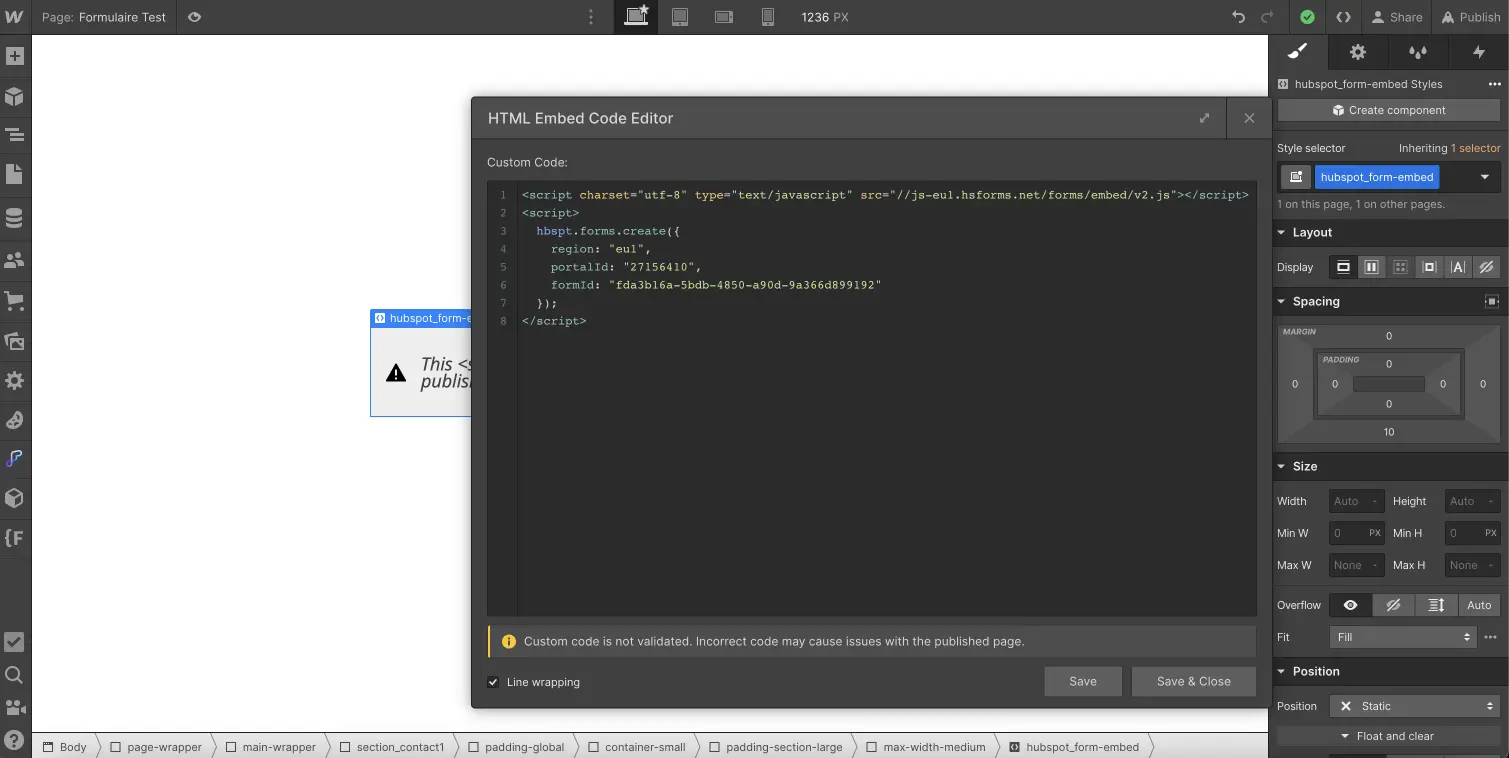
- Add an Embed element where the form should be displayed
- Paste the code copied from Hubspot
- Click on"Save and close".
Step 5: Duplicate the clonable Finsweet "Hubspot Form Elements in Webflow"
Now, to be able to modify the style of the form, we will clone the Hubspot Form Elements in Webflow project from Finsweet.
This clonable contains all the elements with the classes of a Hubspot form that we can style in the Webflow Designer. These CSS classes will be applied to the elements of our Hubspot form.
Step 6: Recreate the structure of your form
After duplicating the Finsweet project, you will be able to reproduce the form you made in Hubspot on Webflow. To do so, you just have to copy and paste the elements of the cloneable to remake the structure of your form.
Copy the elements (inputs) present in your basic form and reproduce the structure in your webflow project.
A whole form is already proposed in the cloneable, you can copy and paste this form in your project and replace or add the necessary fields.
Step 7: Customize the form in your own way
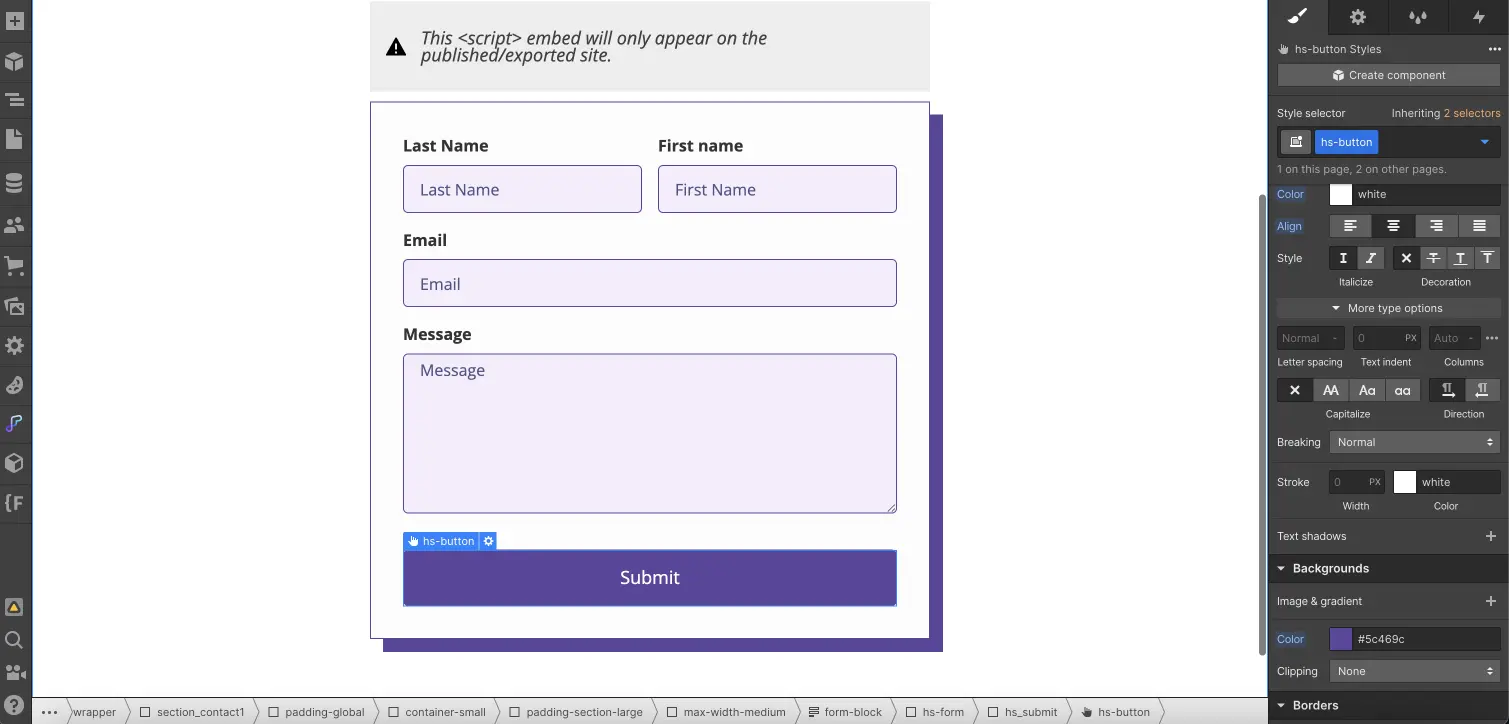
Once you have reproduced your form in Webflow thanks to the clonable Finsweet, you can style the elements inside thanks to the numerous options of the Designer.
Be careful not to change the name of the CSS classes, as they are the ones that apply the styles to the Hubspot form afterwards.
You can then hide the Webflow form on your page (or insert it directly into your guide style page) so that it is not displayed once the project is published.
Step 8: Publish and Test
The modification will only be visible once the site is published, so you will have to publish your project and check that the implementation is correct.
Please note that if you make a modification in Hubspot the form will automatically be updated on your live site (after clicking on the "Update" button in Hubspot).

To go further in the implementation of Hubspot x Webflow forms
You can find Harshit's full video on the subject (you will be able to understand in it the additional customization options) below:
This tutorial now allows you to integrate 100% customized hubspot forms in your Webflow project without the need to use another tool such as Make, Zapier or others. Take advantage of the power of this integration to boost your conversions.
If you want to have a website that reflects your brand image, you can look at our Figma Design offer.
See also our Webflow vs Hubspot CRM comparison.
Ready to take your website to the next level?
Improve your online visibility thanks to Digidop's experience, excellence and reactivity!


.webp)
.webp)

