There are several types of Webflow forms to your tools. The more web forms you integrate to your site, the more data you will have to manage. This can quickly become a burden for you and your team. This is where you will find an iterate to automate your Webflow site. The goal will be to link all the data from your website to your business tools. This can be HR tools, commercial CRM tools, product tools, etc.
There are several techniques to connect your website to your no-code and low-code tools and here we use the automation tool: How to connect several Webflow forms with Make (Integromat)? In this example the goal is to manage the data of 3 different forms to send a personalized message to our teams. We will use the automation tool Make (Integromat) with the Webflow and Slack modules.
1 - Add the Webflow module
Add the Webflow module to Make (Integromat) to start your automation.

2 - Choose the "Watch Event" trigger
This instant webhook will allow you to receive data as soon as a new form is submitted.

3 - Add your Webflow site
You need to connect Webflow to Integromat by selecting the right project.

4 - Add a first Slack module
You will now connect Slack to Make (Integromat). Add a new slack module and select the action "create a message". The objective is to send a personalised message to a specific channel.

5 - Set up the first Slack module
Select the type of channel you are using and then the channel or person you are sending the message to.

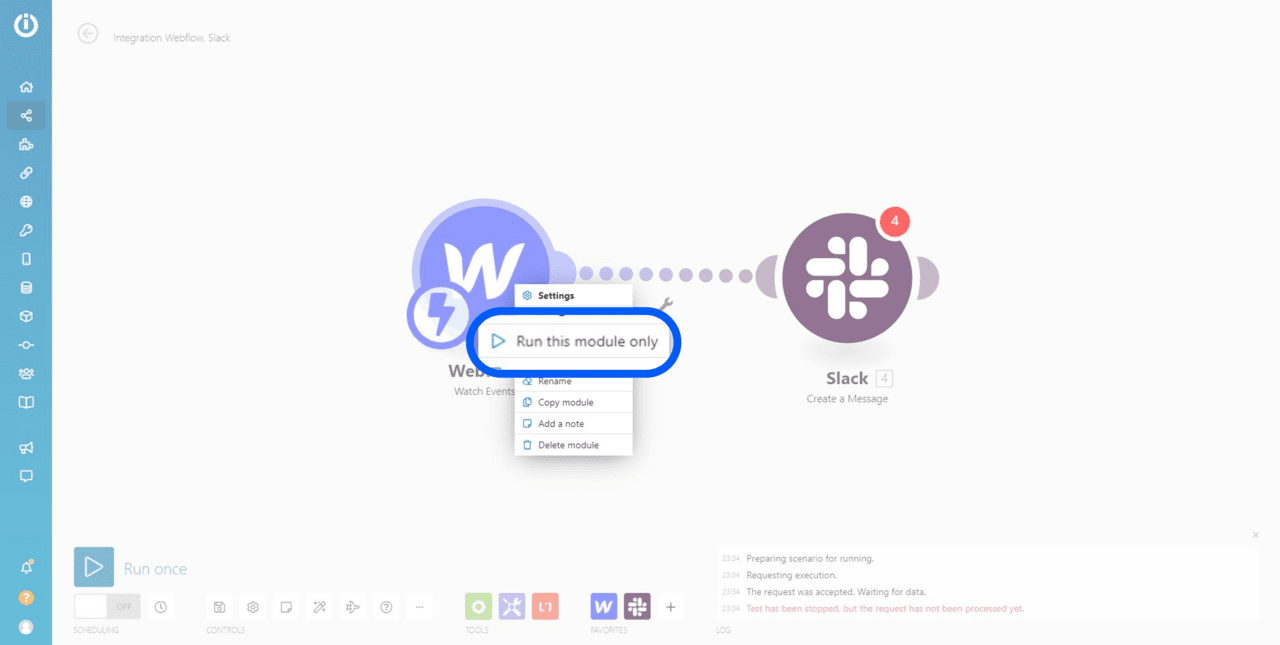
6 - Send the data from your first form
It is now time to send the first data to your webflow webhook. To do so, right click on the webflow module and click on "Run this module only".
Then go to your Webflow site and fill in a first form.
Warning 🚨 Each Webflow form must have a unique name to be properly identified
7 - Filter your first form
The Make (Integromat) filtering system is extremely powerful, and it is this that will allow us to identify the different forms. The objective here is to separate your forms so as not to mix the data. To filter, click on the link between the two modules.

8 - Rename your filter
It is important to identify each filter by renaming them. We advise you to call the filter by the name of your form. Once you have added all your forms, you will be able to easily identify the automations specific to each of them.

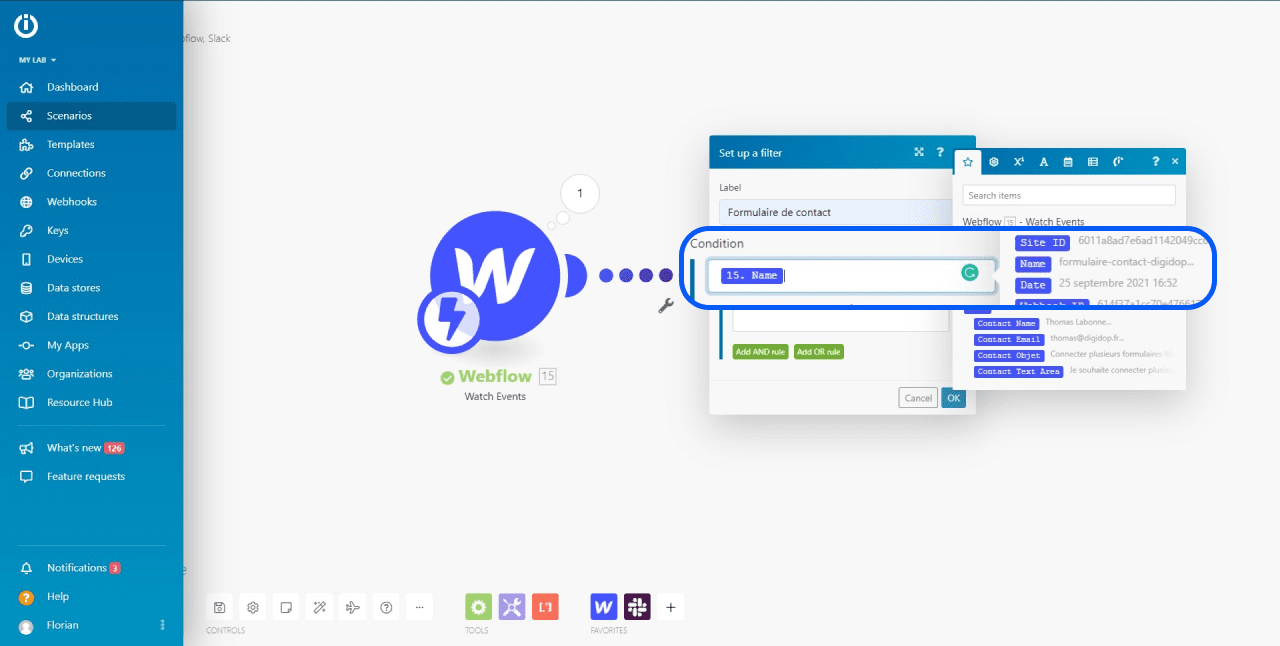
9 - Add a filter condition
Filtering allows you to tell Make (Integromat) to consider data only in certain cases. Here, we will ask the webhook to pass the data if and only if it is the first form. Here's how to do it:
Adding a form name tag
In the first line: add the "name" tag of your webflow form. The "name" tag will tell the filter which form it is, and thus redirect it to the right place in the automation chain. This is why it is important that each form has a unique name.
Adding a filter type
Select an "Equal to" condition of type "Text operators". This tells the filter that the text content of the "name" tag must match exactly the form specified for that part of the string.

Adding a filter condition
Specify the name of your form so that the filter will only send data from this form to this part of the automation.

10 - Tag the following modules
You can now tag the following modules with the data from the first form. Here we set up the custom message in Slack.

11 - Add more modules
Now that your first form is filtered to take a specific path and address a certain part of the chain, you can repeat this operation with other forms:
1 - Add another module
2 - Run the Webflow webhook
3 - Fill in another form
4 - Filter to the workflow entry with the name of the new form
5 - Tag the following modules

Ready to take your website to the next level?
Improve your online visibility thanks to Digidop's experience, excellence and reactivity!


.webp)
.webp)

