Learn how to use a CSV file to import thousands of collection items or just a few into your Webflow site at once.
When creating collections, you can manually add your collection items or import them directly into an existing collection using a comma separated value (CSV) file. This allows you to import hundreds or thousands of data elements from an external source directly into the CMS and link the CSV content to reference fields when importing that content.
To facilitate the update of large amounts of data, you can also selectively update existing CMS elements via CSV import.
In this tutorial, you will learn:
- How to import data into Webflow
- How to configure fields and preview items
- How to structure your CSV file
Guide to Importing CSV Data into Webflow CMS
1. How to upload a CSV file to the CMS
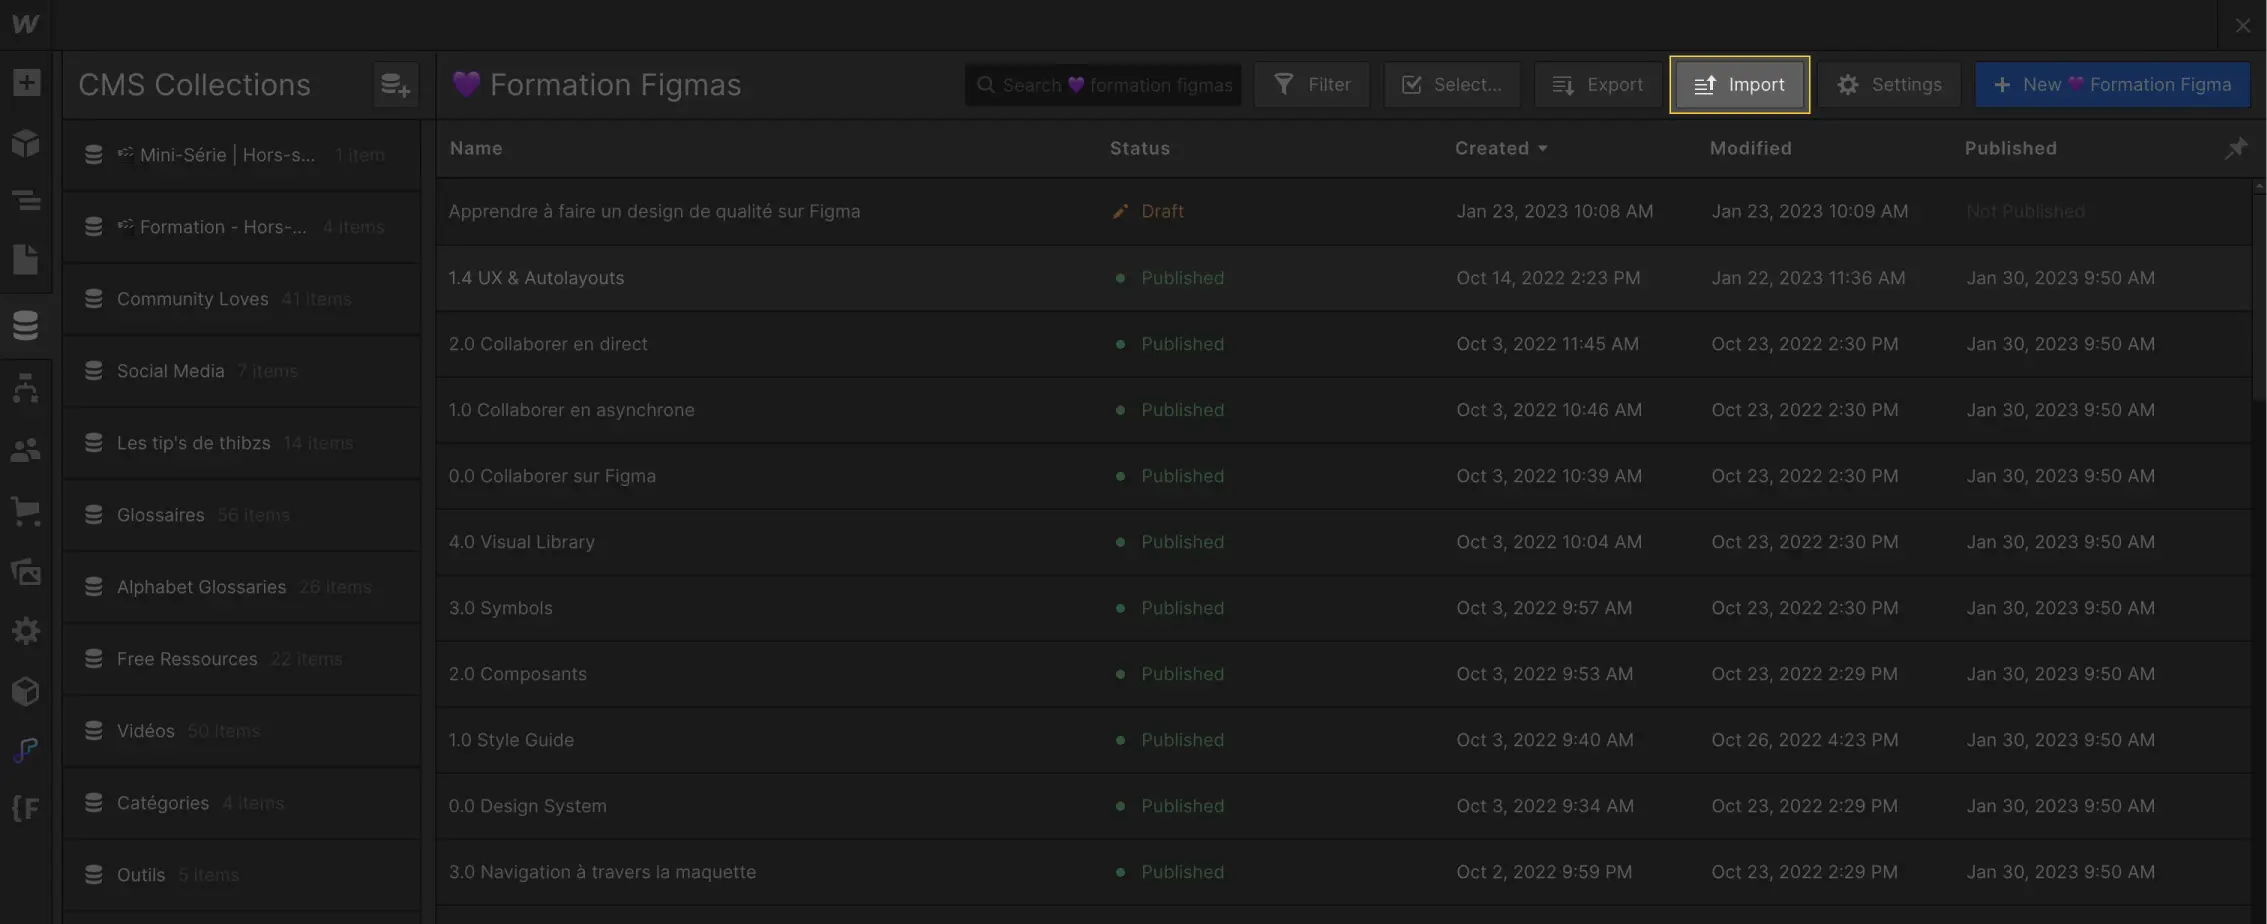
To upload your CSV to your Webflow collection:
- Open the CMS panel
- Select your collection
- Click on Import
- Drag your CSV file (or click to browse your computer)
Note: The maximum size of a CSV file is 4 MB.
2. How to specify the header line
After selecting your CSV file, you will be prompted to specify a header line.
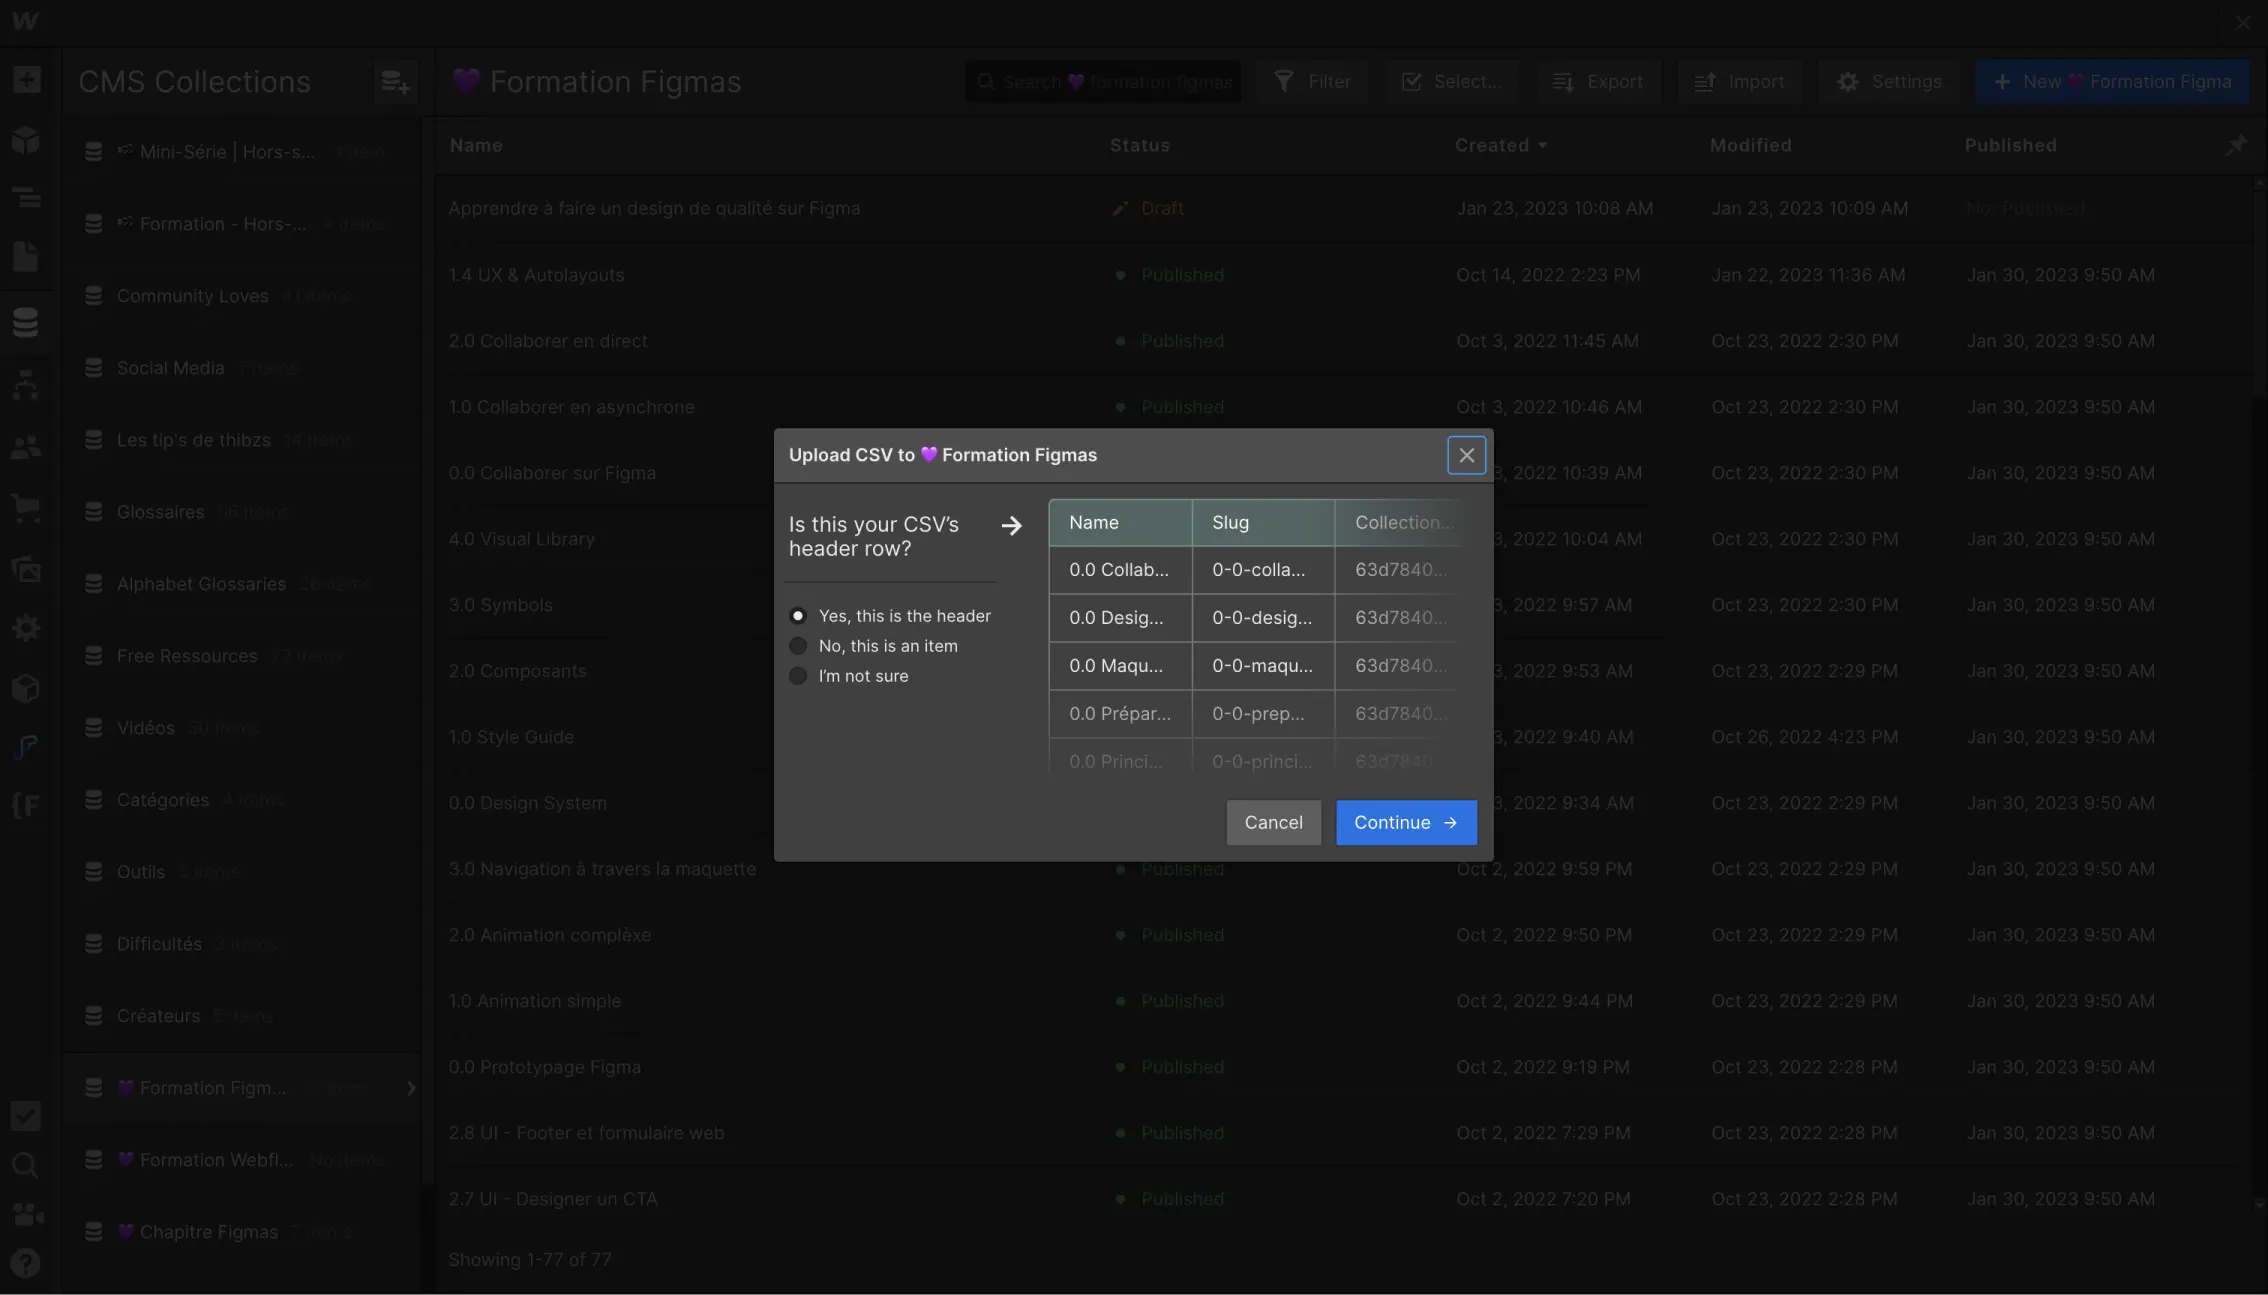
Typically, the header row of a CSV contains column labels that define the type of content contained in each column. Once you have uploaded the CSV file, you will see a preview of your CSV and be able to confirm whether the first row is a header or not.
Selecting "yes" or "I'm not sure" marks the first line as a header and excludes it from the import.
If you choose "No", the first line will be included in the import.
3. How to choose the elements to import
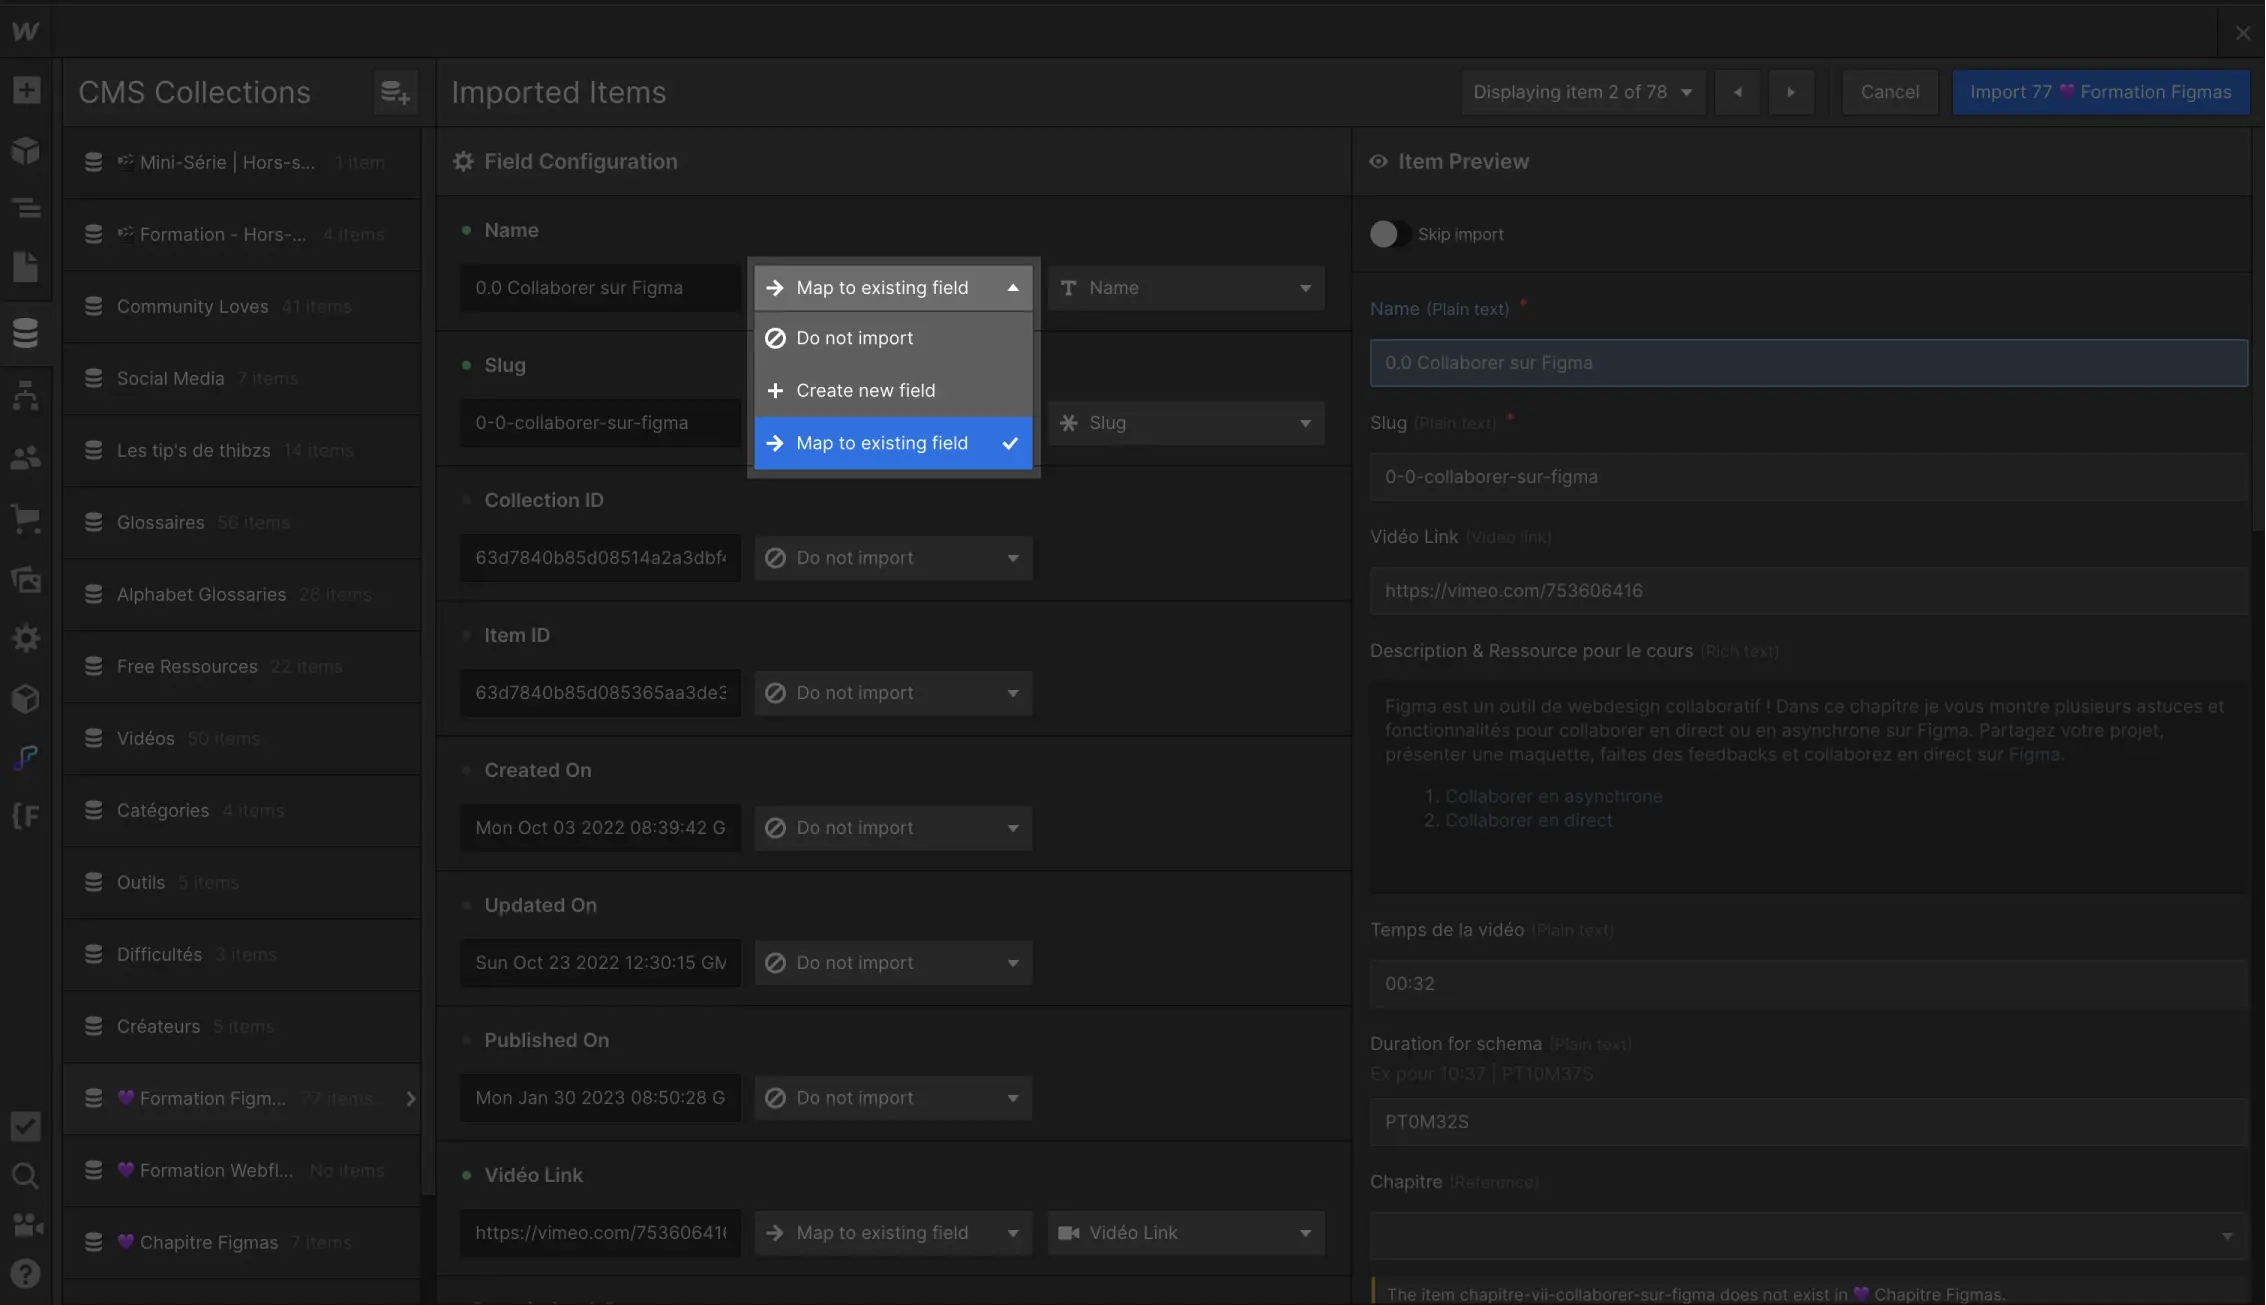
After specifying the header row, you can choose which items you want to import. For each column in your CSV file, you can choose to import it as a new field, associate it with an existing field in your collection, or not import it at all.
- Associate the columns in your CSV file with the fields in your collection by clicking on the drop-down menu for each column and selecting the corresponding field.
- For required fields, make sure they are associated with a column in your CSV file containing the appropriate information.
- If you do not want to import a column, select "Do not import" from the drop-down menu.
How to structure your CSV file
To ensure a successful import, make sure your CSV file is properly structured. Here are some tips on how to structure your CSV file correctly:
- Use commas to separate values in your CSV file.
- Include a header row with column labels to describe the contents of each column.
- Make sure that each column contains consistent data (e.g., one column for names, another for email addresses, etc.).
- Avoid using special characters, such as quotation marks, commas or line breaks, in text fields.
- If your CSV file contains dates, make sure they are formatted consistently (for example, dd/mm/yyyy).
Supported data types
When importing data into Webflow, it is important to understand the supported data types. Supported data types include text fields, rich text fields, date fields, reference fields and image fields. For images, you must provide the direct URL of the image, and Webflow will download the image and associate it with the corresponding collection item.
Import errors and troubleshooting
If you encounter any errors while importing your CSV file, check the following items:
- Make sure your CSV file is properly formatted and does not contain any unsupported special characters.
- Verify that you have associated the columns in your CSV file with the appropriate fields in your collection.
- Make sure that all mandatory data is present in your CSV file.
- If you have problems with importing images, make sure you provide valid image URLs.
Note: find out how to export data from your Webflow CMS in this article
Conclusion
Now that you know how to import data into collections on Webflow using a CSV file, you can save time and simplify your content management.
To learn more about Webflow and discover other tips and tricks, feel free to explore the different resources on Digidop to learn more about creating and managing websites with Webflow
Additional articles that may be of interest to you:
Ready to take your website to the next level?
Improve your online visibility thanks to Digidop's experience, excellence and reactivity!


.webp)
.webp)

