If you own a Webflow site and you want to offer your users the possibility to easily print a page of your site, adding a"Print Page" button can be a simple and efficient solution.
In this article, we will show you how to add a print button to your Webflow site in a few simple steps.
Step 1: Add a button to your page
The first step of this tutorial is to add a button on your page. To do this, you simply insert a link block or button element on your page (you can also use other types of elements if you really want to).
You will be able to fully customize the style and the interactions of the element that will be used as a button (remember to name your class well to keep a Client-First structure).
Pro Tip : To keep a website accessible, we advise you to add the following custom attributes to your button
Name : role
Value : button
&
Name : aria-label
Value : Button to print the web page
Step 2: Give the button an ID
Now that you have added the button to your page, you need to give it a custom ID. To do this, select the button, then go to the "Settings" tab in the right sidebar of Webflow. Under the "ID" option, you can enter the ID you want to use for the button.
In our example, we used the ID "print".

Step 3: Add a script
Dans cette troisième étape, vous devez ajouter un script qui permettra au bouton d'imprimer la page lorsqu'il est cliqué. Pour ce faire, vous pouvez ajouter le script suivant dans les paramètres de votre page (dans la section : Before <!-- fs-richtext-ignore --></body> tag) :
If you did not use the "print" ID in the previous step, you will have to replace #print with #YourID.

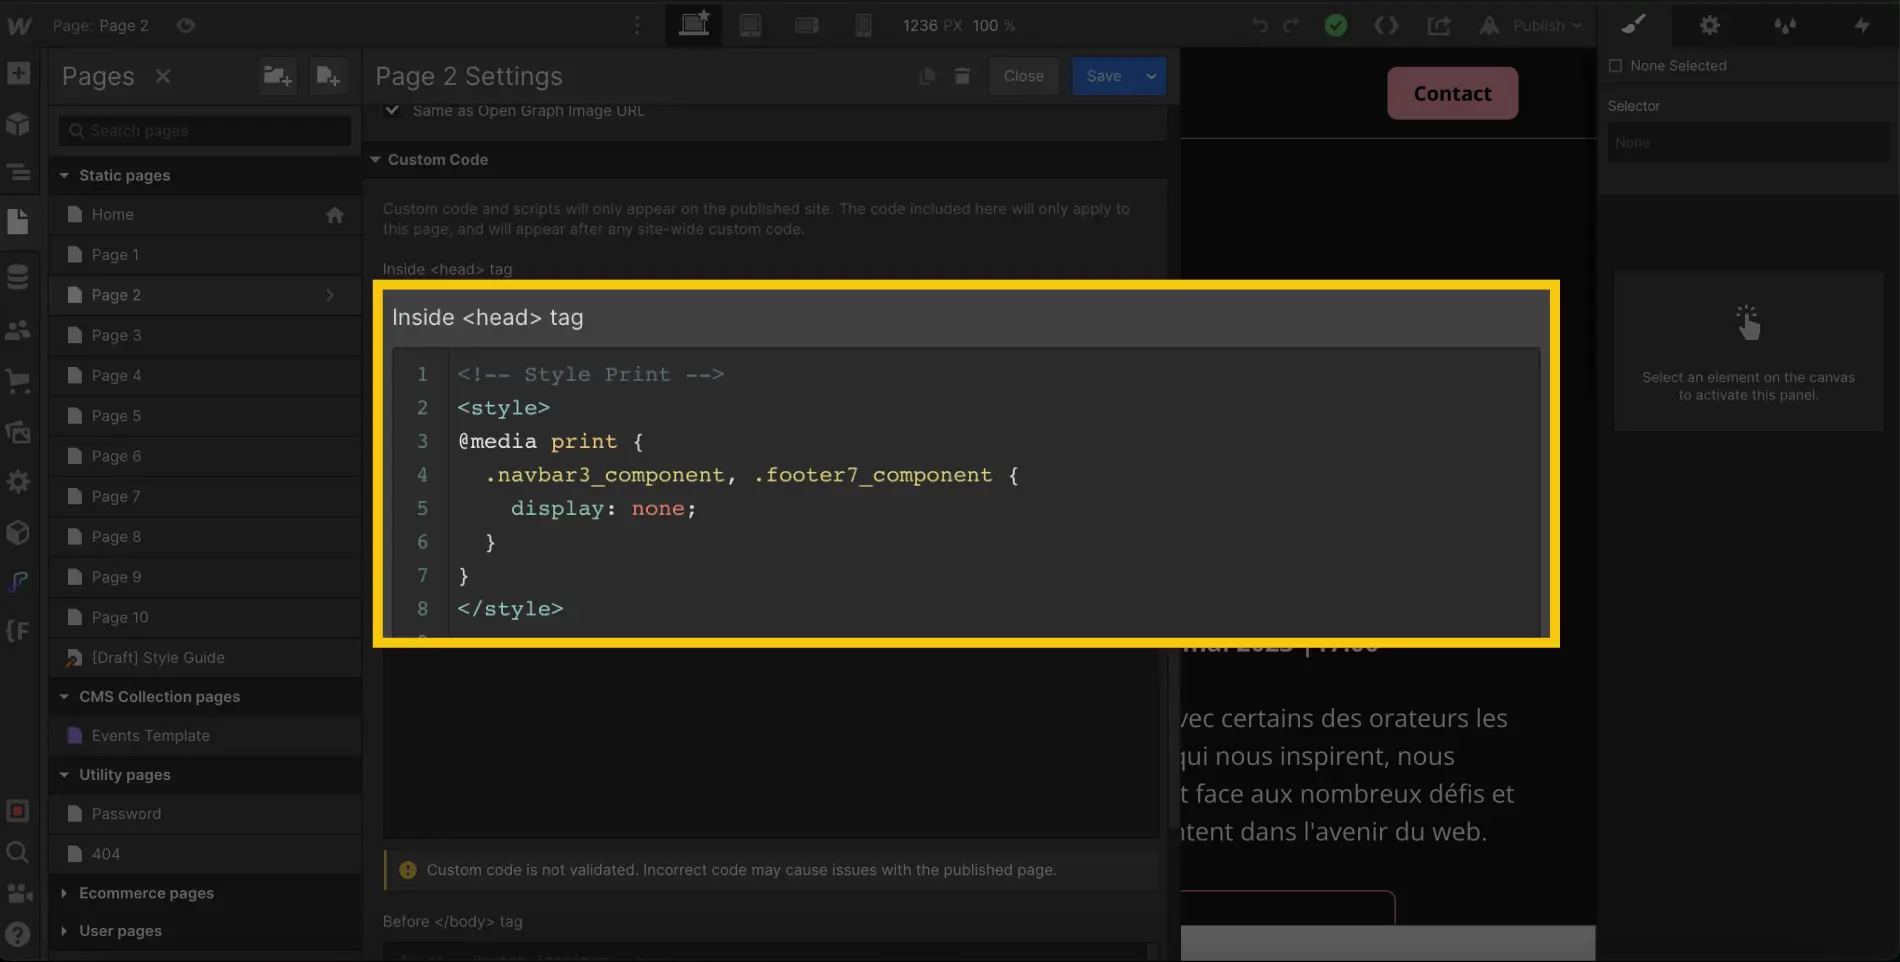
Bonus: Customize what needs to be printed
Enfin, vous pouvez personnaliser ce qui doit être imprimé ou non en utilisant des règles CSS. Pour ce faire, vous pouvez ajouter du code CSS dans les paramètres de votre page (dans la section : Inside <!-- fs-richtext-ignore --><head> tag).
For example, if I don't want my navbar and footer to be there when I print the page, I can add the following code:
Here "navbar3_component" and "footer7_component" are respectively the names of my navbar and footer classes.
In "@media print{", you can add the CSS you want to customize the printing of your page to the maximum.
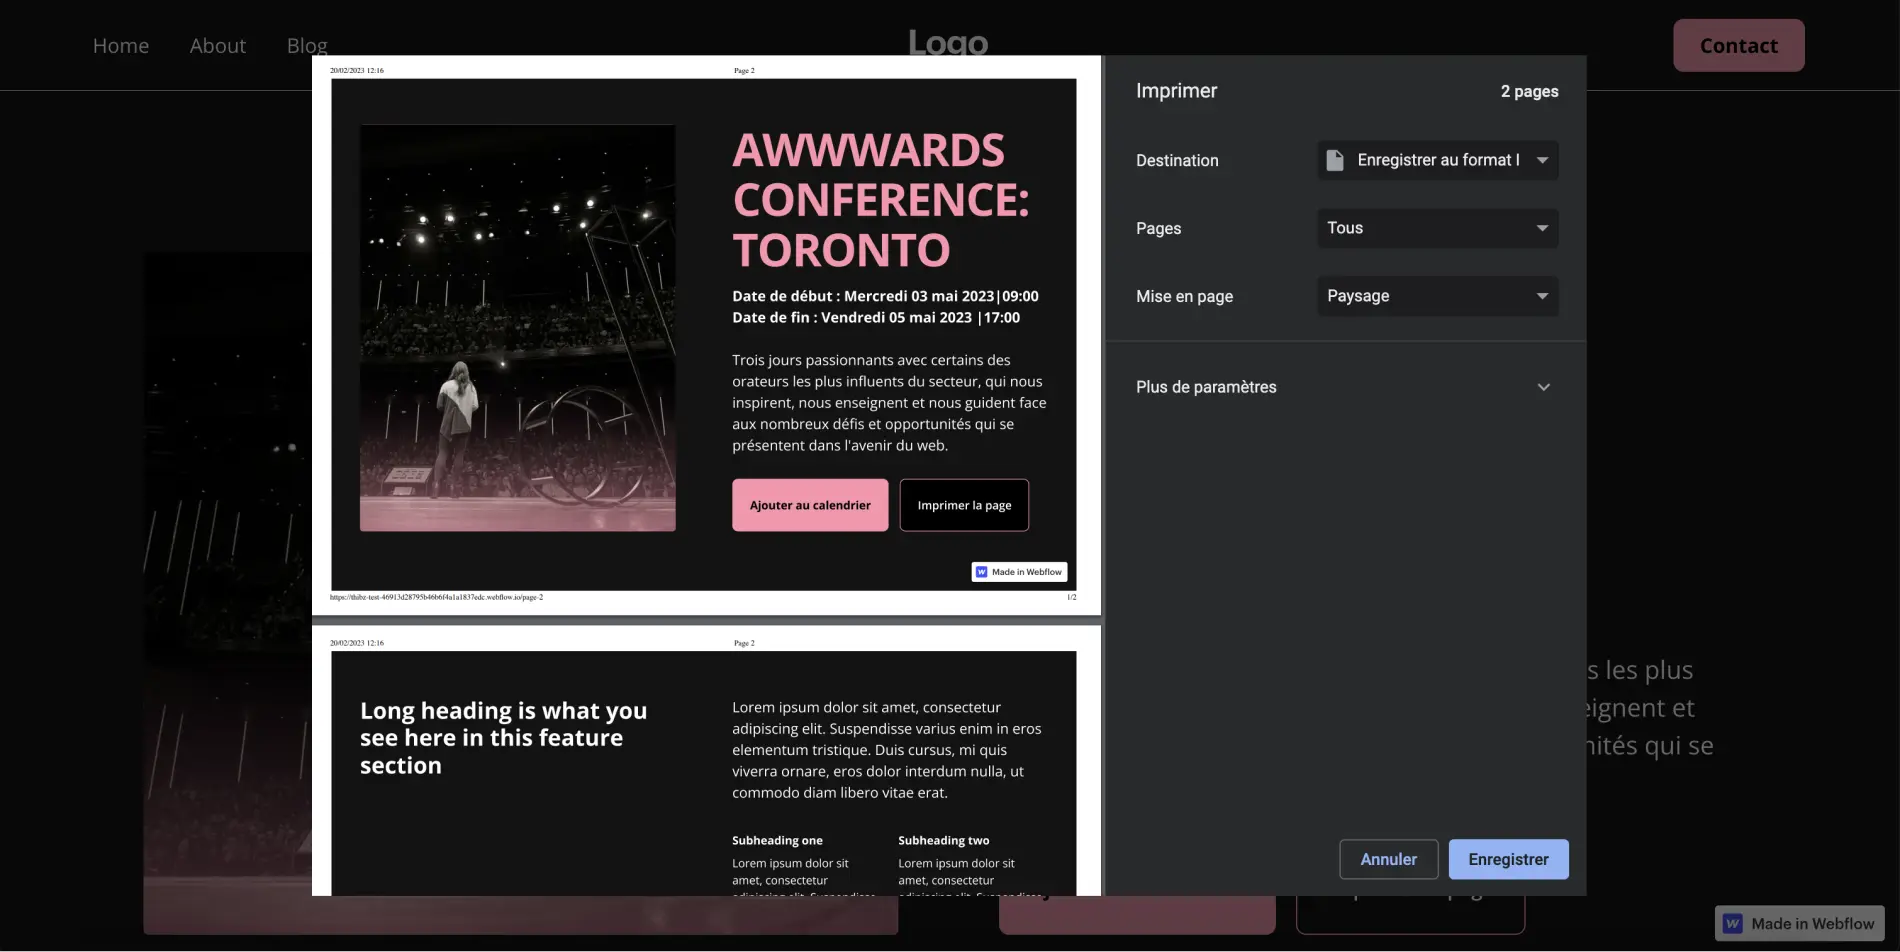
Final Step: Publish your project
You will have to publish your project to test the button and be able to print your web page!
By following these simple steps, you can add a "Print Page" button to your Webflow site to make it easier to print your content. Remember that customizing the display of your printed page is an important step in providing an optimal user experience.
To go further in Webflow, you can also discover how to add an add to calendar button on your project!
Ready to take your website to the next level?
Improve your online visibility thanks to Digidop's experience, excellence and reactivity!


.webp)
.webp)

