Introduction
A few days ago, we told you about GSAP: a JavaScript library that lets you create advanced animations.
While Webflow's native animations already allow you to do a great deal without having to touch a single line of code, GSAP offers almost limitless power and flexibility for your animations. And while using a library like GSAP may seem a little intimidating, it's actually not all that complex!
In this practical introduction to GSAP, we'll discover how to take your Webflow project animations to the next level. Let's get started!
GSAP vs Webflow Interactions
But to begin with, why use GSAP when you already have Webflow interactions natively integrated into the Designer? Let's summarize the advantages and disadvantages mentioned in Florian's article:
The benefits of GSAP :
- Performance:
GSAPis renowned for its excellent performance. If you have an animation challenge on a rather dense website, using GSAP rather than Webflow Interactions will offer you a very significant performance gain. - Power:
GSAPlets you animate just about anything, in just about any way. If you need to animate specific properties, not necessarily available in Webflow Interactions, you'll find what you're looking for with GSAP. - Flexibility:
GSAPalso offers great flexibility. If you want to have greater control over the timeline of your animations, or even target elements more flexibly (with attributes, for example), you can.
GSAP's minuses
- Learning curve:
GSAP's main limitation is its learning curve and the need to hard-code its animations. That said, as we saw in the introduction, GSAP is probably less complex than you might imagine, especially if you're already used to handling a bit of Javascript.
In short, if you're looking for higher-performance, more powerful and fully customizable animations, GSAP is a no-brainer. On the other hand, if you only need small, simple animations, without having to get your hands into the code, you're better off with Webflow interactions.
Well, now that that's out of the way, let's get down to the nitty-gritty. In the following section, we'll review the anatomy of a GSAP animation to understand how the library works.
The basic anatomy of a GSAP animation
Now that we've explored the advantages of the library, let's delve into the very essence of GSAP: its code. First of all, to integrate GSAP code into a Webflow project, we'll need to import the library into the custom code of the :
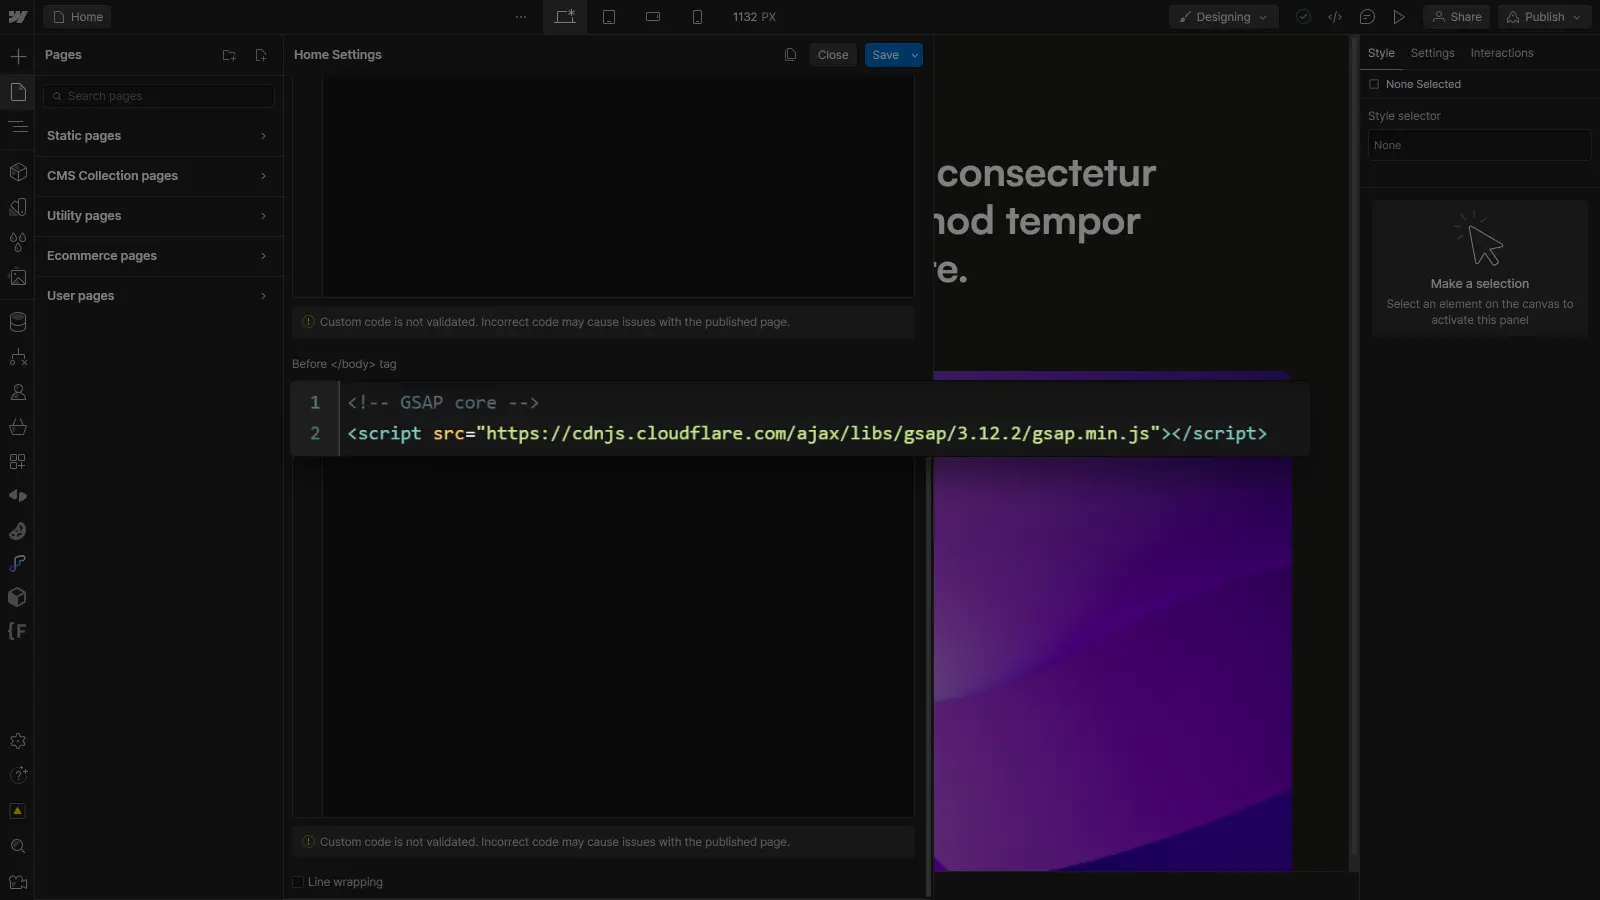
Once the library has been added, we can then add the GSAP code to the custom footer code of our page (or site).
For a basic GSAP animation (known as a tween), here's what the code looks like.
Not very complicated, is it? Let's break it down:
Part 1: specify method ("gsap.to")

Using "gsap.to", we animate the element from its default state (defined in the Webflow Designer) to ("to") the state specified in the animation parameters.
Using "gsap.from", we would have animated the element from ("from") the state specified in the animation parameters to its default state.
Part 2: specify target (".class")
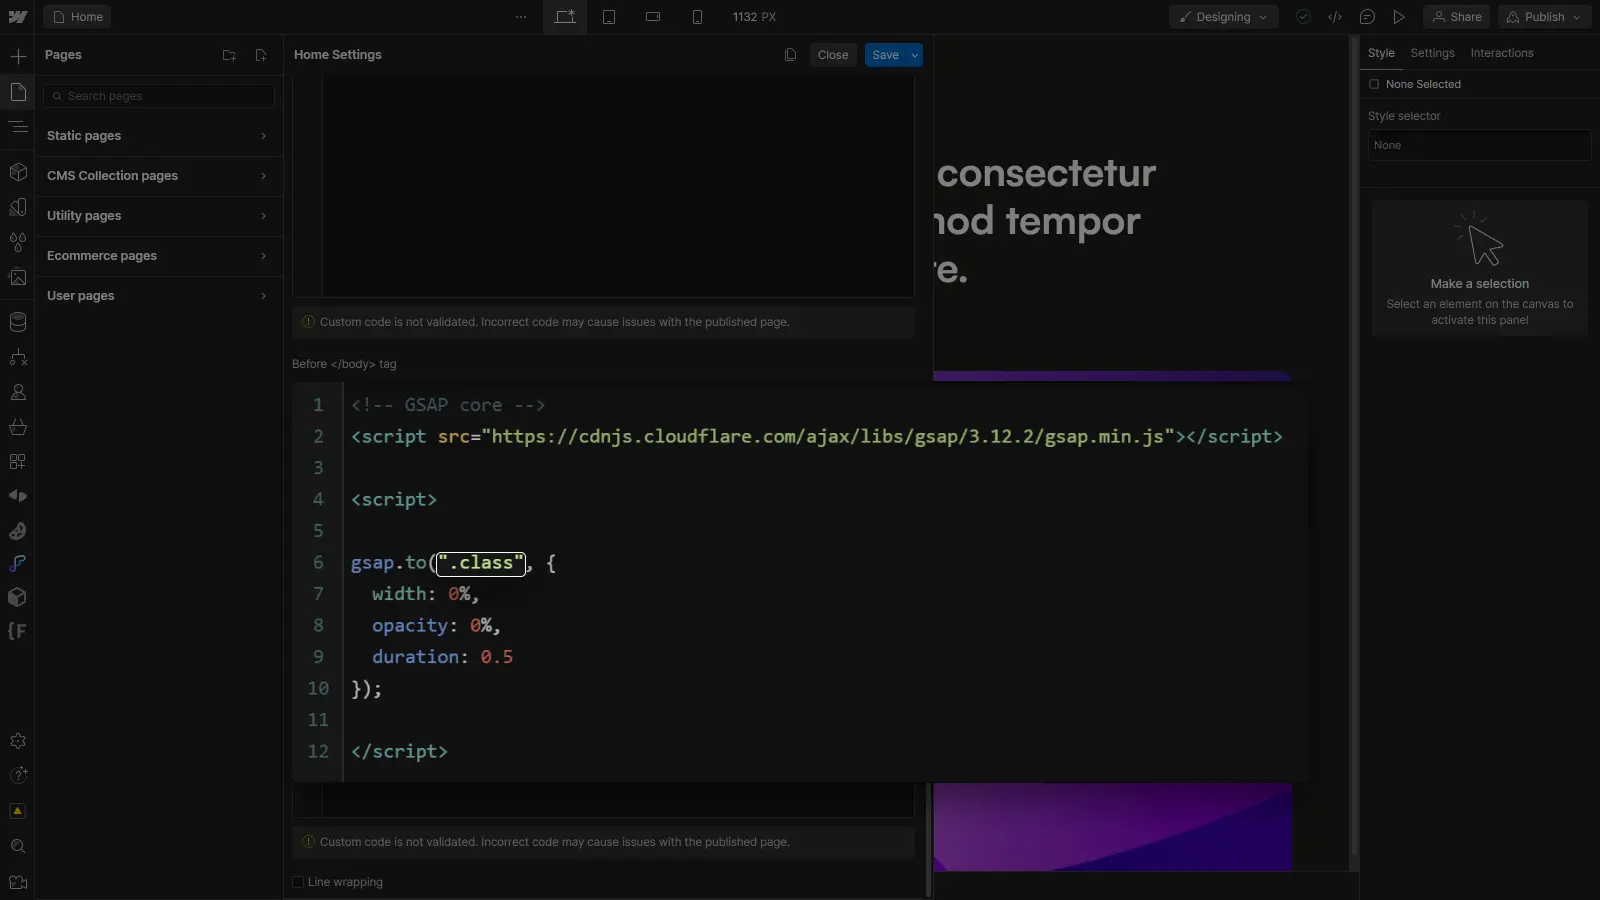
In this example, we're targeting a CSS class (".class"), but we could just as easily target an ID ("#my-element") or an attribute ("[my-attribute]").
Part 3: Indicate the properties to be animated and the values to be animated to

In this example, we animate the element from its initial state to a width and opacity of 0% for a duration of 0.5 seconds.
The basic anatomy of a tween is no more complex than that, but this basic structure can be expanded by adding additional properties/options, advanced plugins or by incorporating several tweens into a timeline, depending on the needs of the animation you wish to recreate.
Timelines in GSAP can be used to group together several animations (tweens) to create a more complex, organized and structured whole:
And with a simple line of code, we've animated our element! In many cases, this simple line of code won't be enough. As things stand, the animation will occur once, as soon as the page is loaded.
But now that we've created our animation, we can make sure it's triggered at the right moment (and not just when the page loads).
Create triggers for animations
Now that our animation has been created, we can make it reactive by wrapping it in Javascript functions that will be executed according to the user's actions (on clicking or hovering over an element, for example).
Execute an animation when an element is clicked
To trigger an animation when a button is clicked, for example, we can wrap our animation in a click event listener:
In this example, the animation will be triggered by clicking on an element with a ".trigger" class.
Execute an animation on hovering over an element
To trigger an animation on hovering over a section, for example, we can wrap our animation in a hover event listener:
In this example, the animation will be triggered by hovering over an element with a ".trigger" class.
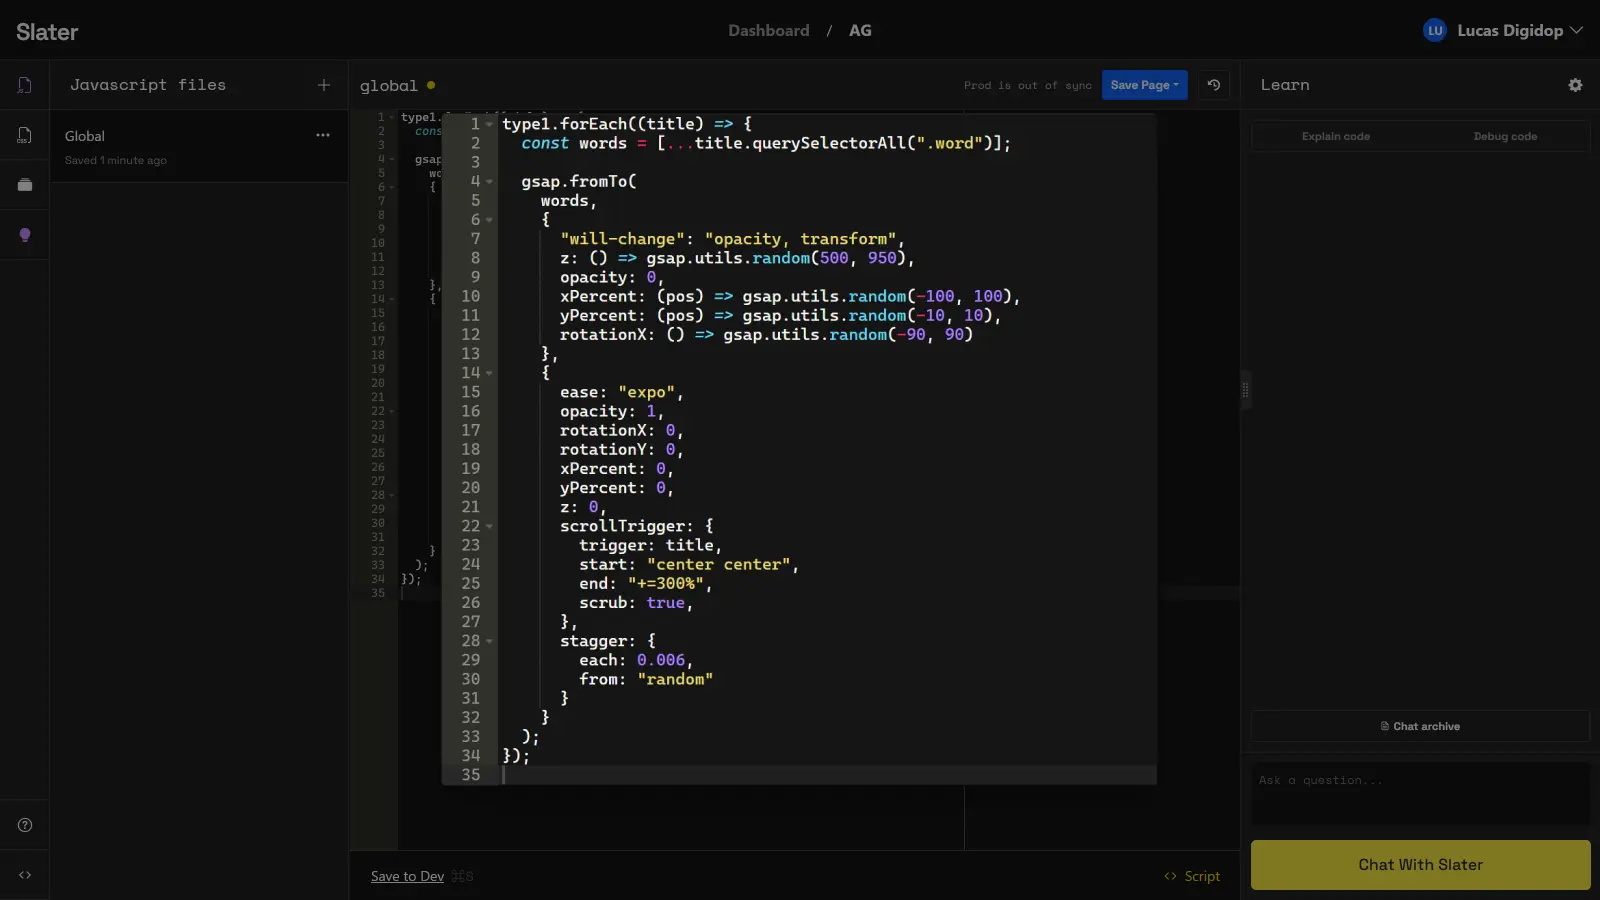
Execute a scroll animation when an element enters the viewport
Finally, a very useful feature of GSAP is the ability to trigger an animation when an element enters the viewport (the equivalent of Webflow's "Scrolls into view" interaction).
For this type of trigger, GSAP offers the ScrollTrigger plugin (which you may already have heard of), which lets you set the animation trigger directly inside a tween :
Important: for the plugin to work, don't forget to import it after the basic GSAP library:

Conclusion
In conclusion, GSAP is an excellent tool for creating high-performance, powerful and flexible animations for your Webflow projects. On top of that, the tool is more intimidating than complex. The learning curve is certainly higher than a no-code/low-code solution, but it's well worth the effort.
Once again, if you're interested in GSAP and want to go further, here are a few recommended resources:
- GSAP documentation - browse to discover all the GSAP options,
- Free GSAP training - to follow for visual training,
- Finsweet's video on GSAP - check it out for a longer, more visual introduction,
- Timothy Ricks' videos - a must-see for advanced use cases,
- Digidop YouTube channel - more GSAP content coming soon!
And don't forget to check out the next YouTube videos from Digidop for more content on creating GSAP animations with Webflow!
Ready to take your website to the next level?
Improve your online visibility thanks to Digidop's experience, excellence and reactivity!

.webp)
.webp)

