Want to add a multi-step form to your website? In today's tutorial, we will show you how to do that in Webflow with a piece of code and custom attributes.
This solution is totally free and does not use the Webflow slider element!
Step 1: Add a script to your page code
La première étape de ce tutoriel va consister à ajouter le script ci-dessous, dans "Before <!-- fs-richtext-ignore --></body> tag" dans les paramètres de la page qui va contenir votre multi step form.
This tutorial presents the steps of the solution developed by Formly.

Step 2: Insert a form on your page
A step that may seem obvious, but it is of course mandatory toadd a native Webflowform element.
When you add a Webflow form, you can delete all the content inside the "Form" div (not "Form Block").
We also advise you to give classes to your "Form Block", "Form", "Success Message" and "Error Message" elements.

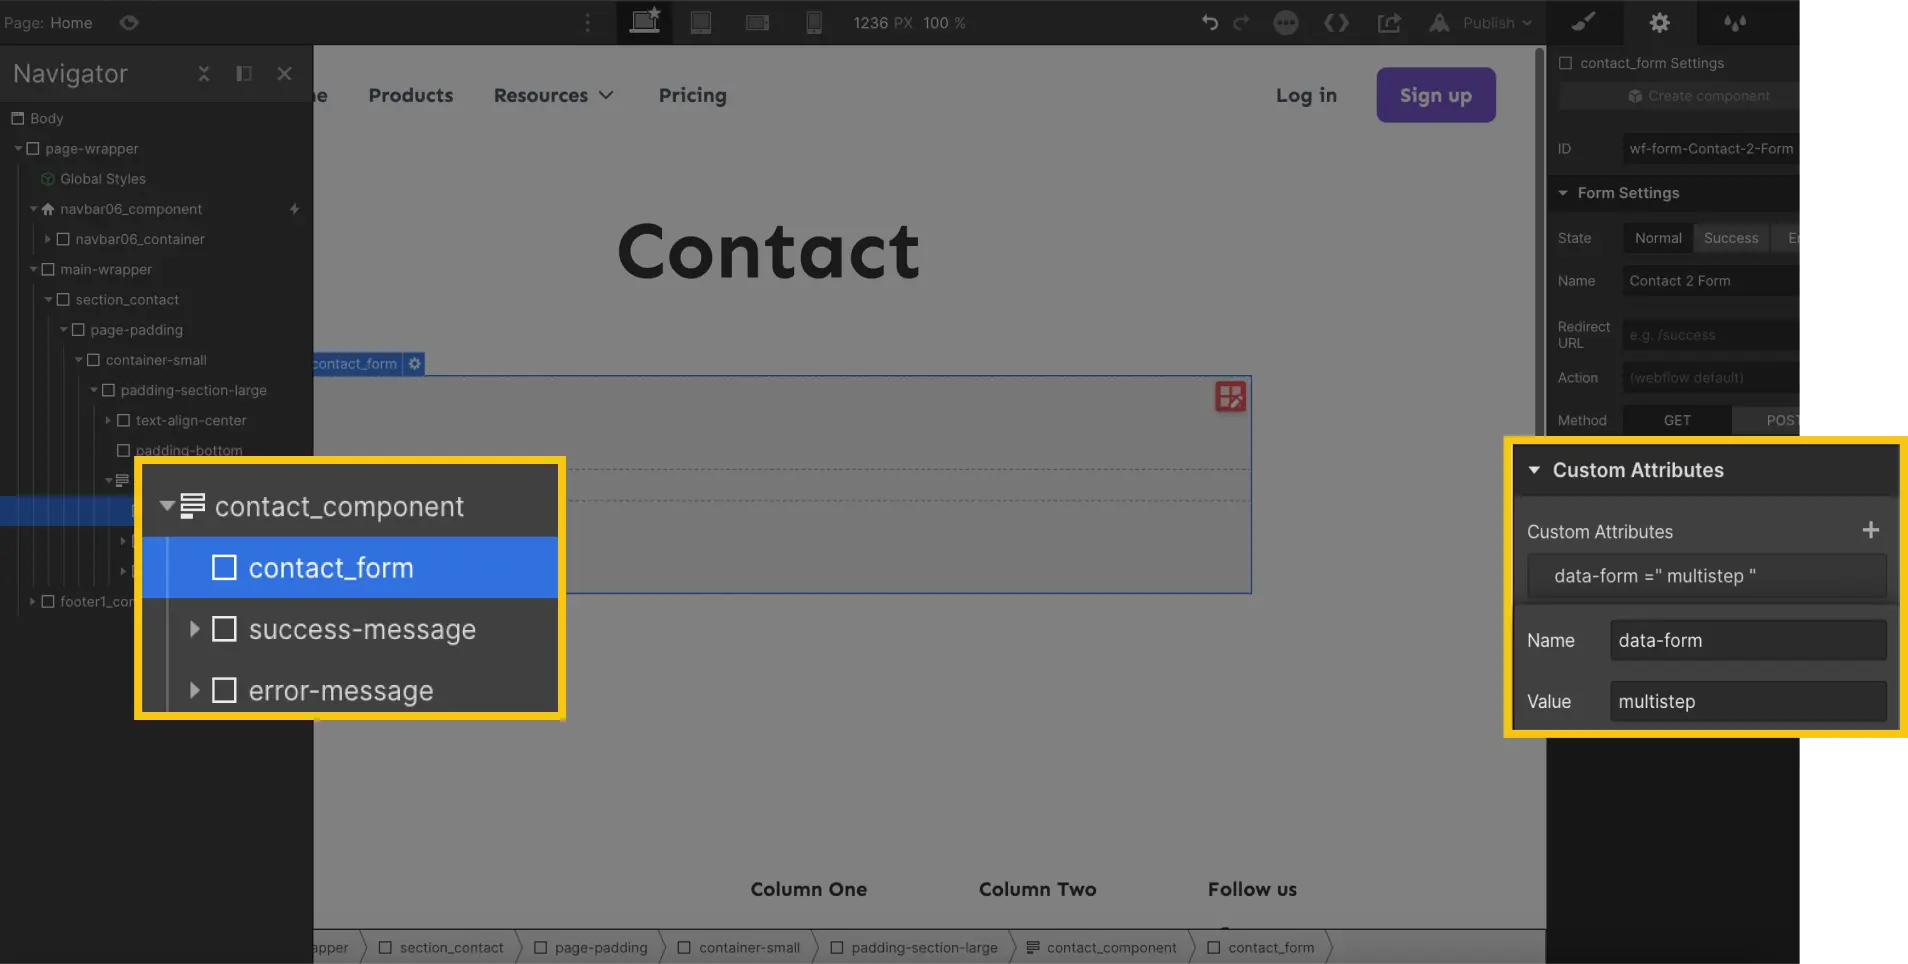
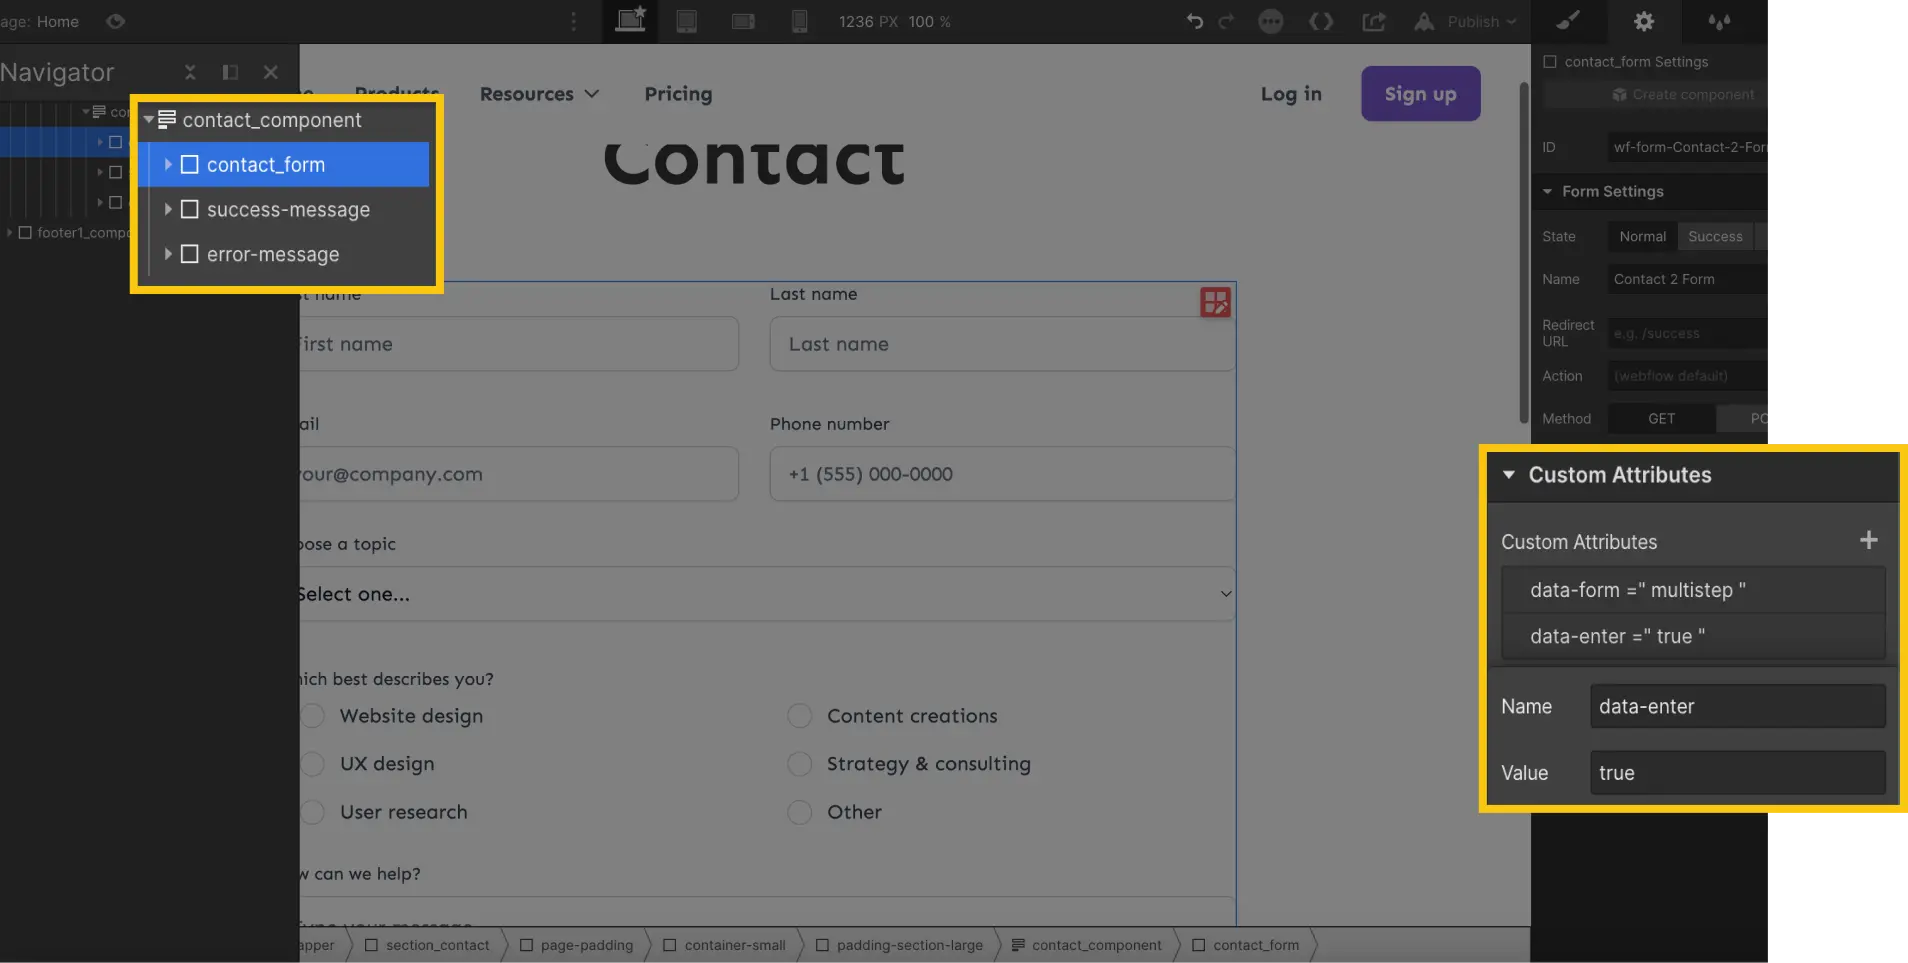
Step 3: Add a custom attribute to the form
After renaming the Div Block"Form", you can go to the settings of this element. Now, in the"Custom Attributes" part, you will add :
Name: data-form
Value : multistep
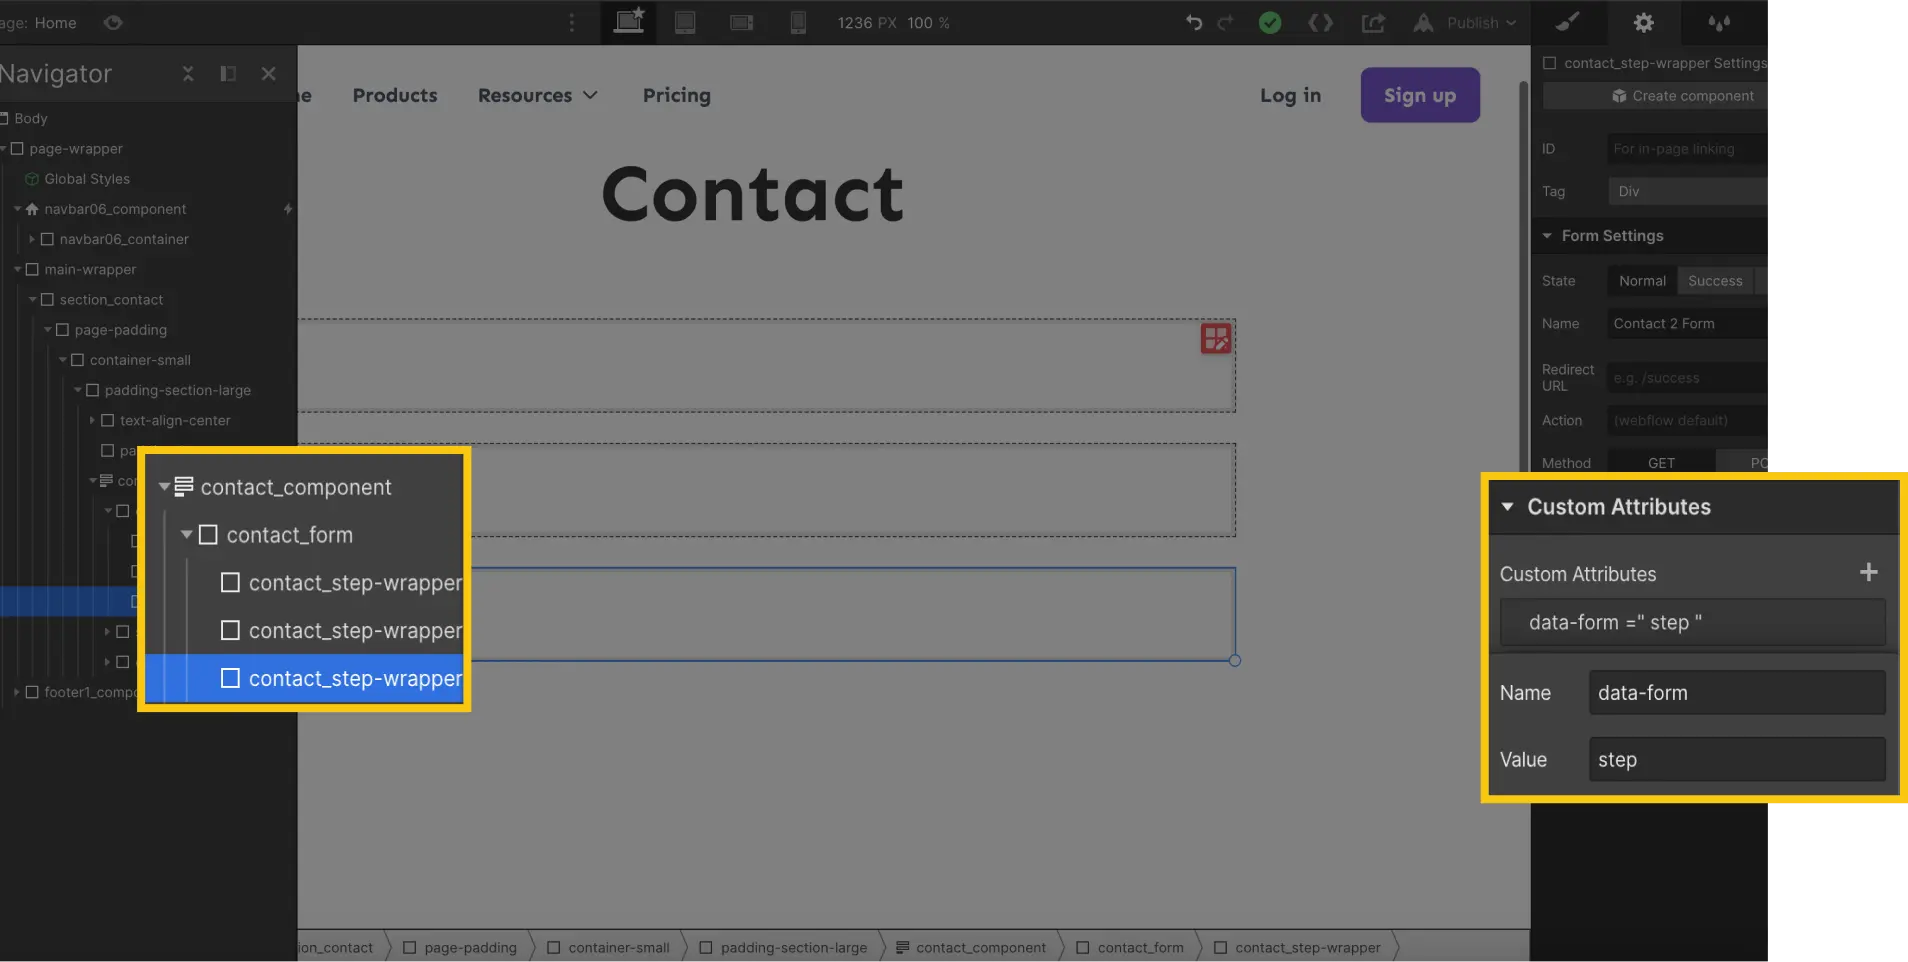
Step 4: Add a Div Block for each step
Inside the "Form" div, you will have to insert as many Div Blocks as you want.
For example, if I want a multi step form with 3 steps, I will add 3 Div Block.
You can give the same class to each Div Block (for example: contact_step-wrapper).
For each of these div blocks, you will add the following custom attribute:
Name: data-form
Value : step
Step 5: Customize your steps
Now, in each div block (representing the steps), you will be able to insert the fields you want and customize the design to your liking.
Remember to add a "Submit Button" in the last step of your form.

Step 6: Add a custom attribute to the "Submit Button
In this step you will need to select the"Submit Button" element and add the followingcustom attribute:
Name: data-form
Value : submit-btn

Step 7: Customize buttons to move from one step to the next
You can now add buttons in your form block that will be used to go to the next step or return to the previous step.
You can add as many buttons to move from one step to another as you want (for example one per step). You can also add them anywhere in your page.
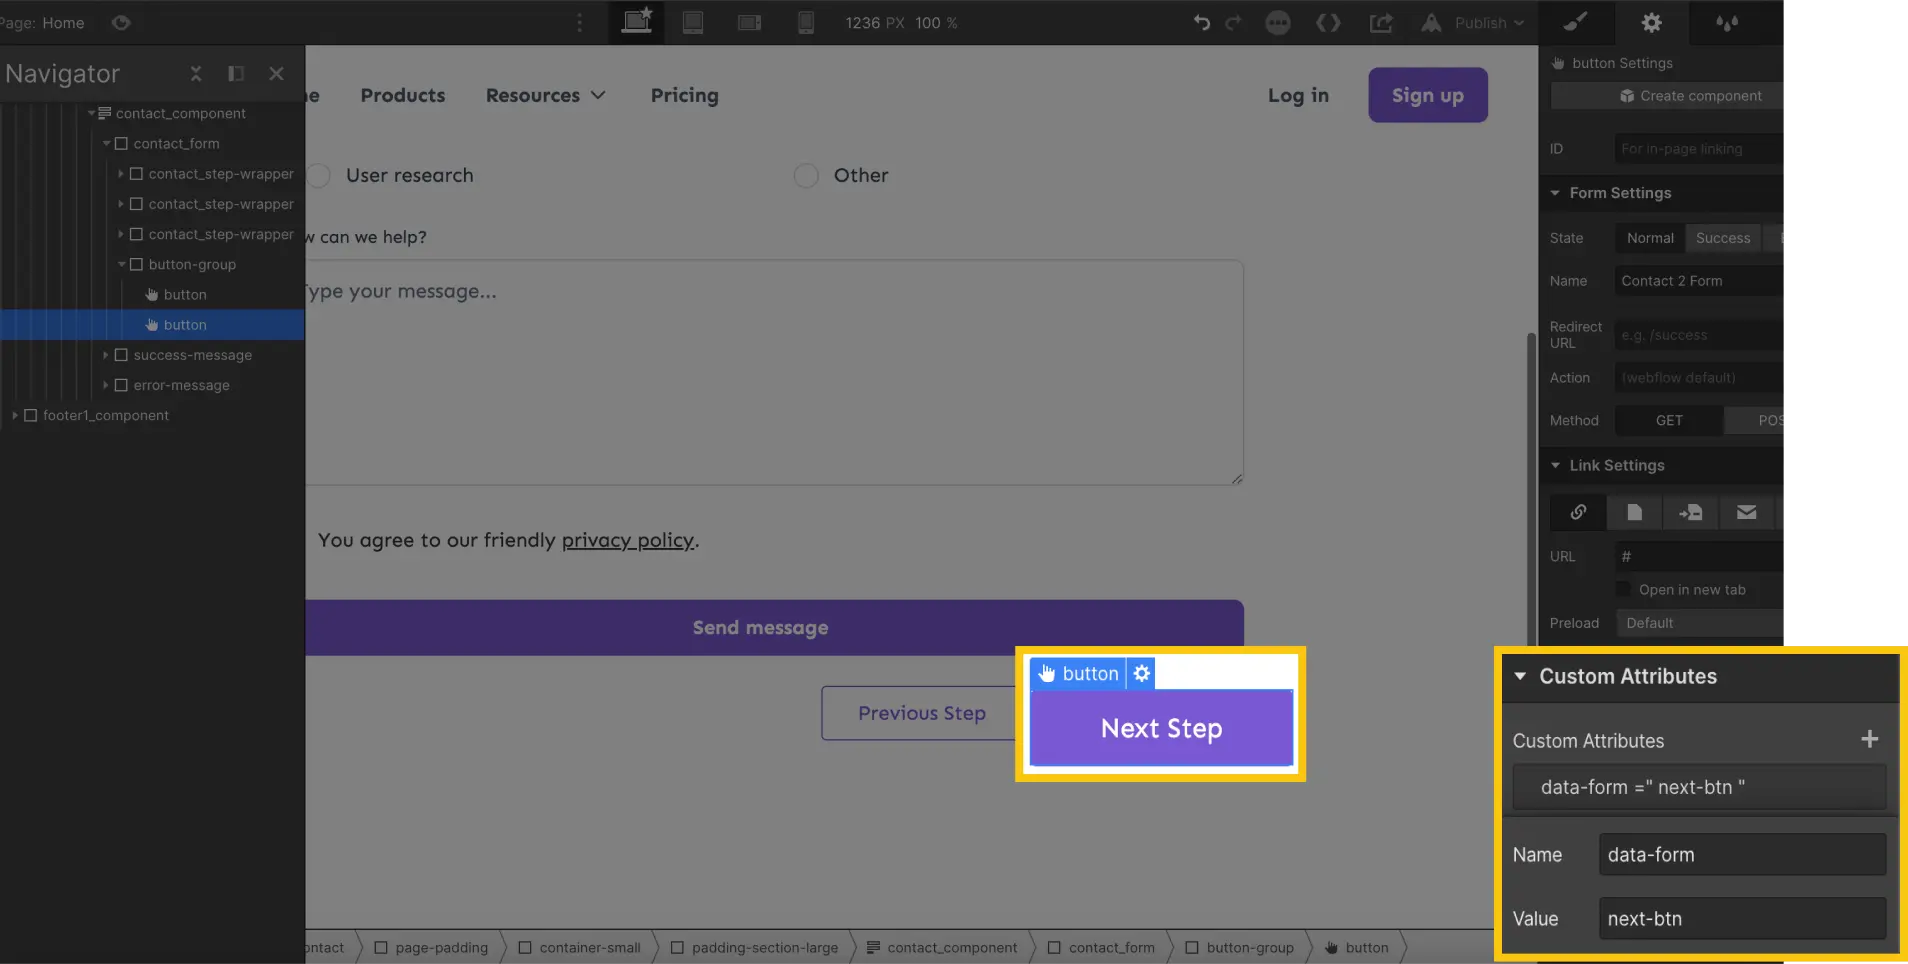
Button to go to the next step
For this button, you will need to add the following custom attribute:
Name: data-form
Value : next-btn
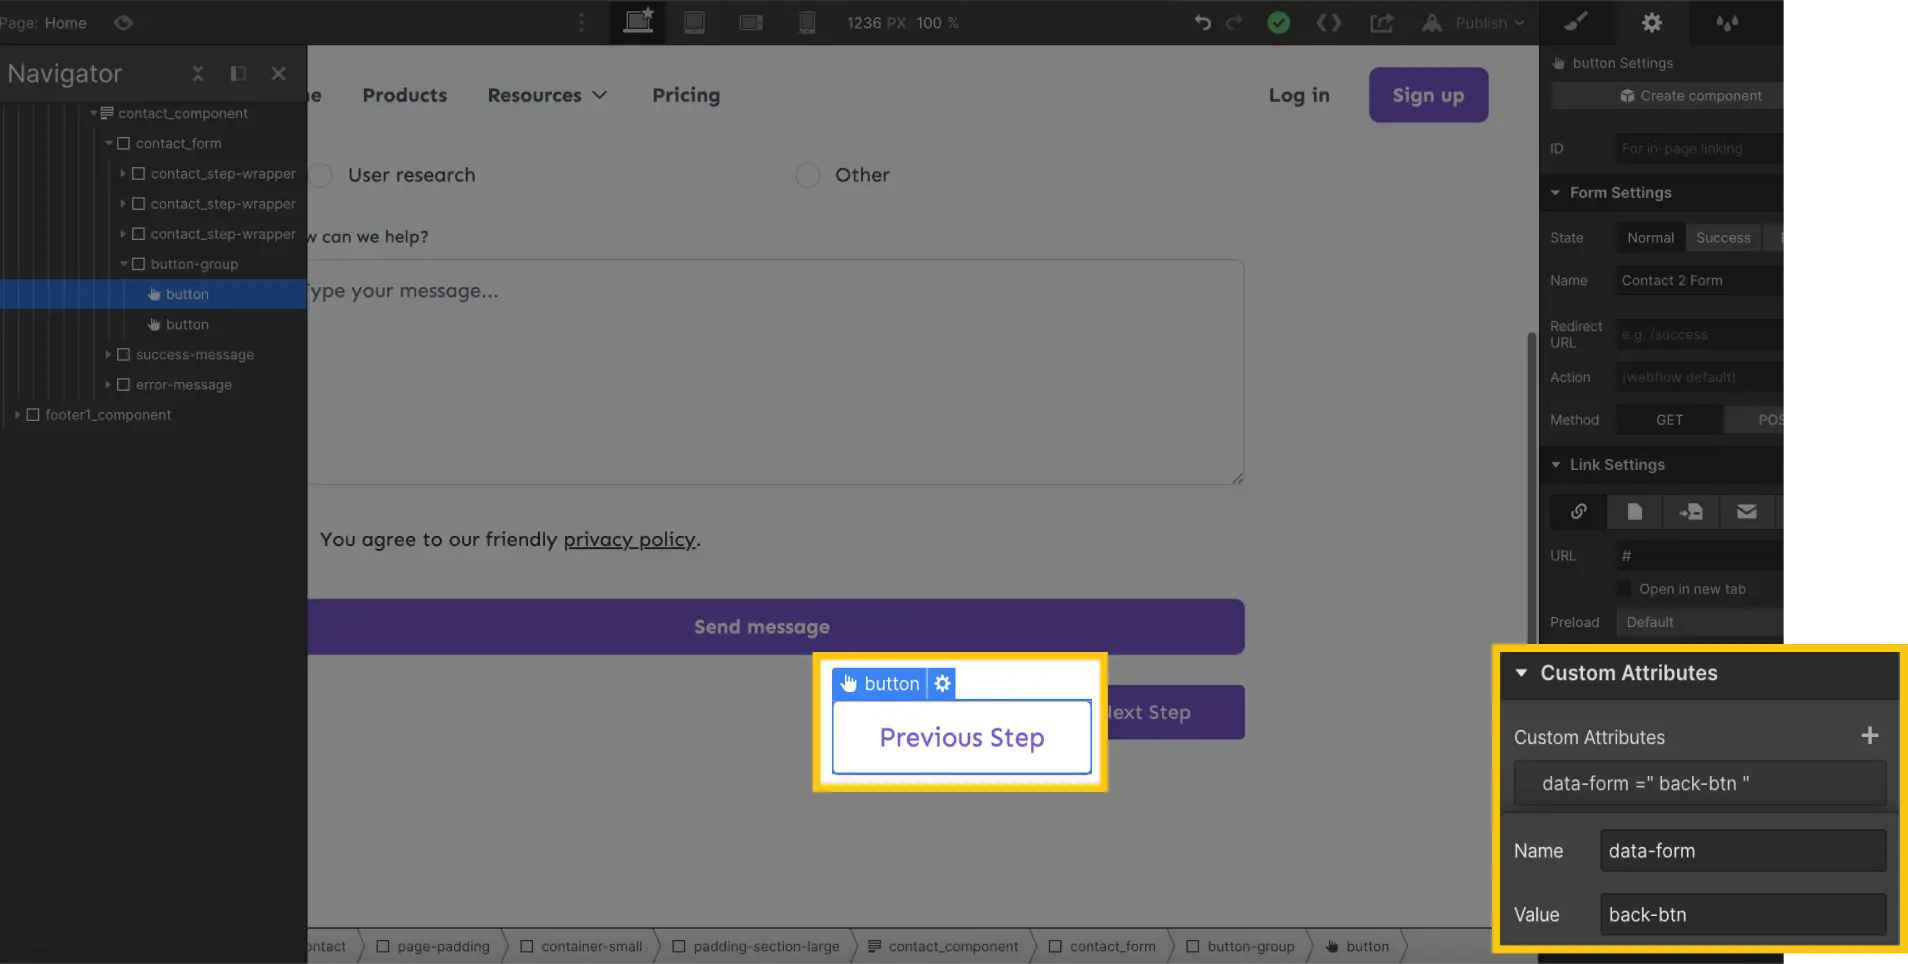
Button to return to the previous step
For this button, you will need to add the following custom attribute:
Name: data-form
Value : back-btn
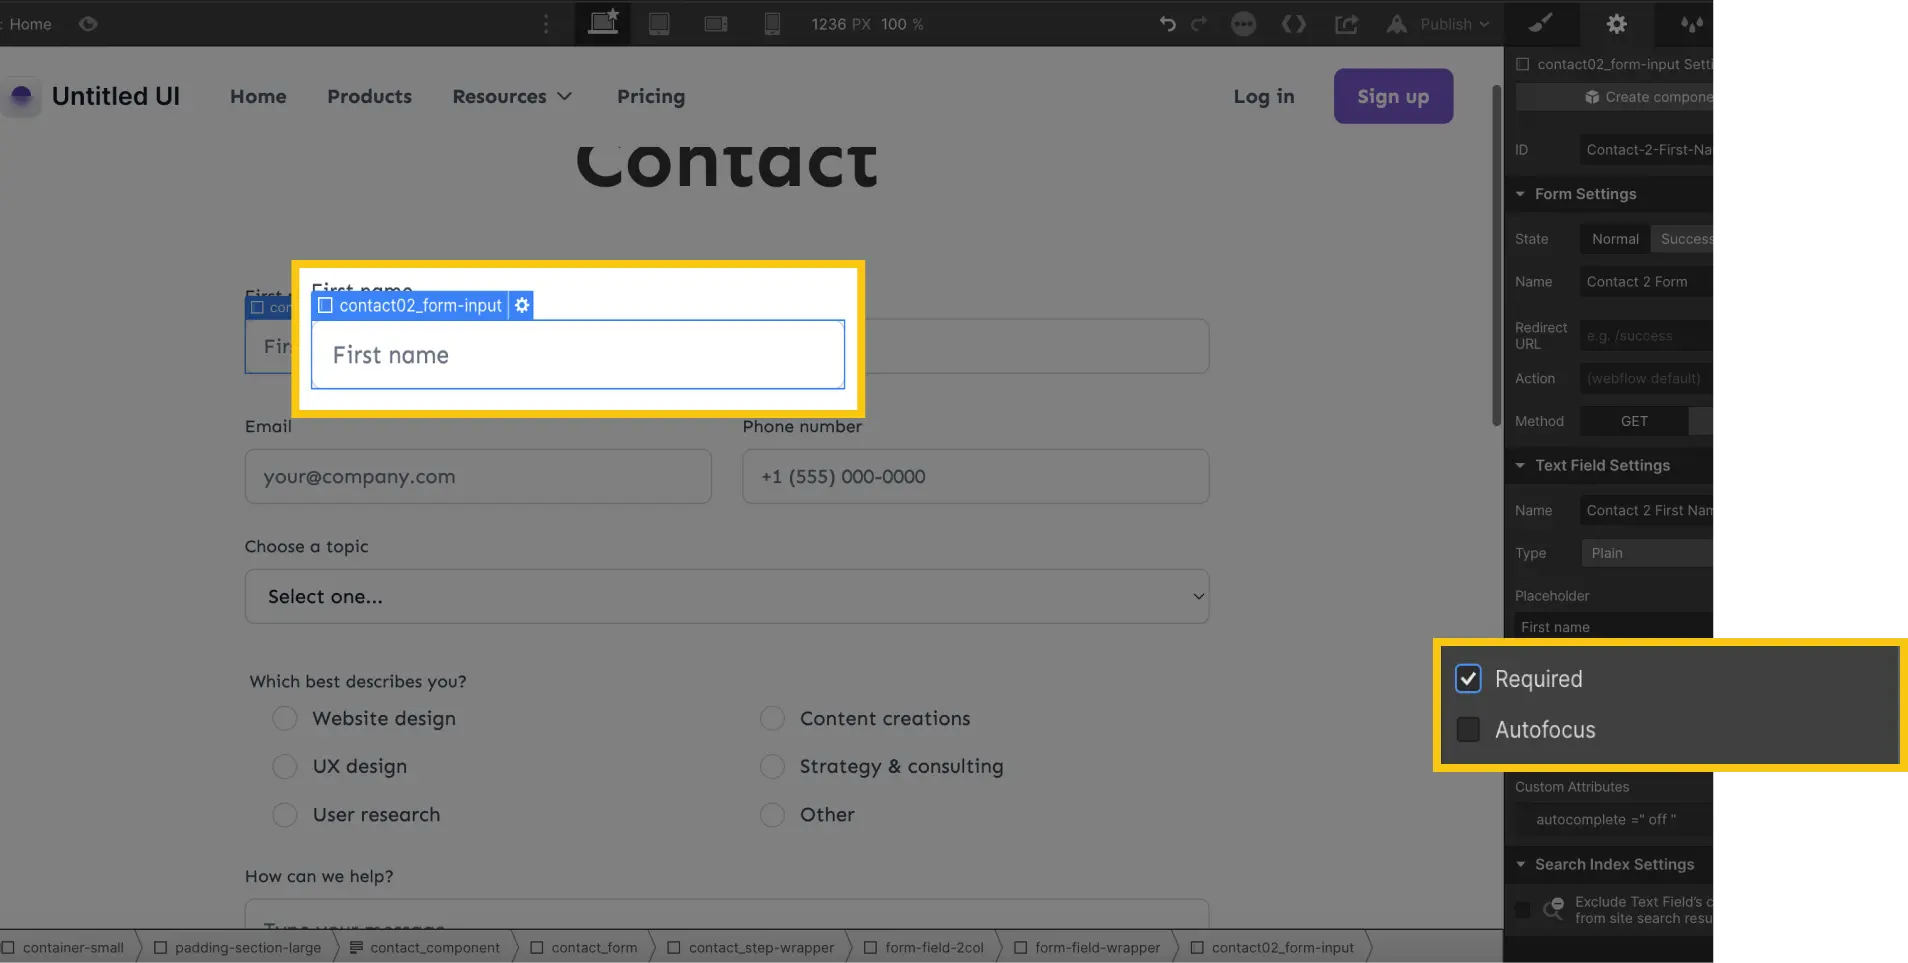
Step 8: Define your required fields
Thanks to this form, a user will not be able to move from one step to another if he/she has not filled in the mandatory fields of the step he/she is in.
For this to work, you must check the"required" option in your input settings.
Warning: At the moment, this does not work with the "Email" and "Phone" types, so you have to add "Plain" types for these fields.
If you want a user to check a specific number of checkboxes before moving on to another step, in his step parent div (in our example: contact_step-wrapper), you will have to add the following custom attribute:
Name: data-checkbox
Value : n (minimum number of checkboxes to check)

Step 9: Publish your project
You will not be able to see the active multi step form directly in the Designer. You will have to publish your project to be able to test it. It is not mandatory to hide the different steps from the Designer, the code will do it automatically on the online site.
Bonus : Customize your form
Designing the Success and Error reports
You can of course customize the "Success Message" and "Error Message" as you wish, it will not affect the multi-step form. There are no specific attributes for these reports.
Click on the "Enter" key to go to the next step
If you want to add this feature to your project, you will need to add the following custom attribute to your form element:
Name: data-enter
Value : true
Click on "Cmd + Enter" to go to the next step
To enable this, add this custom attribute to the form element:
Name: data-submit
Value : true

Add steps without fields (decorative)
If you want to add steps that do not contain any fields to be filled in, you can add elements in a step div (contact_step-wrapper) that will have in addition to the attribute (data-form: step), the followingattribute :
Name : data-card
Value : true

Display the current step and the total number of steps
You can also add a text information about the current stage and the total number of stages. To do this, simply add a custom attribute to a text for the current stage:
Name: data-text
Value : current-step
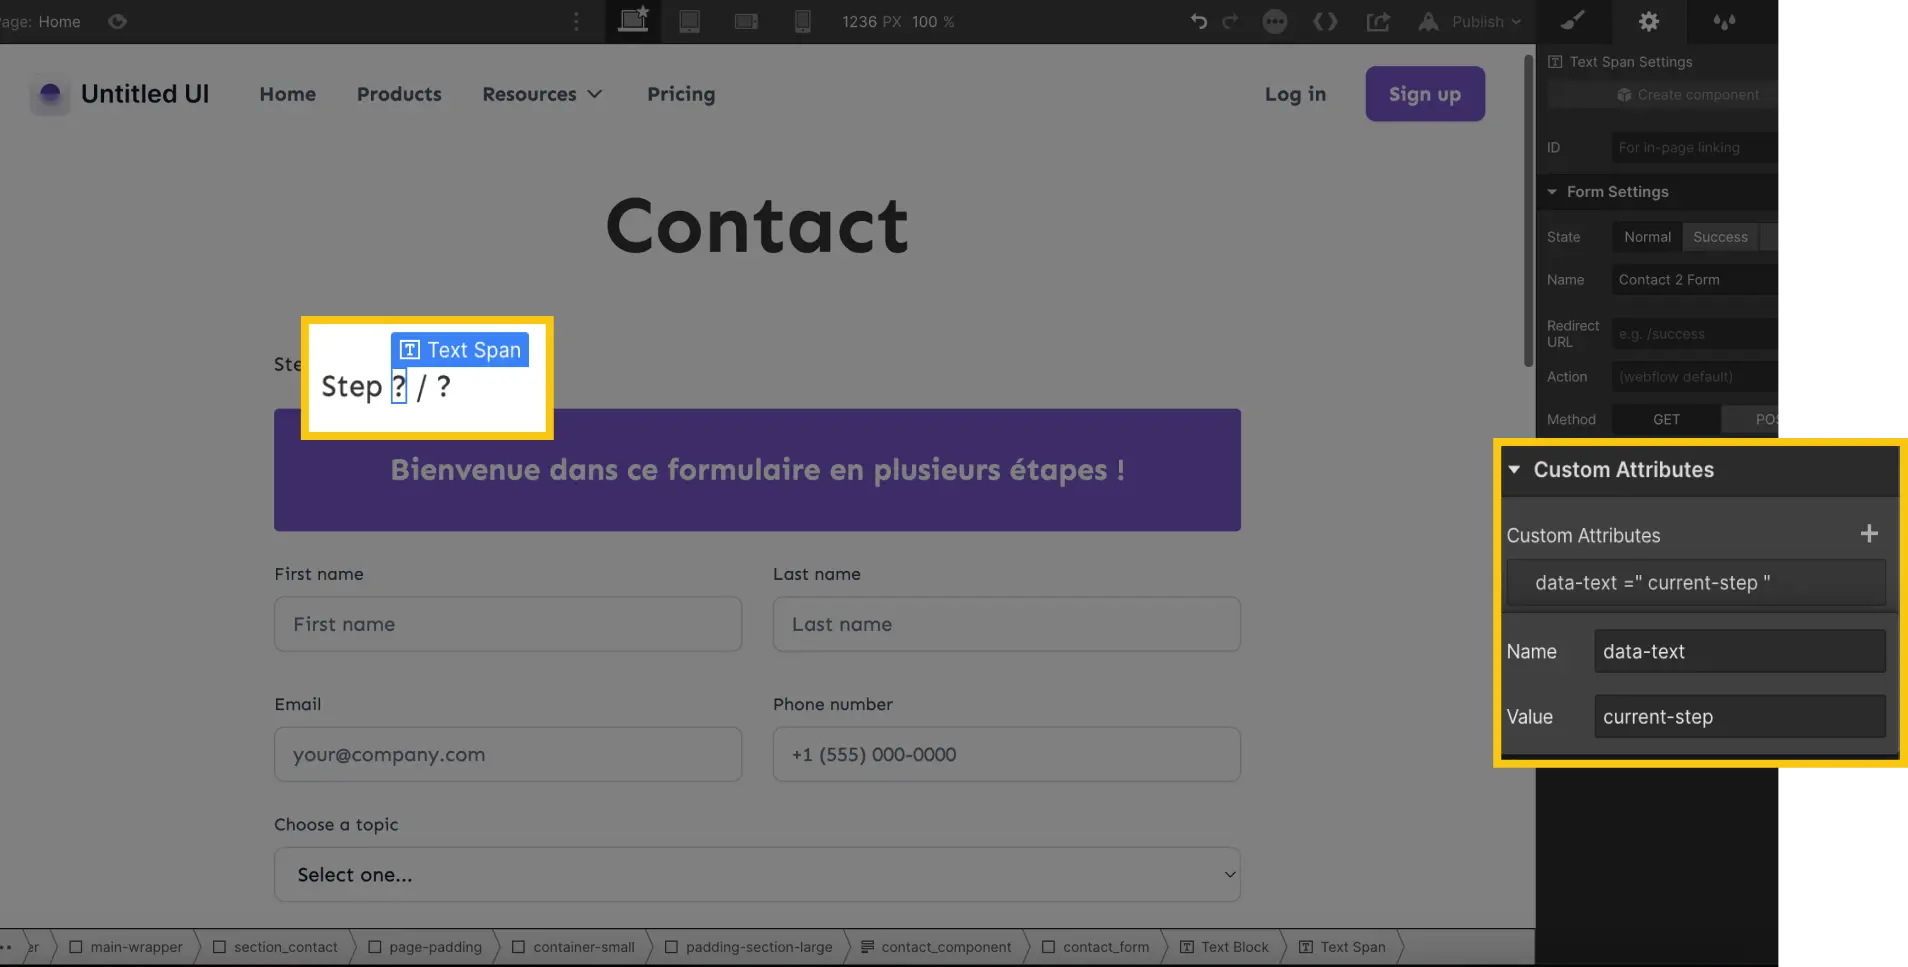
And another custom attribute on a text for the total number of steps:
Name: data-text
Value : total-steps


Many more features for the Multi Step Form
There are still many attributes to add functionality to your custom form through the attribute system. For example, you can add an automatic or custom progress bar.
You can find all the documentation of Formly - Multi-Step Forms!
If you are interested in forms in Webflow, you can find our tutorials to change the name of a Webflow form or our method to block unprofessional emails from Webflow forms.
Ready to take your website to the next level?
Improve your online visibility thanks to Digidop's experience, excellence and reactivity!


.webp)
.webp)

