Lightboxes can be very interesting elements to insert on a website to create a unique experience. In today's article, we will look at the case of lightboxes in Webflow and see how to connect them.
What is a lightbox on a website?
In a website, a lightbox is a pop-up window that will open when you click on a particular element. It is a box that will bedisplayed on top of the current web page (which will be darkened at the same time). The fact that the website is darkened and the window is fully visible gives it the special name of lightbox.
Most often, lightboxes are used to highlight images or pop-ups (e.g. newsletter) on a web page.

How to add a lightbox on Webflow?
In the Webflow designer, there is a "Lightbox" element. You can insert it via the element tab or via the keyboard shortcut Ctrl + E (or Cmd + E) in the Navigator. The native Webflow "Lightbox" element only allows you to display images or videos on the big screen (via a link).

Tutorial for linking different lightboxes using groups
The objective of this Webflow tutorial is to connect different lightboxes together so that when the pop-up window is opened, we can have all our images grouped together.
Step 1: Inserting lightboxes in your Webflow project
The first step is simply to add lightboxes to your site and then connect them together.
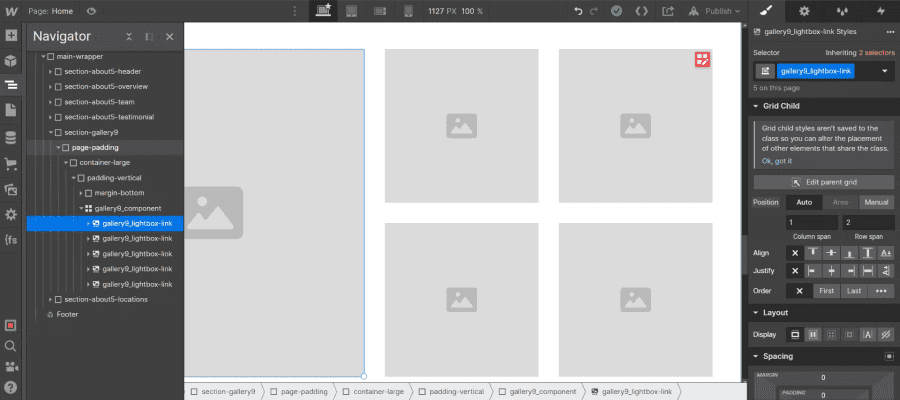
In our example, we will use different lightboxes in the same section. The objective will be to link and group the 5 images in the same window.
Step 2: Insert a media file in a lightbox on Webflow
Before inserting images or videos into our lightbox, we will add the images that will be directly visible on our web page.
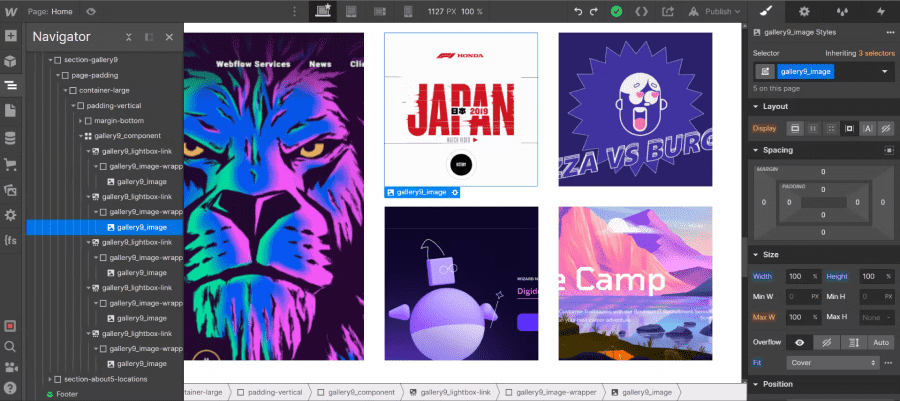
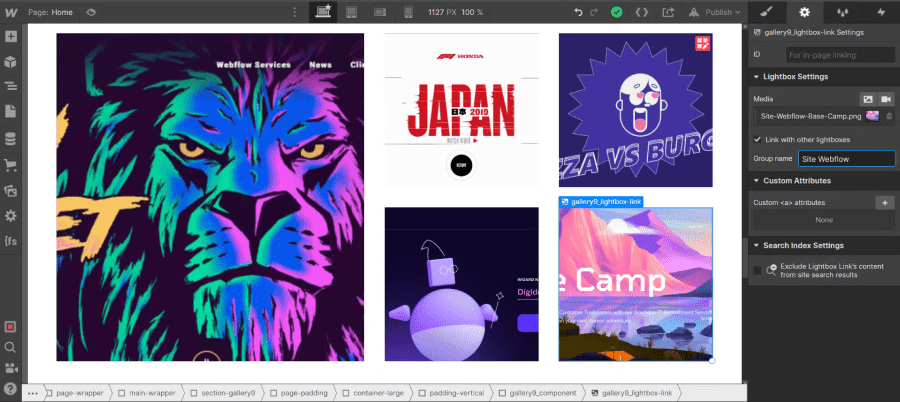
Next, we will insert the images (or videos) that we want to display in our lightbox (in our pop-up window). To do this, we need to select our lightbox element in the navigator. Once this is done, we need to go to the element's parameters.
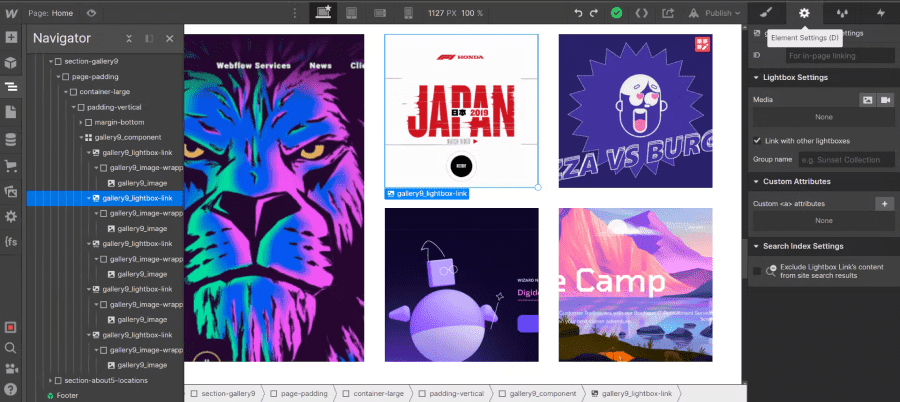
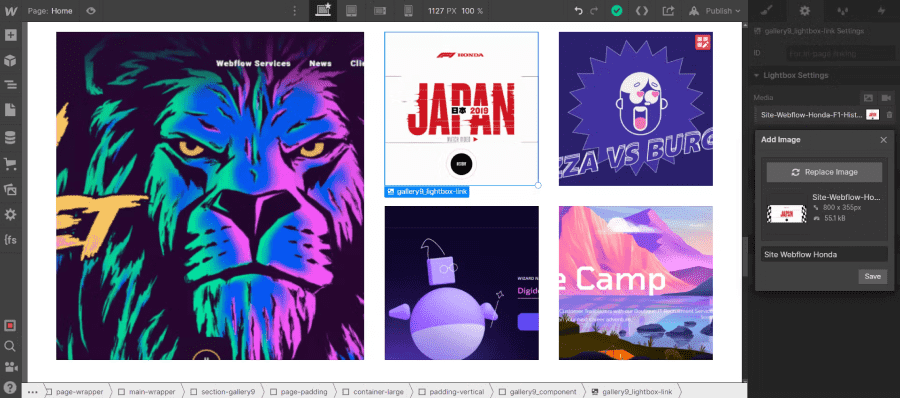
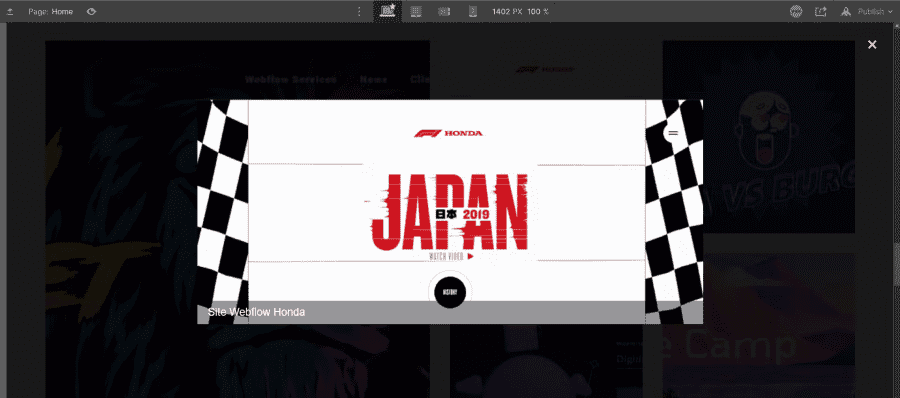
We see that in the settings there is a section called "lightbox settings". In this section, we have a "Media" box. It is in this box that we will be able to insert the media files that we want to put forward. To add an image, click on the image icon, and for a video, the video icon. Then repeat the process for all your lightboxes.
PS: You can even add descriptions to your images which will be displayed once the lightbox is opened.
Now when I click on my lightbox, the pop-up window opens with my media file and description. However, you can see that my lightboxes are not connected and grouped because there is only one image (I cannot scroll through the images of my other lightboxes).
Step 3: Linking lightboxes by groups in Webflow
Now here is the step we are most interested in for our tutorial. We are going to modify some parameters of the lightbox element to display the images in a row.
To do this, in the "Lightbox Settings" section, we will check (or leave checked by default) the "Link with other lightboxes" checkbox. However, this is not enough. Below this button, there is a box called "Group Name". This box will allow us to give a name to our group of lightboxes to link them.
You can give any name you like, but you will have to use the same name for the lightboxes you want to connect together. In our example, we name our group "Webflow Site" and apply it to all our other lightboxes.
PS: Click on your "Enter" key to make sure the change is saved each time you enter your group name.
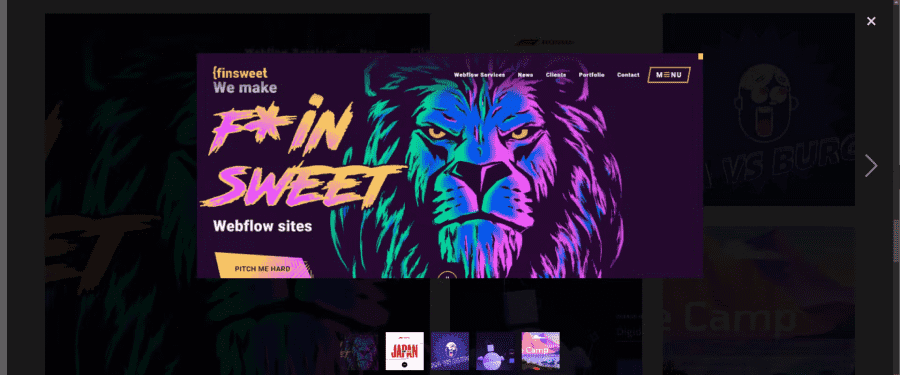
Now that I've done these steps, my various media files are displayed in a row in my pop-up window. You can even see all the images in the group at the bottom of my lightbox. Of course, you can create different groups by multiplying the names and applying them to your specific lightbox items.
You can now have fun on Webflow and create custom lightboxes. If you want to progress on Webflow, don't hesitate to find in our blog our different tutorials. You will be able to see the mistakes not to make in your Webflow project. You can also contact our Webflow agency for your web project!
Ready to take your website to the next level?
Improve your online visibility thanks to Digidop's experience, excellence and reactivity!


.webp)
.webp)

