Building in Webflow for the first time is not an easy task. Having a basic knowledge of HTML and CSS will help you a lot, but not everyone knows these languages. HTML is about building the structure of your page and CSS is about the design, the style of your elements in that same page.
Today, we are going to present you the structure that each of your sections must have to develop a site or a web page properly on Webflow.
What is a Div?
Before we get into the nitty-gritty of the subject, we will try to explain to you simply and quickly what a div represents. A div is an HTML element that will contain content. A div allows you to group several contents (for example a text, an image, a video or others) in a container. By creating several divs, you can therefore delimit different types of content.
A div can be formatted in different ways (using CSS) to arrange its content.
It should also be noted that you can insert multiple divs into a div (create div stacks) to contain and group elements.
The div structure to be respected for its sections in Webflow
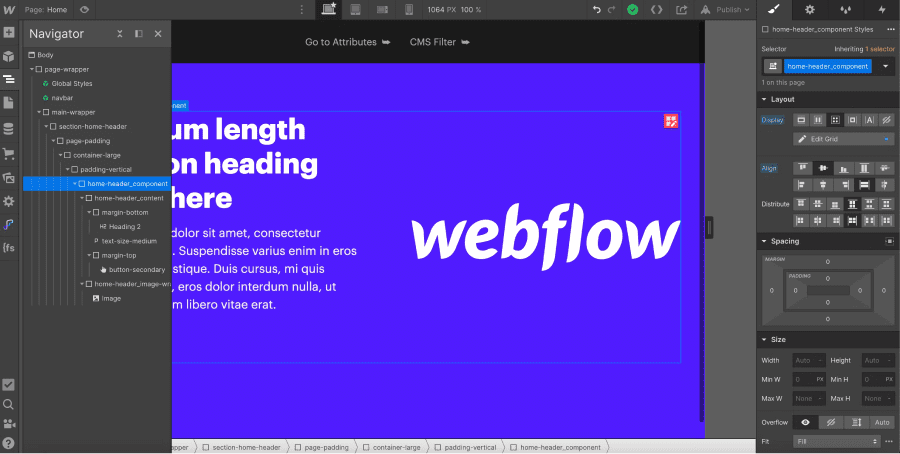
In Webflow, we can add divs easily in our project. For each of our Webflow sections, we can add a stack of 4 div blocks that will always be useful.
PS: We strongly advise you to clone the "Client-First " project of Finsweet before starting your project. As some classes are already created, this will save you time in the development of your sections.
1. Div Block: Section
This first div block is essential because it is the one that will contain all the elements of your section. Once you have inserted it into your project, you can give it a class. For example: section-home-header. You can then give it a specific style, for example a background colour.

2. Div Block : Padding-global (Ex : Page Padding)
We are then going to add a block div whose purpose is to give padding to our section so that the elements inside our section are not stuck to the edge. Inside the div of our section, we add a new div with a class that we will name "padding-global". Then we define a value for the padding in the manager style.

3. Div Block: Container
Next, we will create a new stack. We're going to insert a new div to put our content into a container. This will keep the content aligned in the centre and in the same space even if we are on a large screen.
So we add a div which we name for example: "container-large". Then, we add a formatting with a right and left margin in auto to centre the div, then a width of 100% to take all the width of the div and finally a max-width of 80 rem to keep the content in the same space.
Why use REMs instead of pixels?

Concrete example of the interest of a container on a website:

4. Div Block : Vertical Padding (Now Padding Section)
After our container, we will add a new div block that will manage the vertical spacing of my content within my section. A bit like page padding, vertical padding will allow you to air out your section by leaving a "gap" before moving on to the previous or next section.
So once again we will add a div that we will format. We will name our div padding-vertical. If you haven't cloned the basic client first guide style, you will add a padding to the right and left of 0 rem.

You will then add a combo class, for example: "padding-custom1" and define a value for the top and bottom padding.

After following this div block stacking, you can add new Webflow HTML elements to arrange your section.
You can now add this div stack every time you create a new section to have an optimised structure.
If you need to redesign your website, our expert agency can help you!
Ready to take your website to the next level?
Improve your online visibility thanks to Digidop's experience, excellence and reactivity!


.webp)
.webp)

