Integrating a member area into your Webflow site offers many possibilities for personalizing your users' experience. However, a few months ago, Webflow decided to put the development of this feature on hold. The Users feature is available to everyone, but has some limitations. One limitation is thatyou can't display a logged-in user's information natively.
In this article, we'll take you through the steps required to display the name, email or other information of a logged-in user on a web page.
1. Set up your member area in Webflow
Before you can display a user's information, it's important to ensure that your member area is correctly configured.
Learn how to configure your Webflow member space!
2. Using the Sygnal Attributes 5 Memberships documentation
To display the information of a logged-in user, we're going to use the Sygnal Attributes 5 Memberships solution. As with Finsweet Attributes, Sygnal Attributes offers documentation for adding functionality to your website with relative ease.
There are many features we can add to our Webflow site, but in this article we'll concentrate on displaying information about a user's member area.
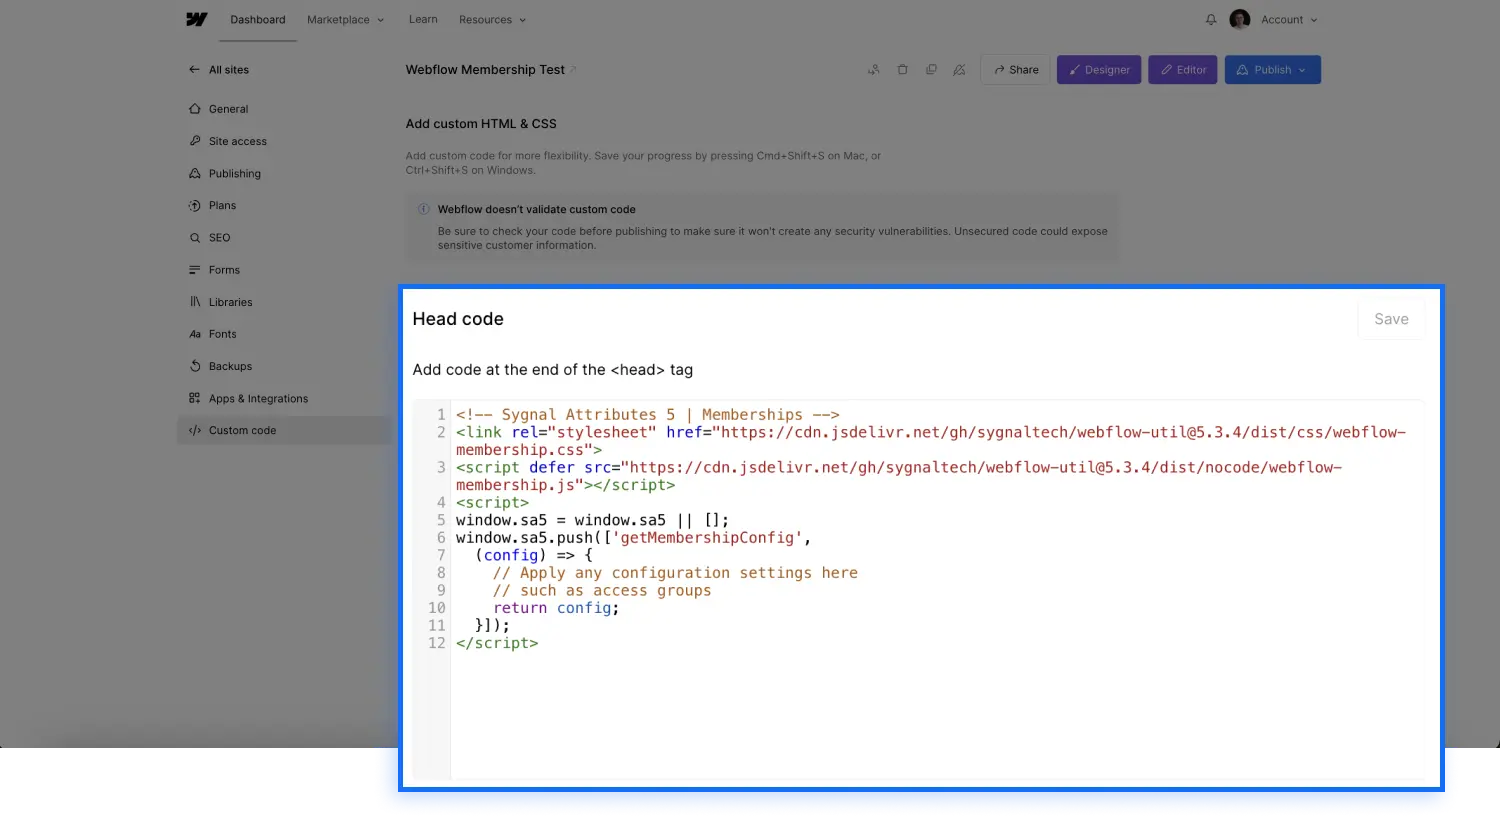
Step 1: Add code to your project's head code
To display user information, you first need to integrate a script into the head code of your Webflow project. To do this, simply go to the parameters of your Webflow project, go to the "custom code" section and paste the following code into the "Head code" section:
This step is crucial to the smooth running of the operation.
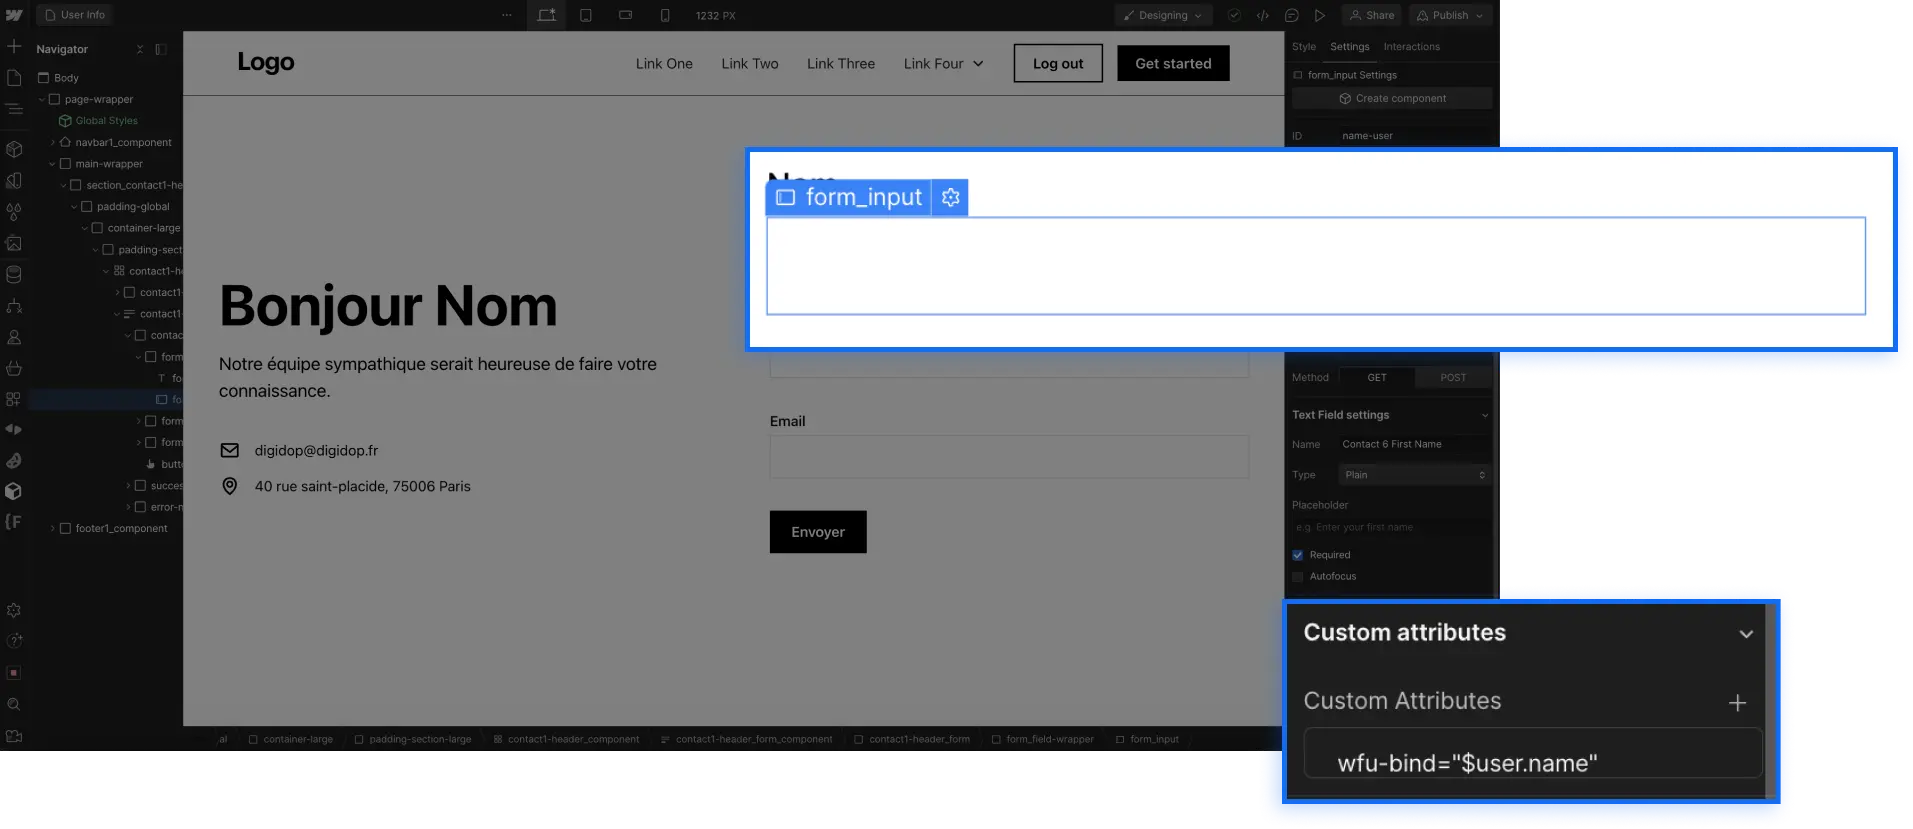
Step 2: Add specific attributes to your elements
You can now return to the designer and go to the page on which you wish to display the logged-in user's information.
You'll then need to add attributes to the elements on which you wish to display specific user information.
You can add attributes to both form fields (input) and text elements (via a span, for example).
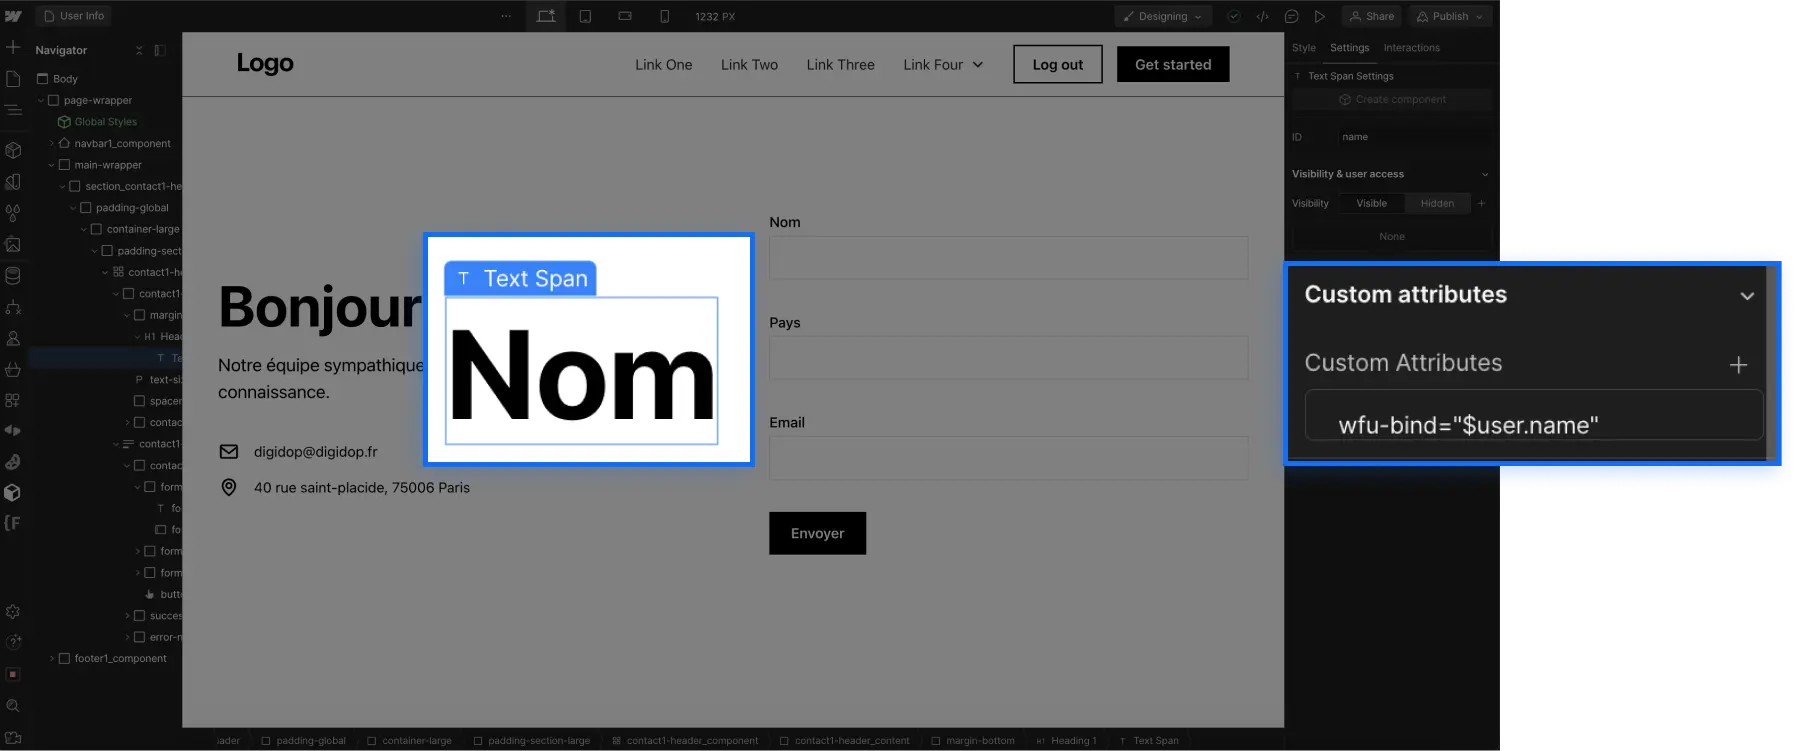
Display logged-in user name in Webflow
To make the name of the logged-in user visible, select your text or input, go to the element parameters and, in the "custom attributes" section, add the following attribute:
[wfu-bind="$user.name"] (wfu-bind is the "Name" and $user.name is the "Value")
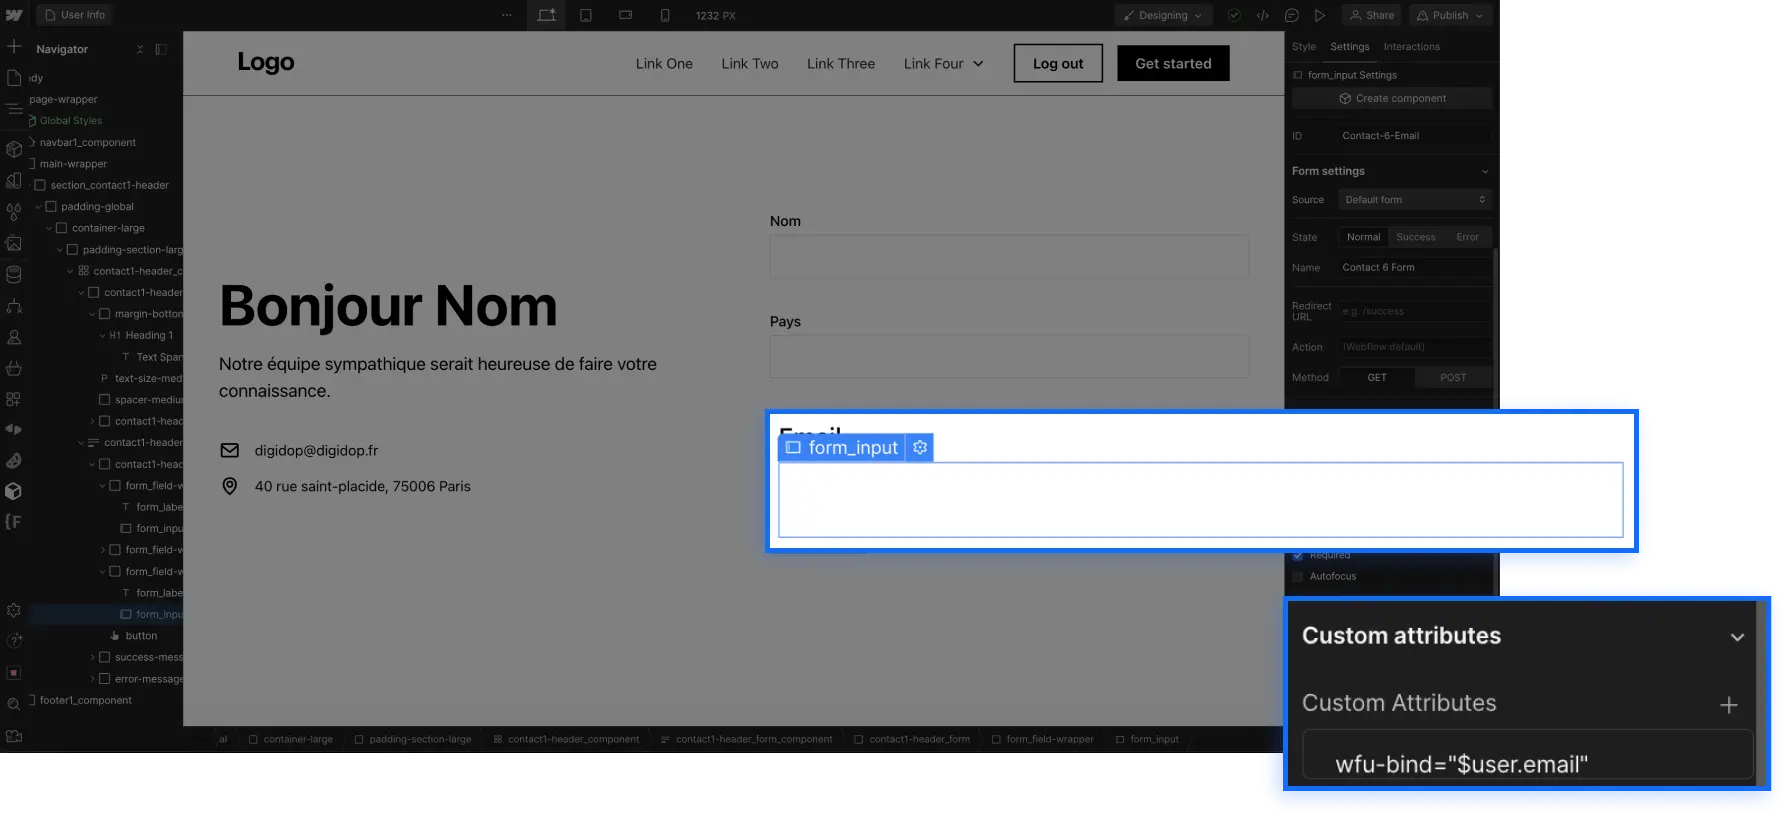
Display logged-in user's email in Webflow
To make the e-mail address of the logged-in user visible, select your text or input, go to the element parameters and, in the "custom attributes" section, add the following attribute:
[wfu-bind="$user.email"] (wfu-bind is the "Name" and $user.email is the "Value")
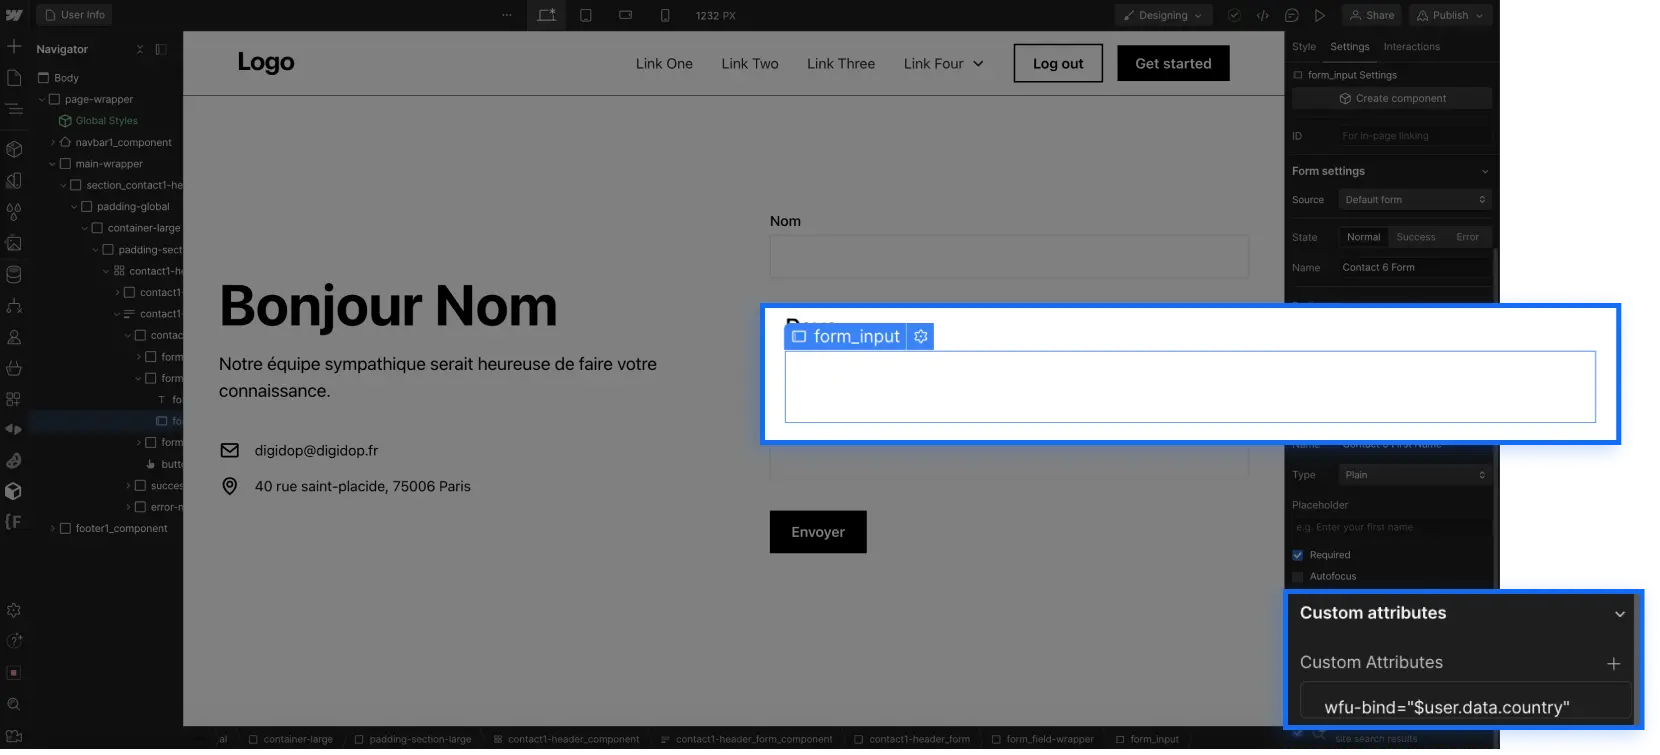
Display a custom field for the logged-in user in Webflow
To perform this operation, you must of course have first added a custom field in the "Users" section of your Webflow" member area.
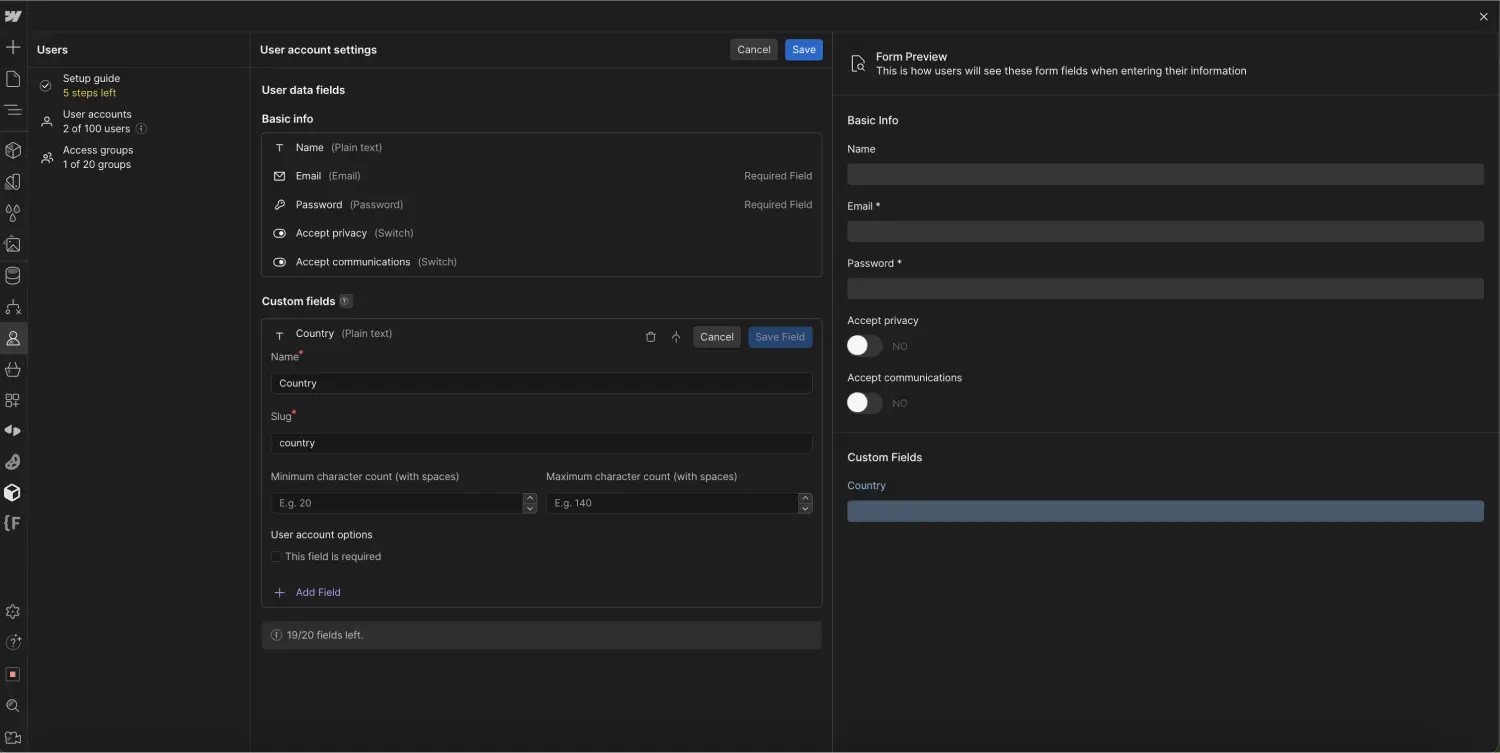
Next, you'll need to add this field to Webflow's default "User Account" page. You can do this from the parameters of the form element on this page, by clicking on the "+" for "Custom fields".
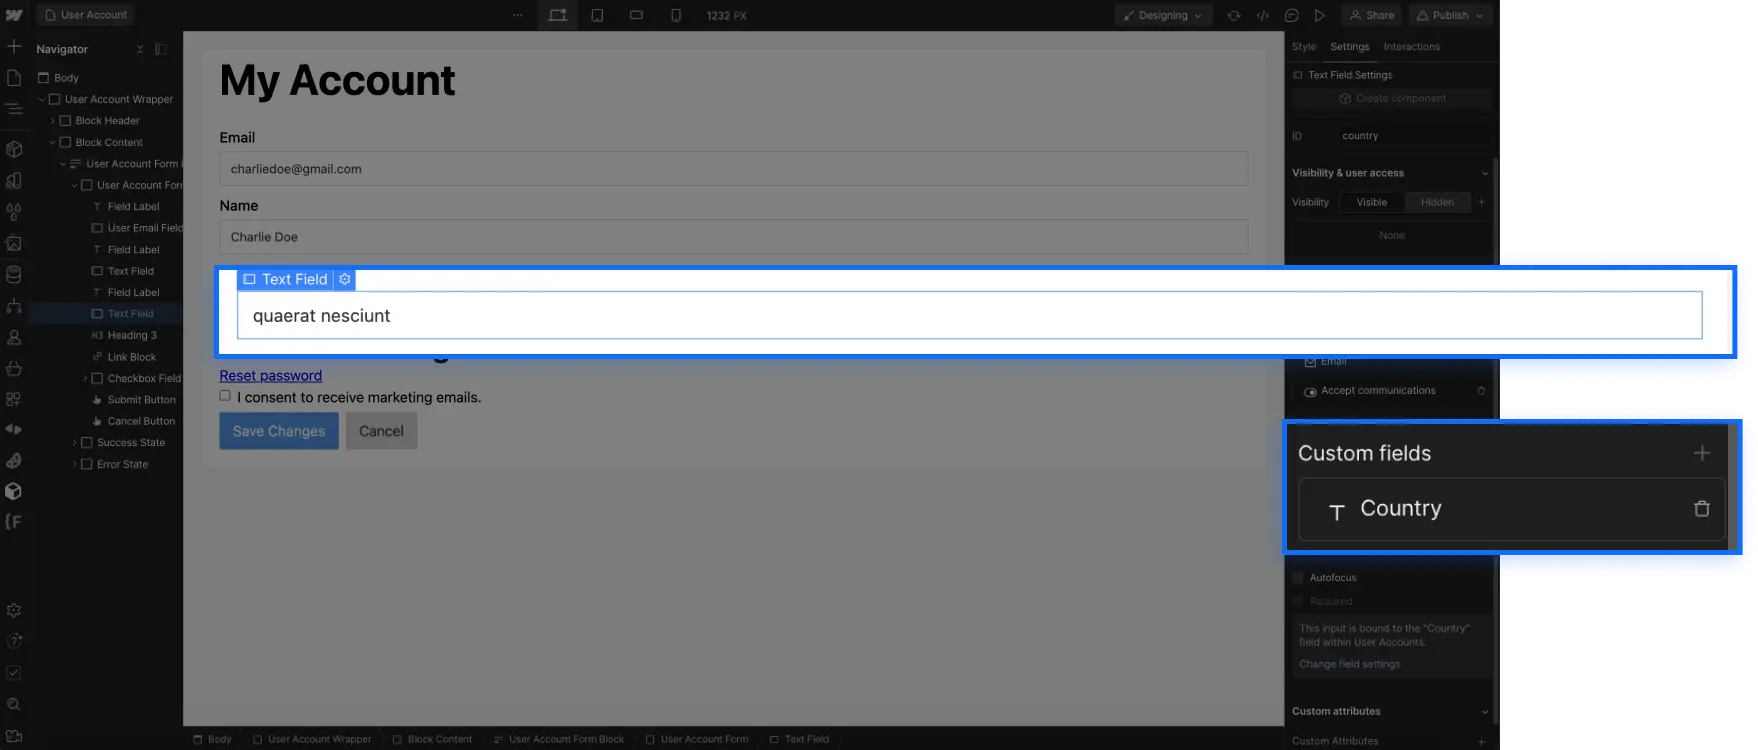
Finally, return to the page where you wish to display the information, select the text or input and add the following attribute:
[wfu-bind="$user.data.slug"] (wfu-bind is the "Name" and $user.data.slug is the "Value").
Note that slug is the slug of your custom field in your member area (so you need to change this part according to your configuration).
Result of the information displayed by a user connected to his Webflow member area, guaranteed without faking:
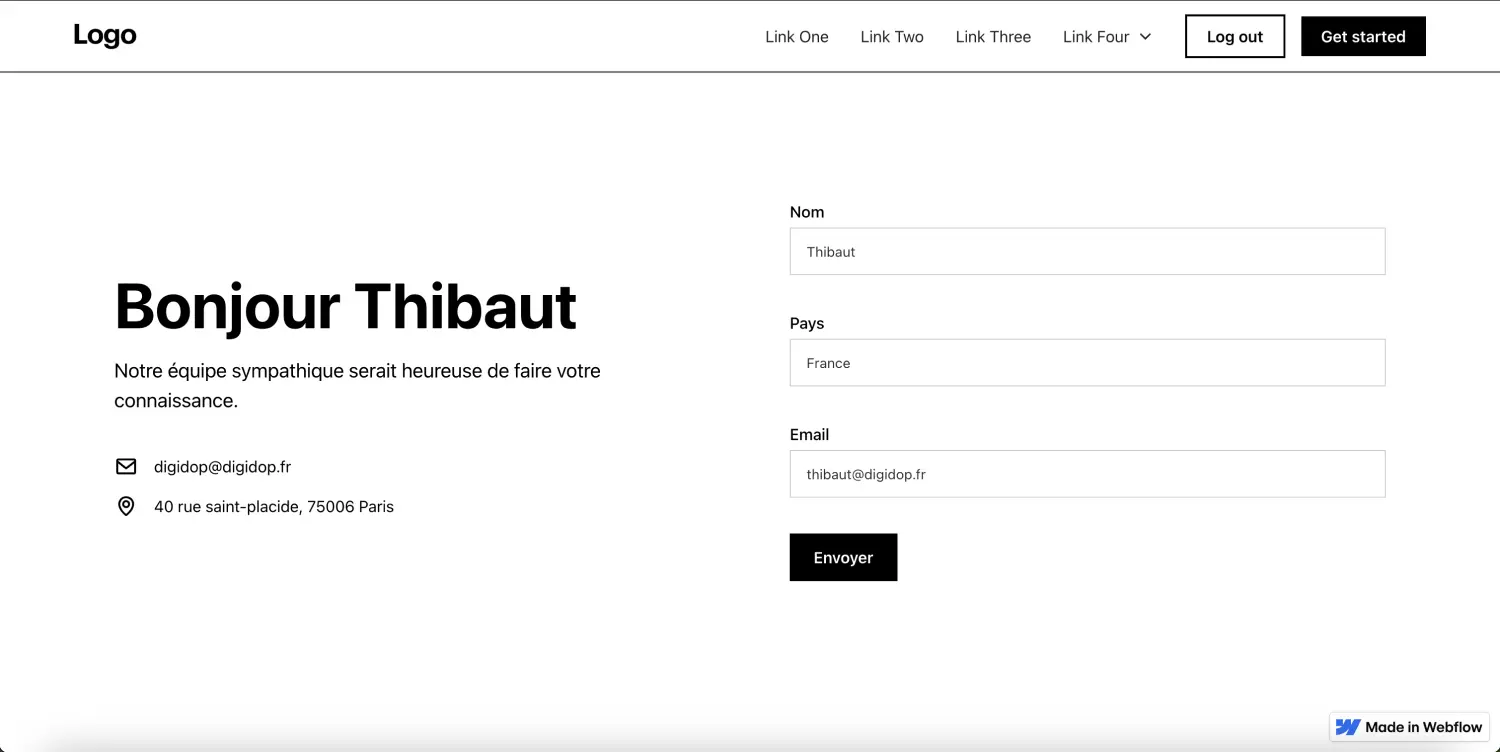
Displaying the information of a user connected to a Webflow member area can improve the user experience on your site. By following the steps described in this article, you can now display personalized messages or pre-fill forms. Feel free to explore the possibilities further and customize your site to your specific needs.
Ready to take your website to the next level?
Improve your online visibility thanks to Digidop's experience, excellence and reactivity!


.webp)
.webp)

