Introduction
When it comes to designing interactive, personalized Webflow forms, conditional visibility is one of the key features to have in your toolbox. Imagine being able to show or hide form fields according to the user's choices, creating a fluid, personalized experience.
In this article, we'll show you how to add this advanced functionality to your site. Although it may seem a little complex, don't worry, we'll take you step-by-step through the process of integrating conditional visibility into your Webflow forms with just a little custom code.
Get ready to create interactive forms that react intelligently to your users' actions. We'll start by exploring the basics of conditional visibility, then guide you through each step, from the initial setup in Webflow to the implementation of the custom code that makes it all work. Let's get started!
Conditional visibility principle
Conditional visibility is a principle that can be quite useful in form design. It allows you to control which form fields are visible depending on the user's previous actions or choices. This dynamic approach can enhance the user experience by simplifying the form and making it more complete, only when necessary.
Why is this important?
Imagine a contact form with fields that are only relevant if the user selects a particular option or fulfills certain conditions.
For example, you could have an "Industry" field with several options, including an "Other" option. If the user chooses "Other", you may wish to display an additional text field so that they can specify their sector. On the other hand, if the user has already designated a business sector, this additional text field is superfluous and could be misleading.
It's typically in this kind of situation that conditional visibility can be interesting. It allows you to show the relevant elements at the right time, avoiding confusion and simplifying the process for the user. This feature is also particularly useful in longer, more complex forms longer, more complex forms where the presentation of information is crucial.
Now that we understand the importance of conditional visibility, let's move on to the next section to learn how to implement it in Webflow.
Prepare your form in Webflow
Well, before diving into adding custom code, the first step to creating effective conditional visibility in Webflow is to prepare your form properly. Follow these steps to make sure everything's in order before adding the code magic:
1. Create your form in Webflow :
If you haven't already created your form, now's the time to do so. Create the form and add all the necessary fields (including those you plan to hide). If you have selection fields, make sure you add all your options.
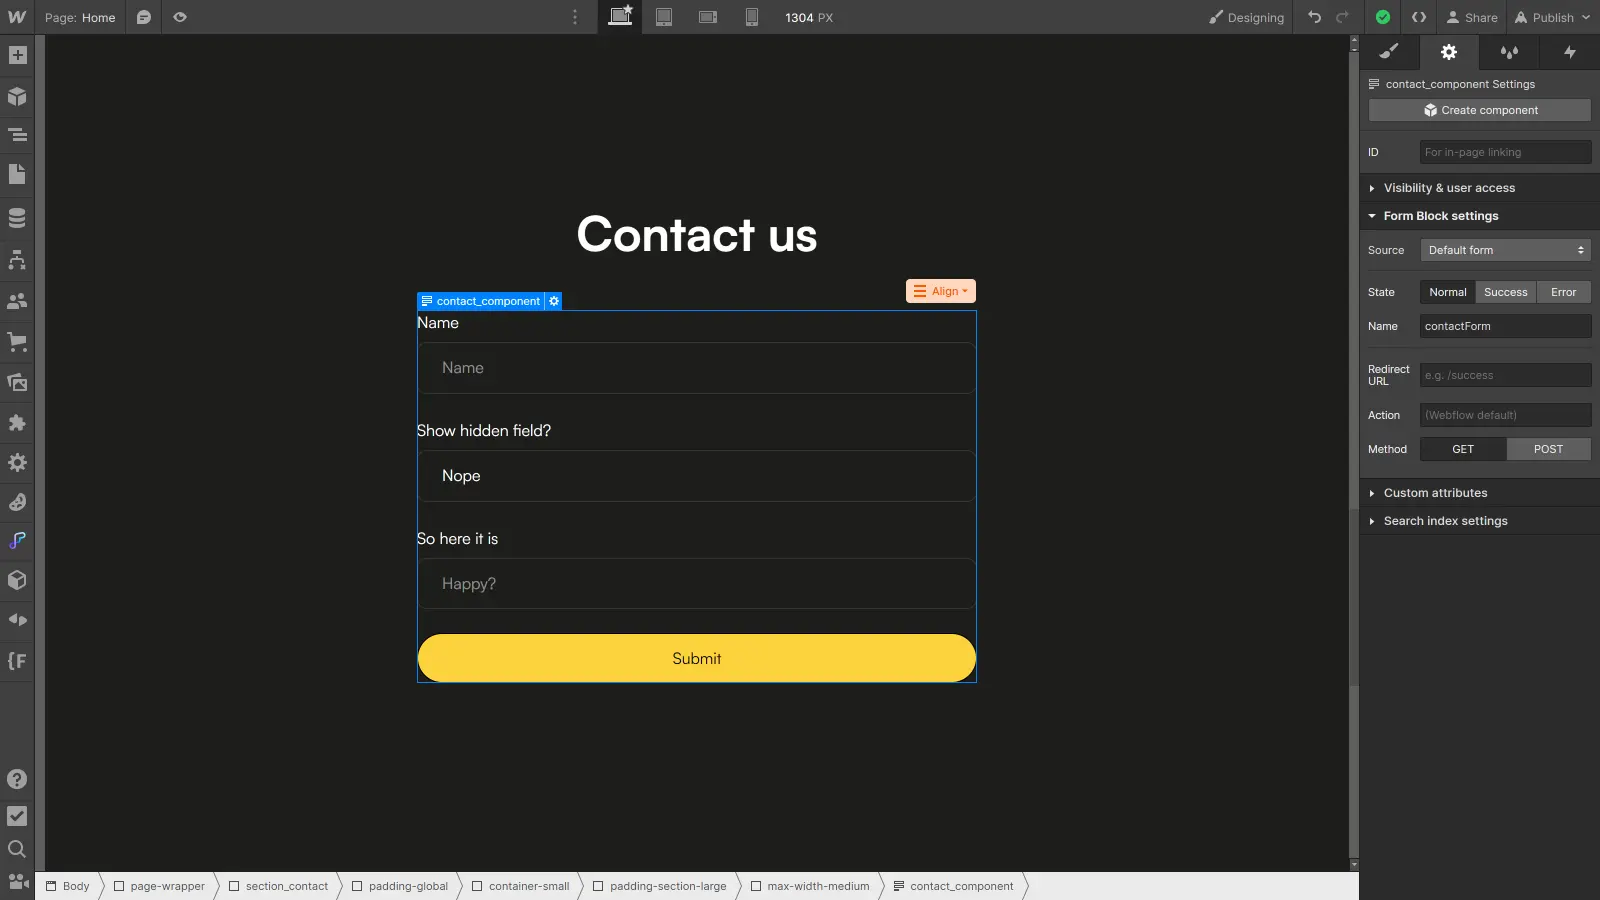
2. Set up the form
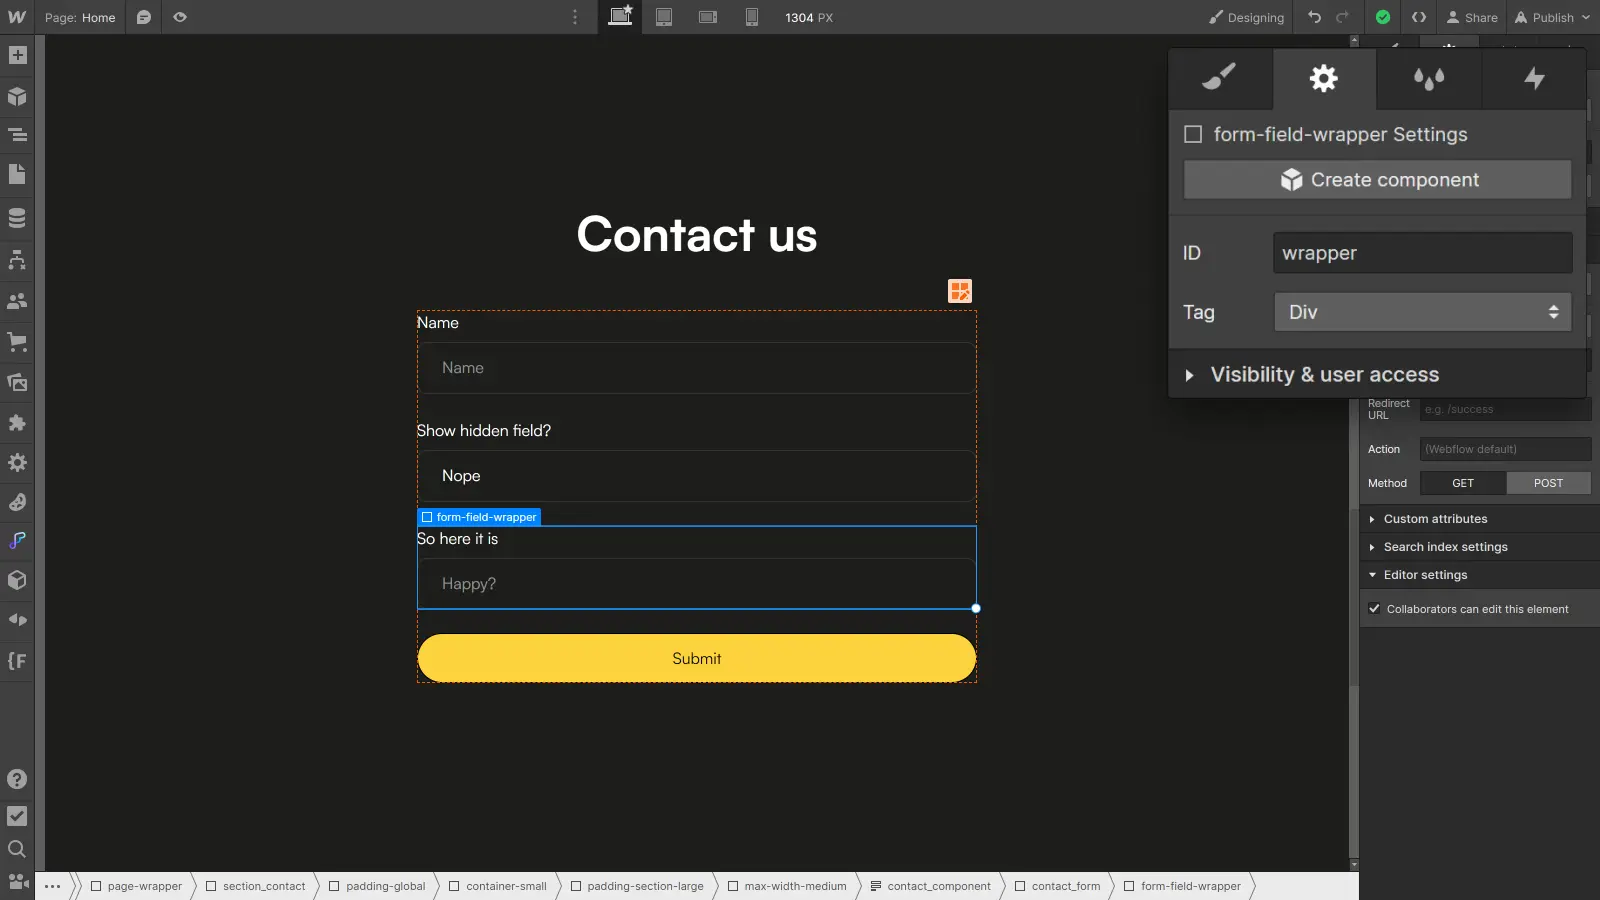
Each form field must have a unique identifier (ID ) to be targeted via custom code. Be sure to assign appropriate IDs to each field. Also assign an ID to the Div Block that will be displayed or hidden (the element containing the field and its label). You'll need this when you write the conditional visibility code.
Once your form is ready in Webflow, you're ready to move on to the next step: adding the custom code that will manage conditional field visibility. In the following section, we guide you through the coding process to make your form responsive to user choices.
Add the conditional visibility code
Now that your form is ready in Webflow, it's time to add the custom code that will activate the conditional visibility of your fields. Follow these steps carefully to integrate this feature into your project:
1. Access your page's custom code
From the Designer, open the parameters of the page containing the form you wish to enhance with conditional visibility, then scroll down to the Custom code tab.
2. Paste the conditional visibility code
Paste the following code into the Head tag:
This JavaScript code will manage the conditional visibility of your form's fields according to the user's choices.
3. Customize the code to suit your needs
The code you've pasted is a general base. You can now customize it according to your field IDs and the specific choices you've configured in your form.
Here are the changes to be made:
- Replace "trigger" (1) with the ID of the field that manages conditional visibility.
- Replace "conditional" (2) with the ID of the field to be displayed or hidden.
- Replace "wrapper" (3) with the ID of the Div Block to be displayed or hidden (field + label).
- Replace "show" (4) with the value of the trigger field that will trigger the display of the hidden field.
Only these four elements need to be modified, as in the following example (lines 6, 7, 8, 15):
.webp)
Lines 7, 17 and 20 in the example above are optional. They allow you to make the field mandatory if it's displayed, but optional if it's hidden.
4. Publish your Webflow site
Once you've added the custom code, make sure you publish your Webflow site so that the changes take effect (the custom code will not take effect in the Designer). Don't forget to test the form to make sure there are no errors.
Once you've followed these steps, your Webflow form should be equipped with conditional visibility functionality. Fields will seamlessly show and hide according to the user's choices, offering an enhanced user experience.
Conclusion
Congratulations, you now have the tools to add conditional visibility to the forms on your Webflow sites!
Remember that conditional visibility isn't just a question of technique, but also of design. It allows you to create intelligent, responsive forms that adapt to your users' needs to enhance their experience.
To find out more, check out these other articles:
Ready to take your website to the next level?
Improve your online visibility thanks to Digidop's experience, excellence and reactivity!


.webp)
.webp)

