Ever since Webflow launched its app marketplace, every month we've been treated to a little surprise with new, cooler apps.
Today, we're going to introduce you to a Webflow application that will greatly simplify the way you perform A/B Tests with Webflow. It's called Optibase and was developed by the world-renowned Webflow agency Flowout!
What is A/B Testing?
Definition - A/B Testing: A/B Testing is a method of experimentation in which two different versions of an element, such as a web page, e-mail or advertisement, are randomly presented to users to determine which generates the best results in terms of performance or conversions.
A/B testing, also known as A/B testing, is a simple but powerful technique used on the Internet to optimize the performance of websites, e-mails and advertisements. The aim: to see which version of an element works best (generates more clicks, for example, depending on the KPIs you're looking at) among several.
Let's take a concrete example: let's say you have an e-commerce store and you want to know which color "Add to cart" button most encourages users to complete a purchase. With A/B Testing, you can randomly present a version of your site with a green button to one group of users and a version with a red button to another group, then measure which generates more sales.
In the same way, you could test different versions of a section of your site, such as the layout of elements or the text used, to see which attracts the most attention and encourages visitors to explore further.
The advantages are numerous: you can :
- Improve the user experience
- Increase conversions and sales
- Make more informed decisions based on hard data rather than guesswork
Ultimately, A/B Testing enables you tooptimize your online presence continuously and effectively !
A/B testing made easy with Webflow
In a previous article, we showed you howA/B testing can be carried outwith Google Optimize and Webflow.
Today, Flowout has released an online tool and Webflow application that lets you run tests tooptimize your conversion rate in just a few clicks.
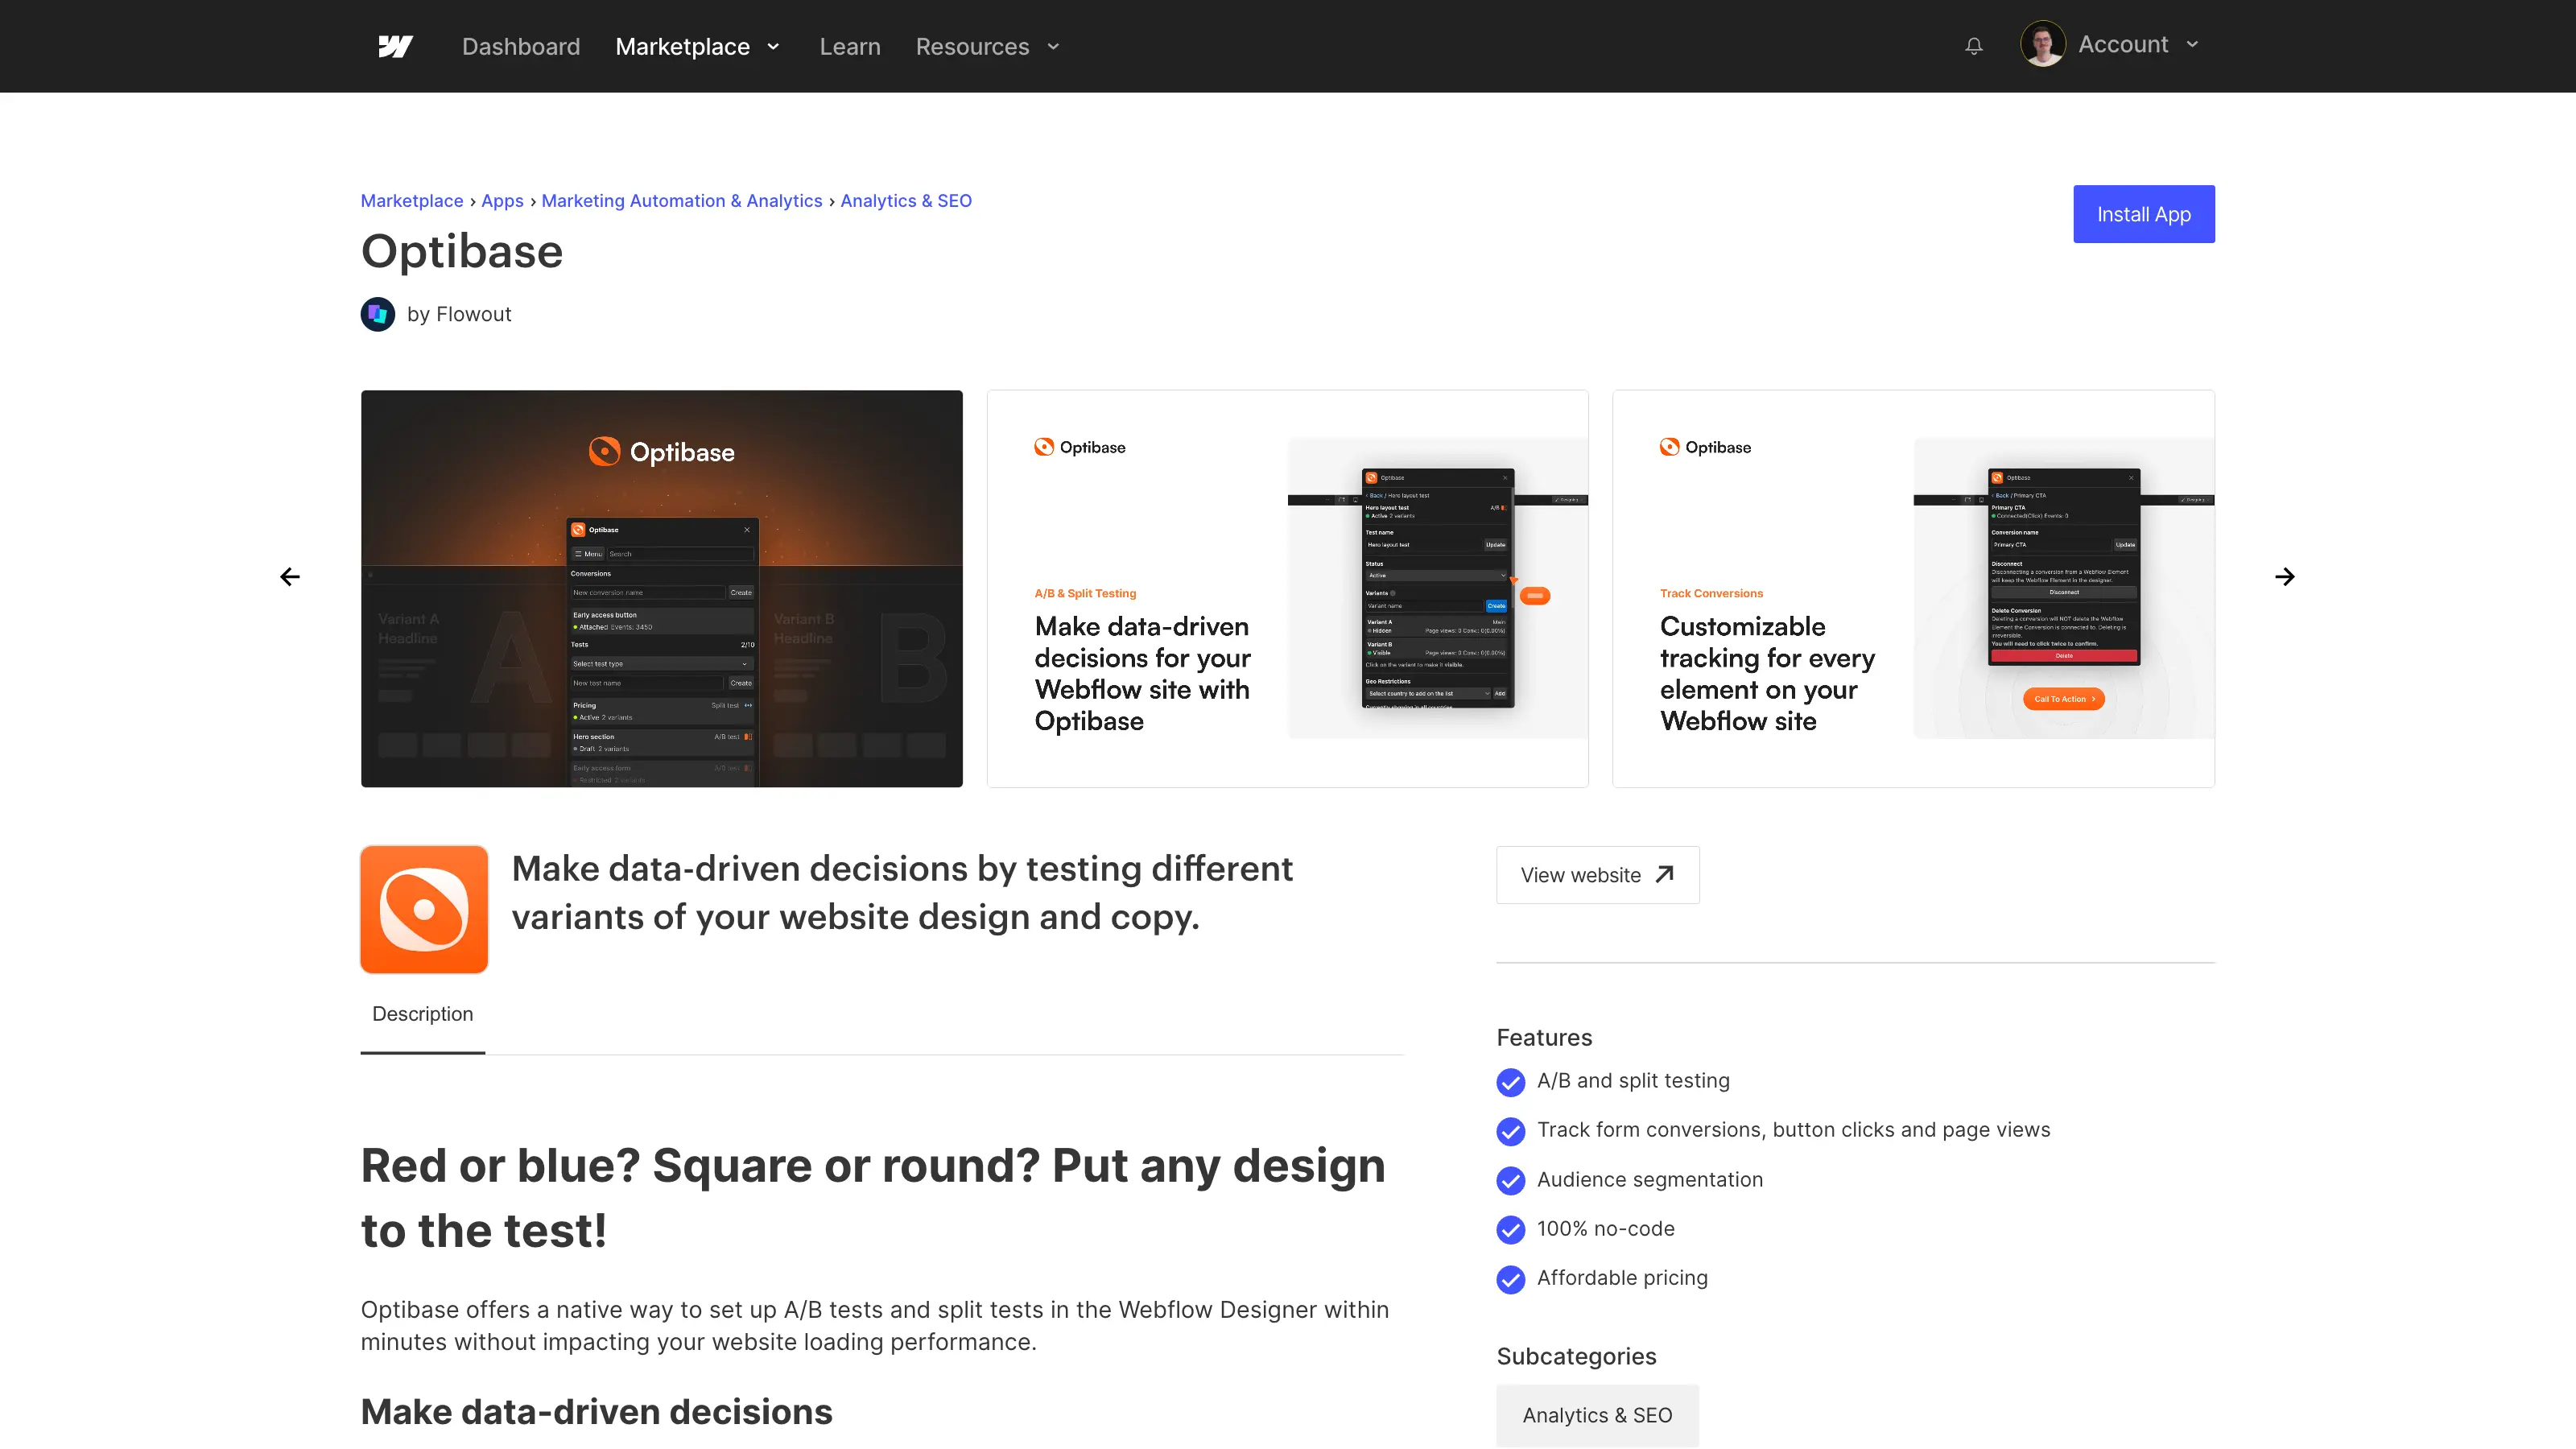
What is Optibase?
Optibase is an A/B Testing application for Webflow. It is designed to help no-coders to easily optimize their website statistics.
Are you hesitating between a red or a blue button? Not sure whether to opt for components with or without radius? Optibase lets you test any design element in your Webflow designer.
By running A/B or split tests on different versions of your site, you can continually discover the best-performing variations that dramatically improve your conversions.
Key features :
- Performance tests with no impact on your website speed.
- Audience segmentation based on geolocation and screen size.
- No-code friendliness perfect for beginners.
The application has a free version that lets you test the tool (3 tests, 1 active test, 10k page view limit).
It also has flexible pay-as-you-go plans for teams of all sizes. The basic plan starts at $19 per month.
How do I install Optibase in Webflow?
First, you'll need to install the Optibase application from the Webflow marketplace. Then connect it to the project you want to use it on.
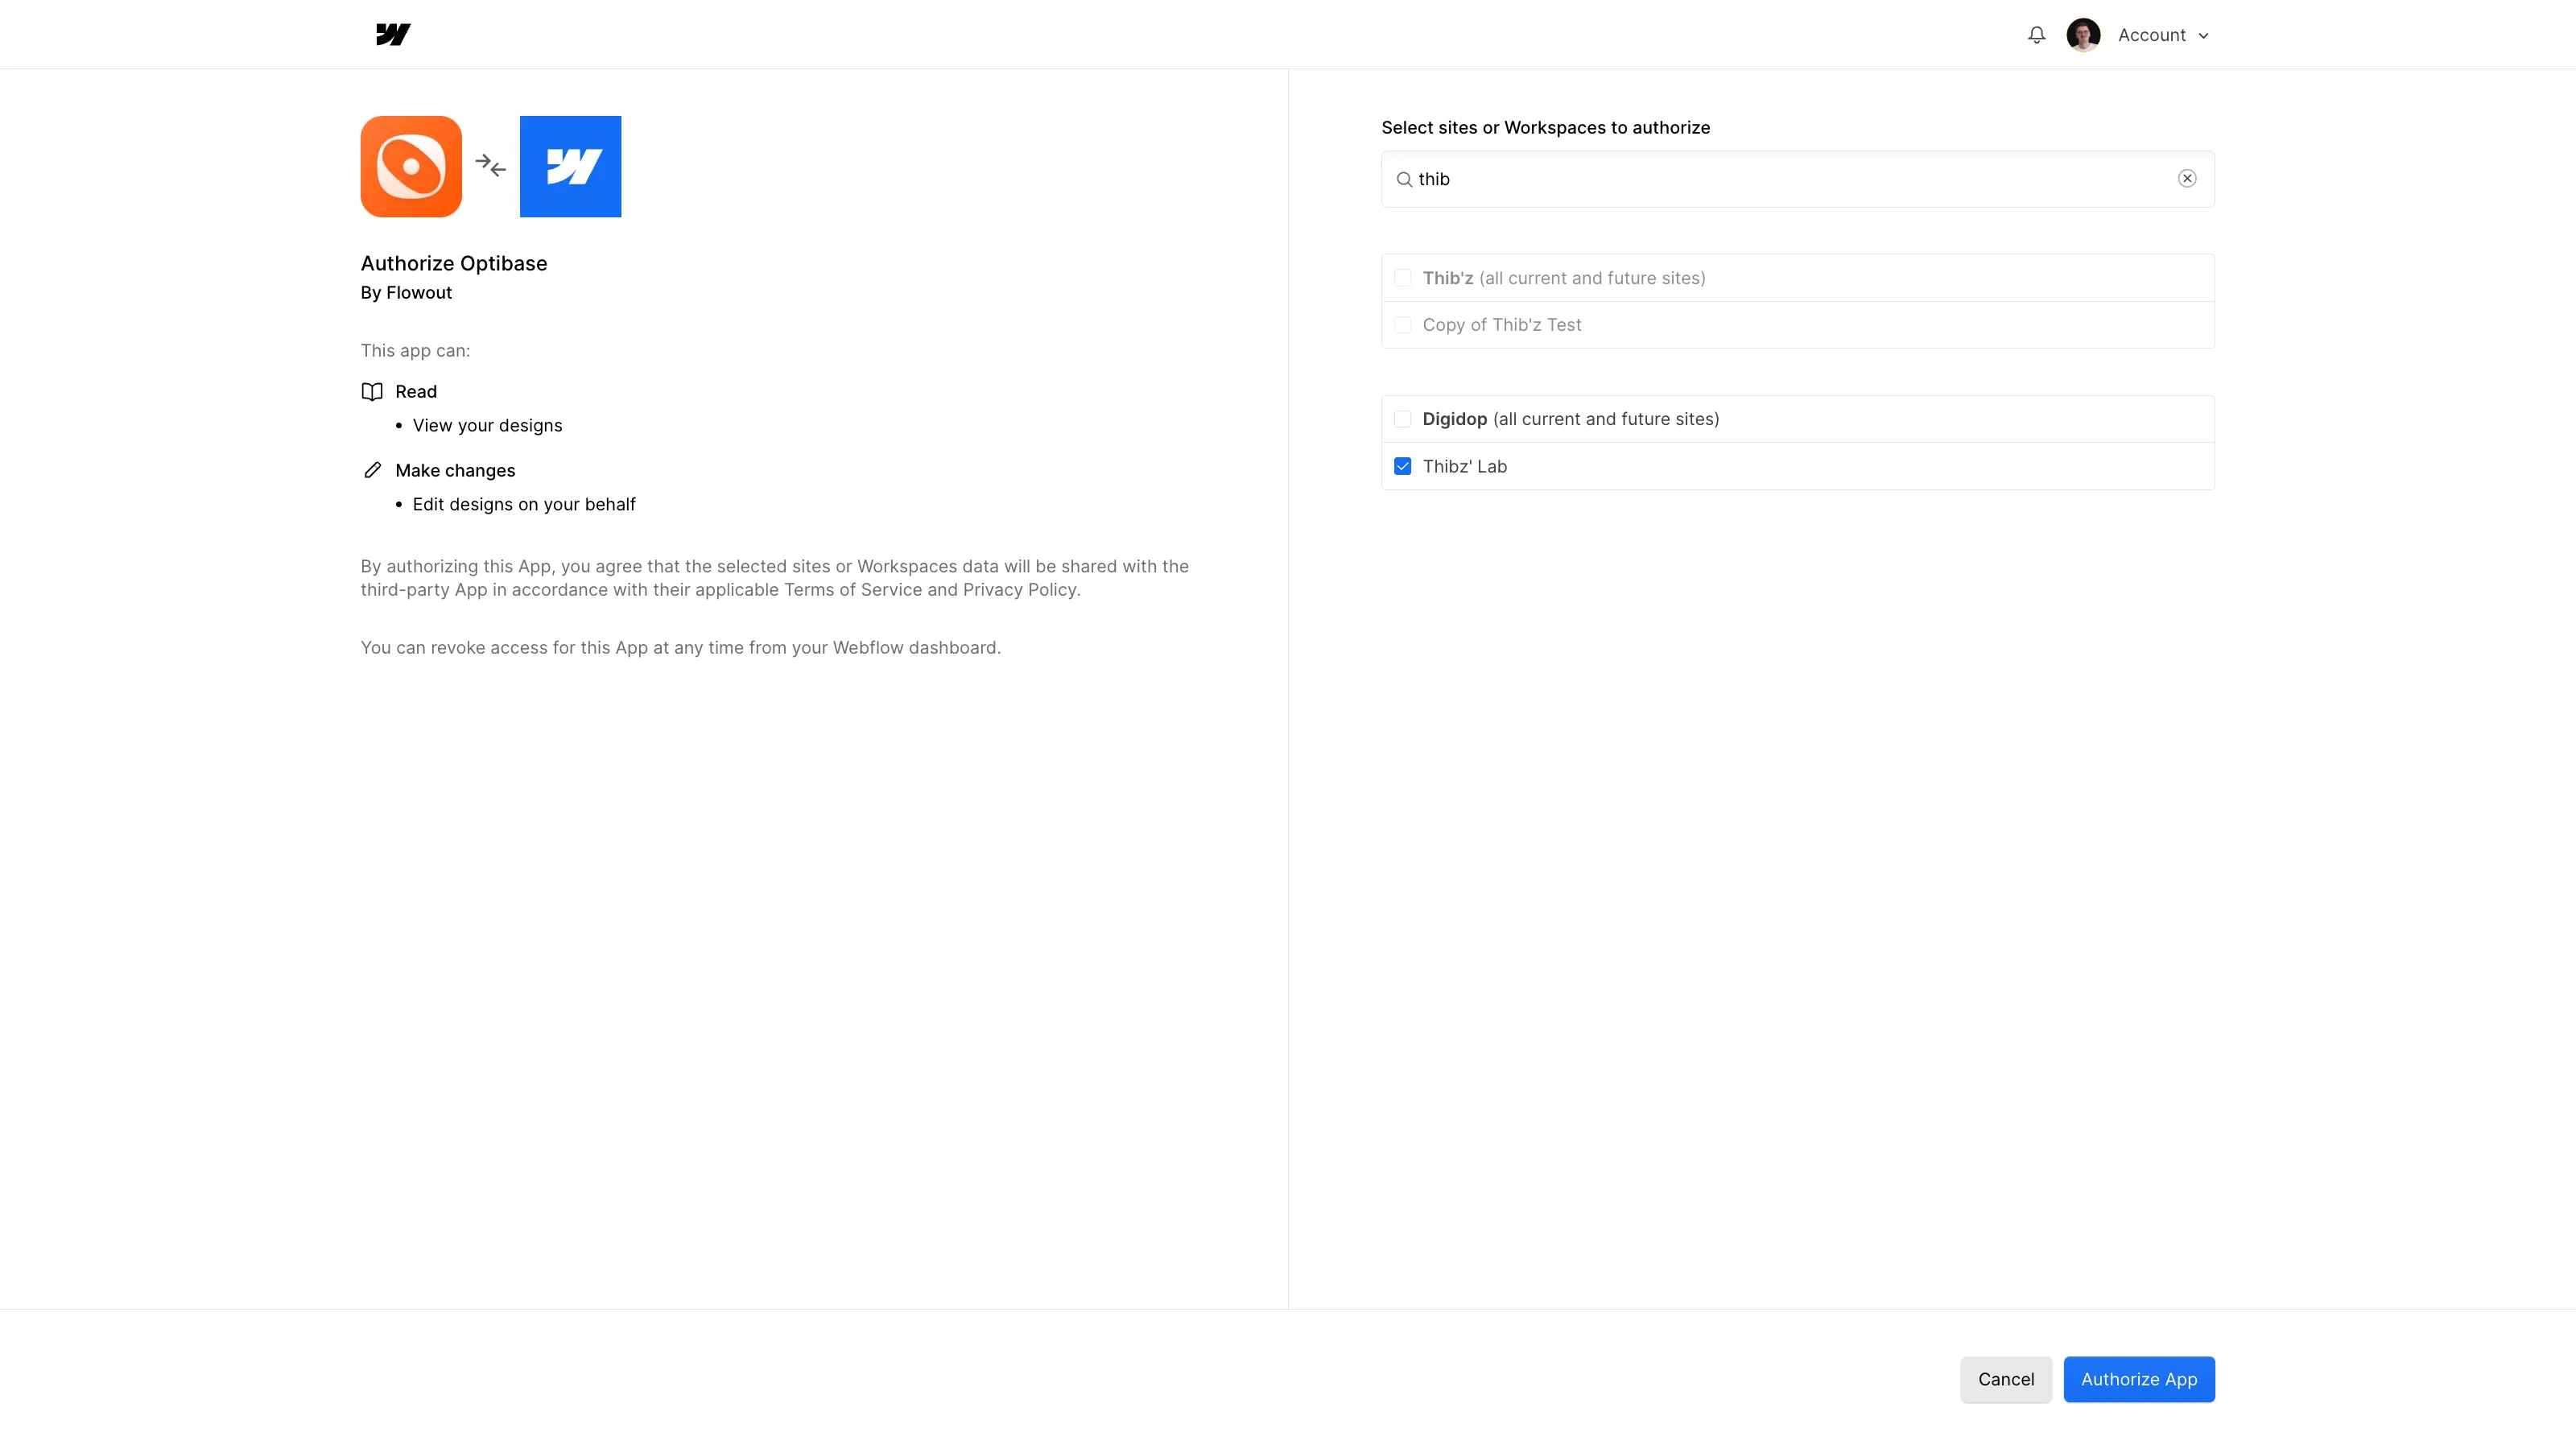
In the Webflow designer, you can open the application from the dedicated tab. You'll then need to log in or register (if you don't already have an account).
Next, you'll need to retrieve the API key from the Web application's user parameters, and synchronize it with the Webflow app.
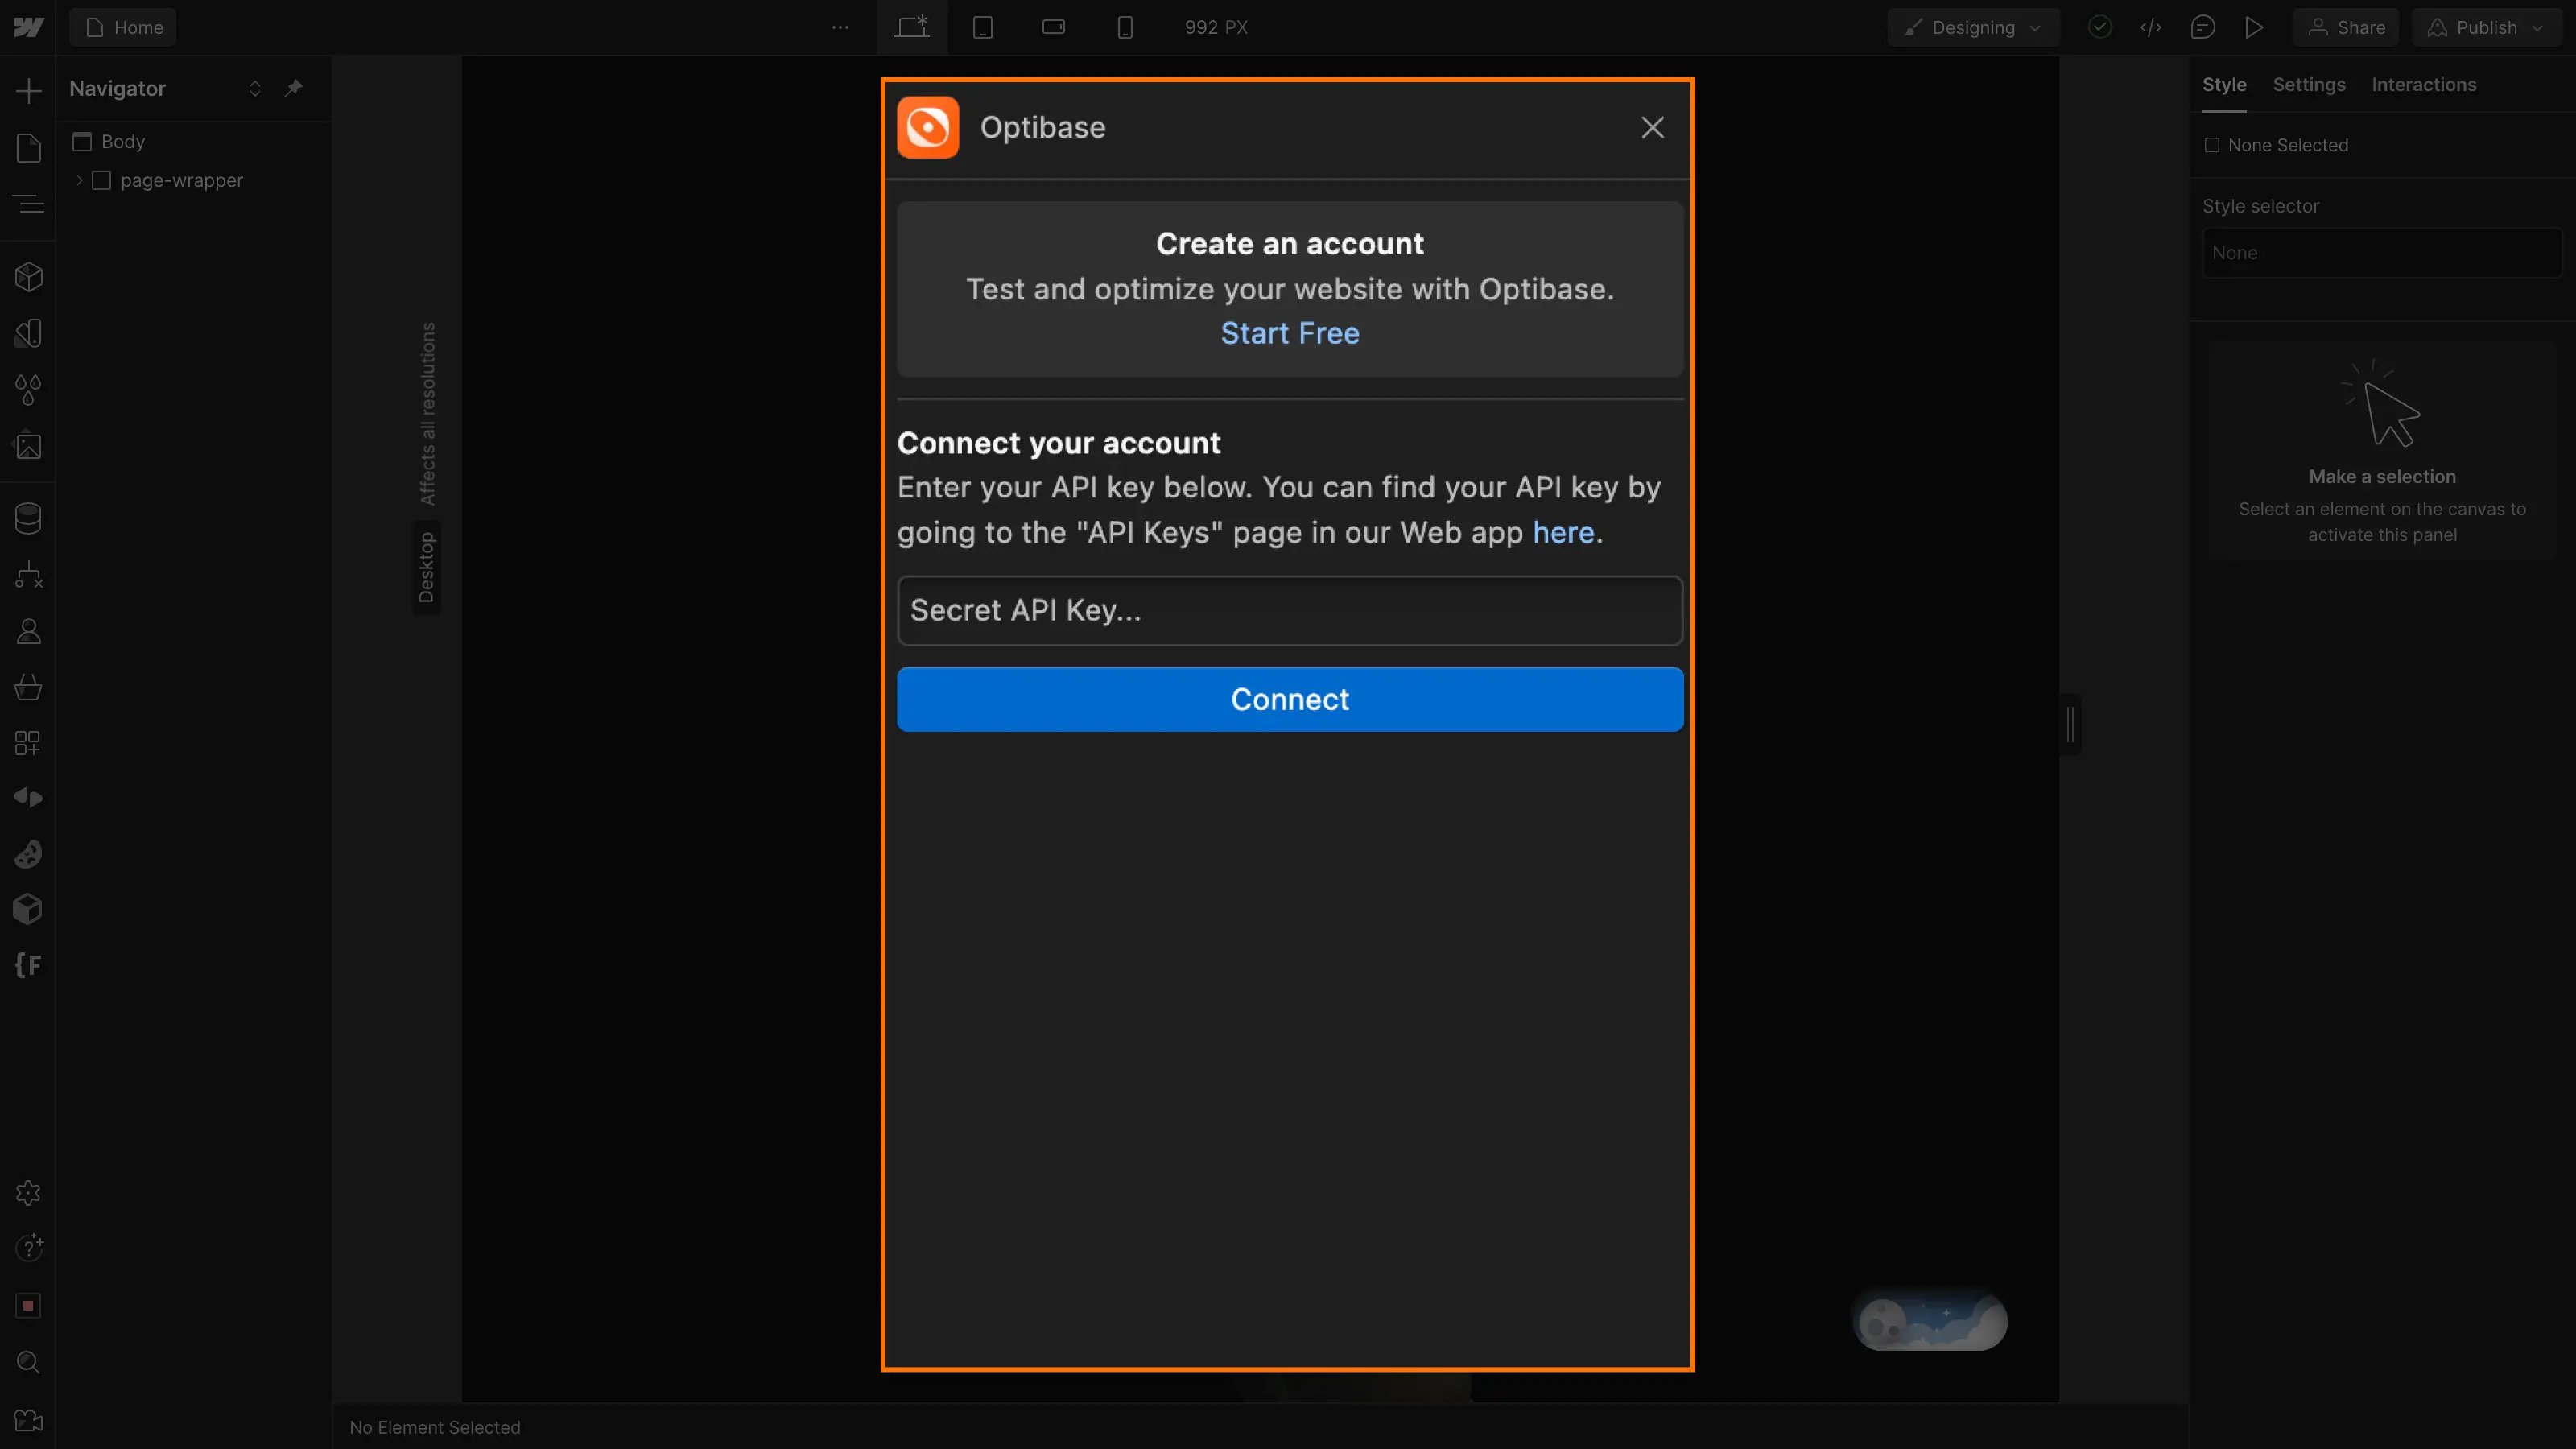
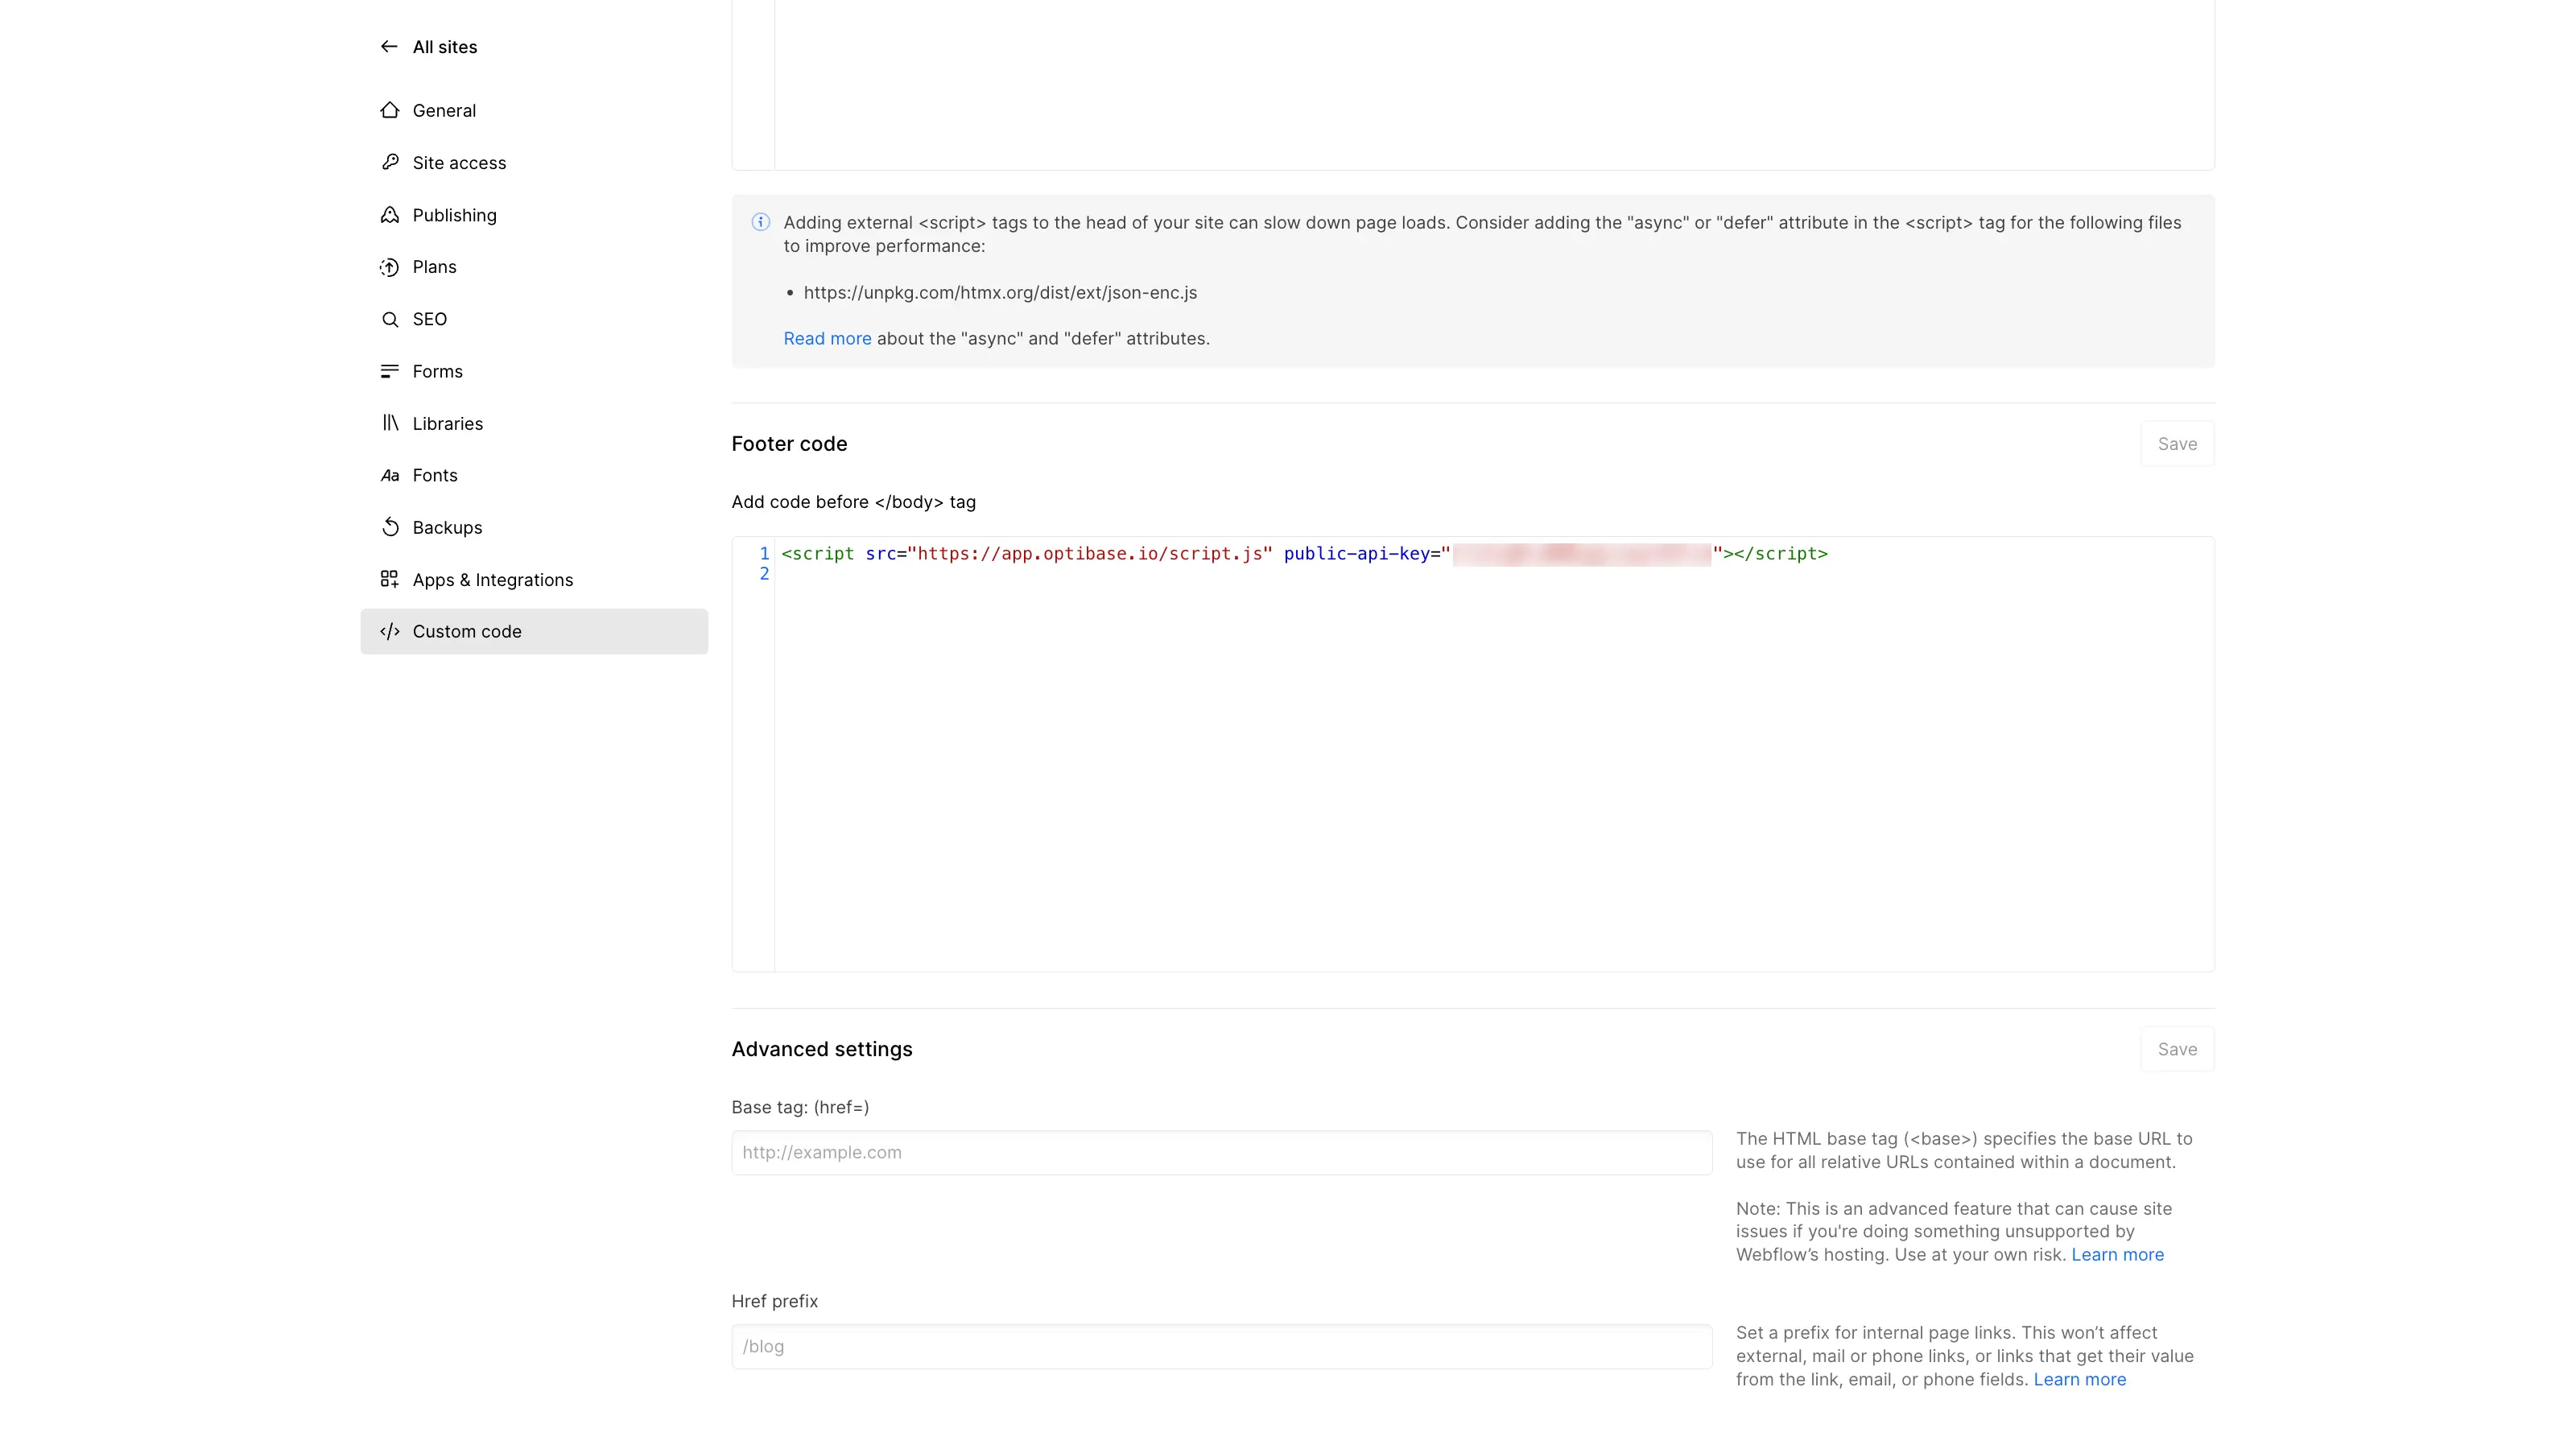
Finally, you need to copy and paste the script provided by Optibase into the Before Body Tag section of your project, publish and validate the connection from the Webflow app.
How to use Optibase in Webflow for A/B testing?
Once you've set up your application, you can start AB Testing.
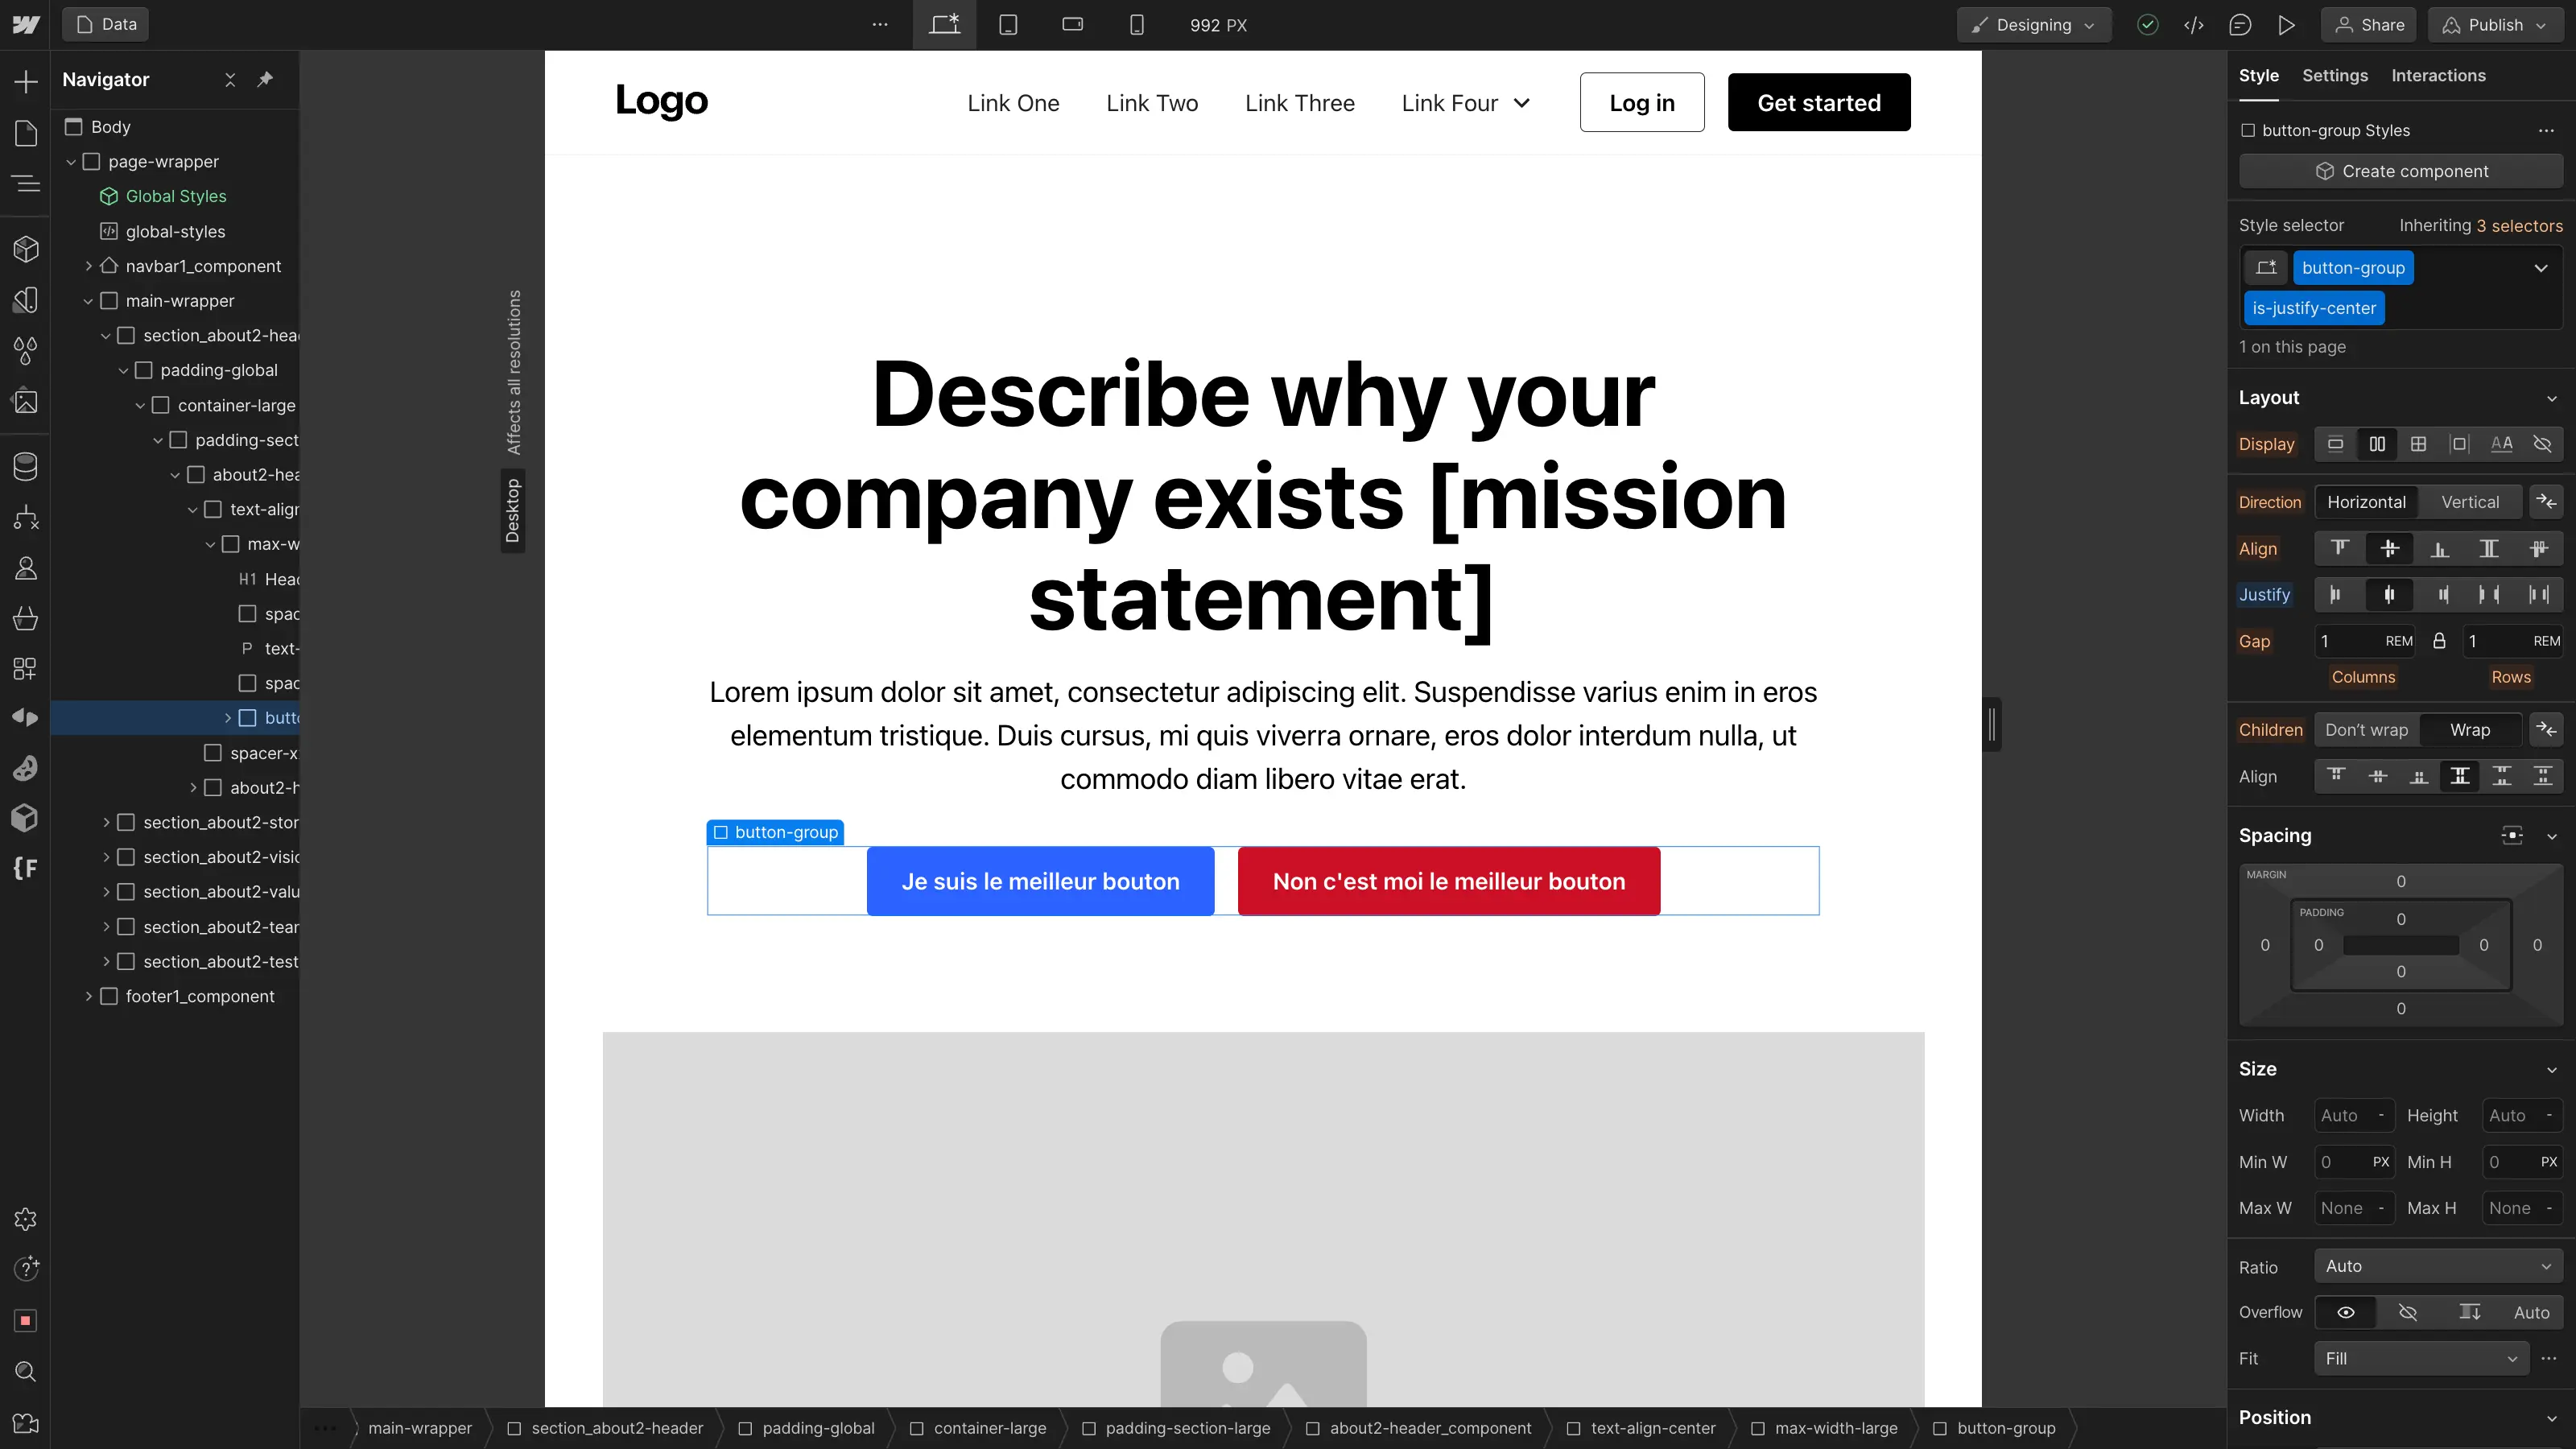
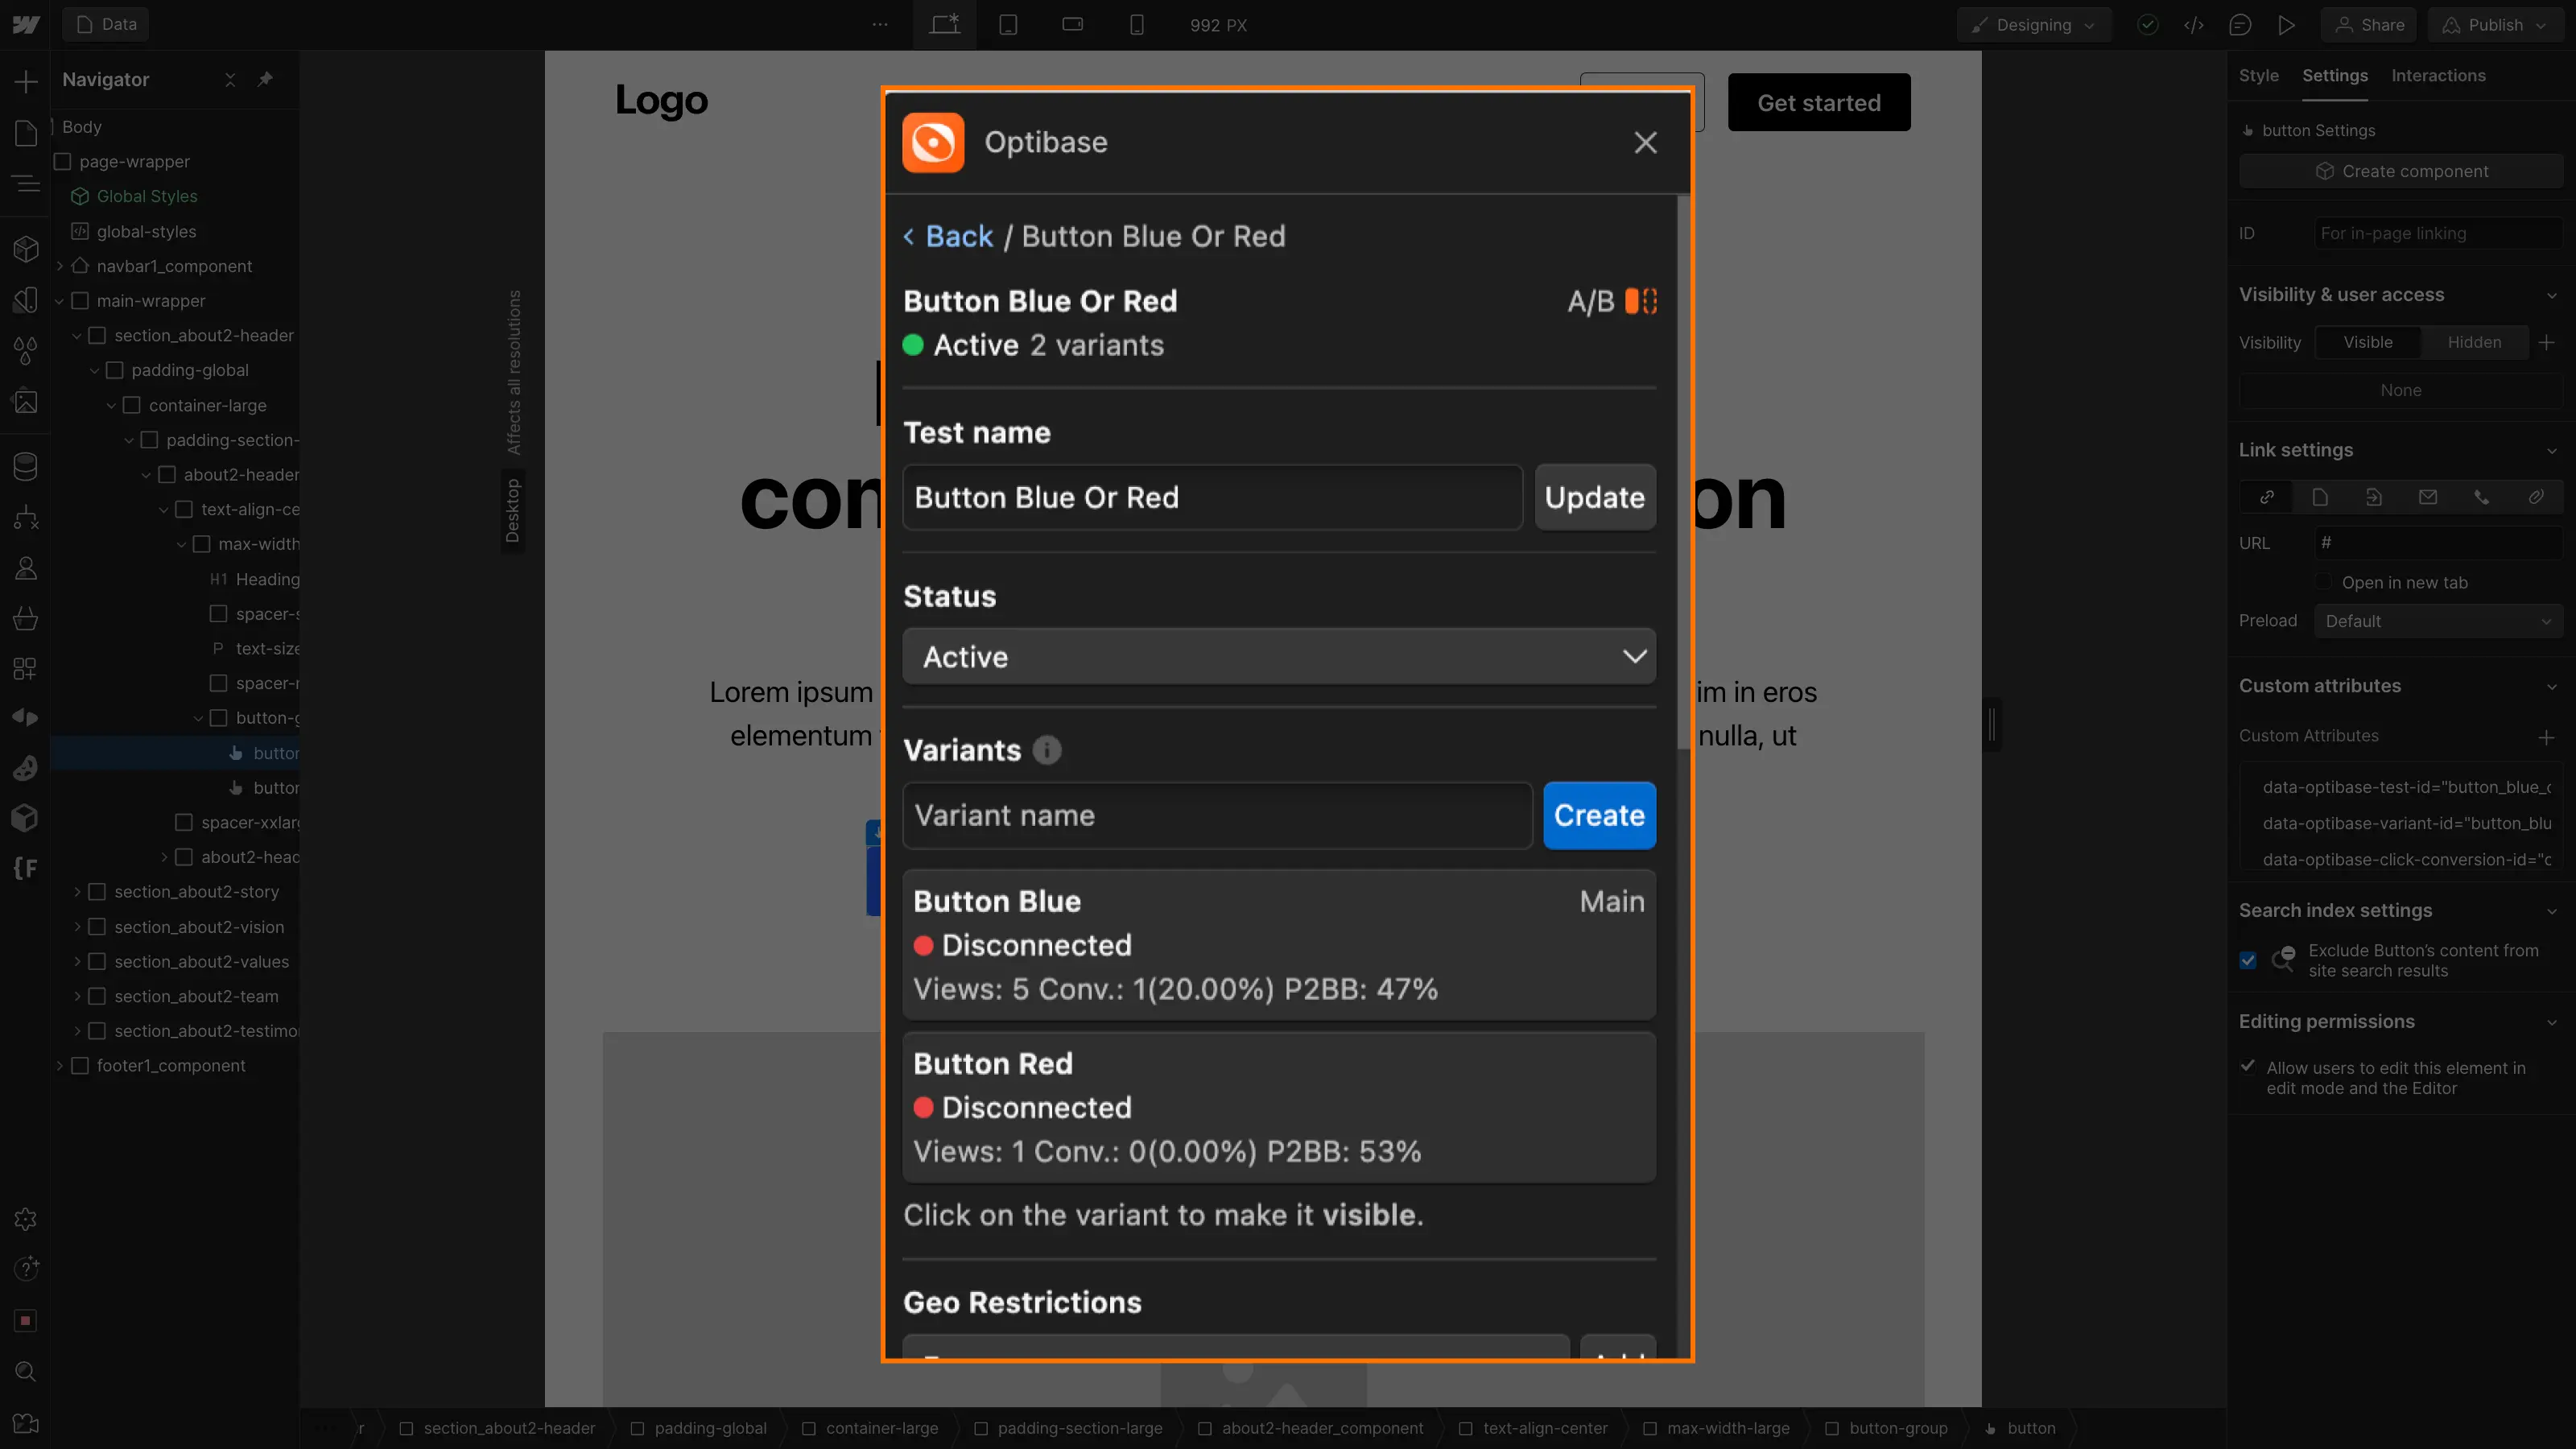
In our case, we'll take a very simple example. In the hero header of our website, we want to display a button. However, we don't know whether it's better to use a Blue button or a Red button. So we're going to run an A/B test to see which gets more clicks.
To do this, we will :
Step 1: Create variants in Webflow
The first thing we're going to do is create a blue button and a red button in our Webflow page. You can create as many variants as you like, with very different characteristics.
Step 2: Open the Optibase app
We're now going to open the Optibase application from our Webflow.
Step 3: Create the AB Test
In this step, we fill in the various fields to create our A/B test.
In the "Tests" selection field, we'll choose"A/B".
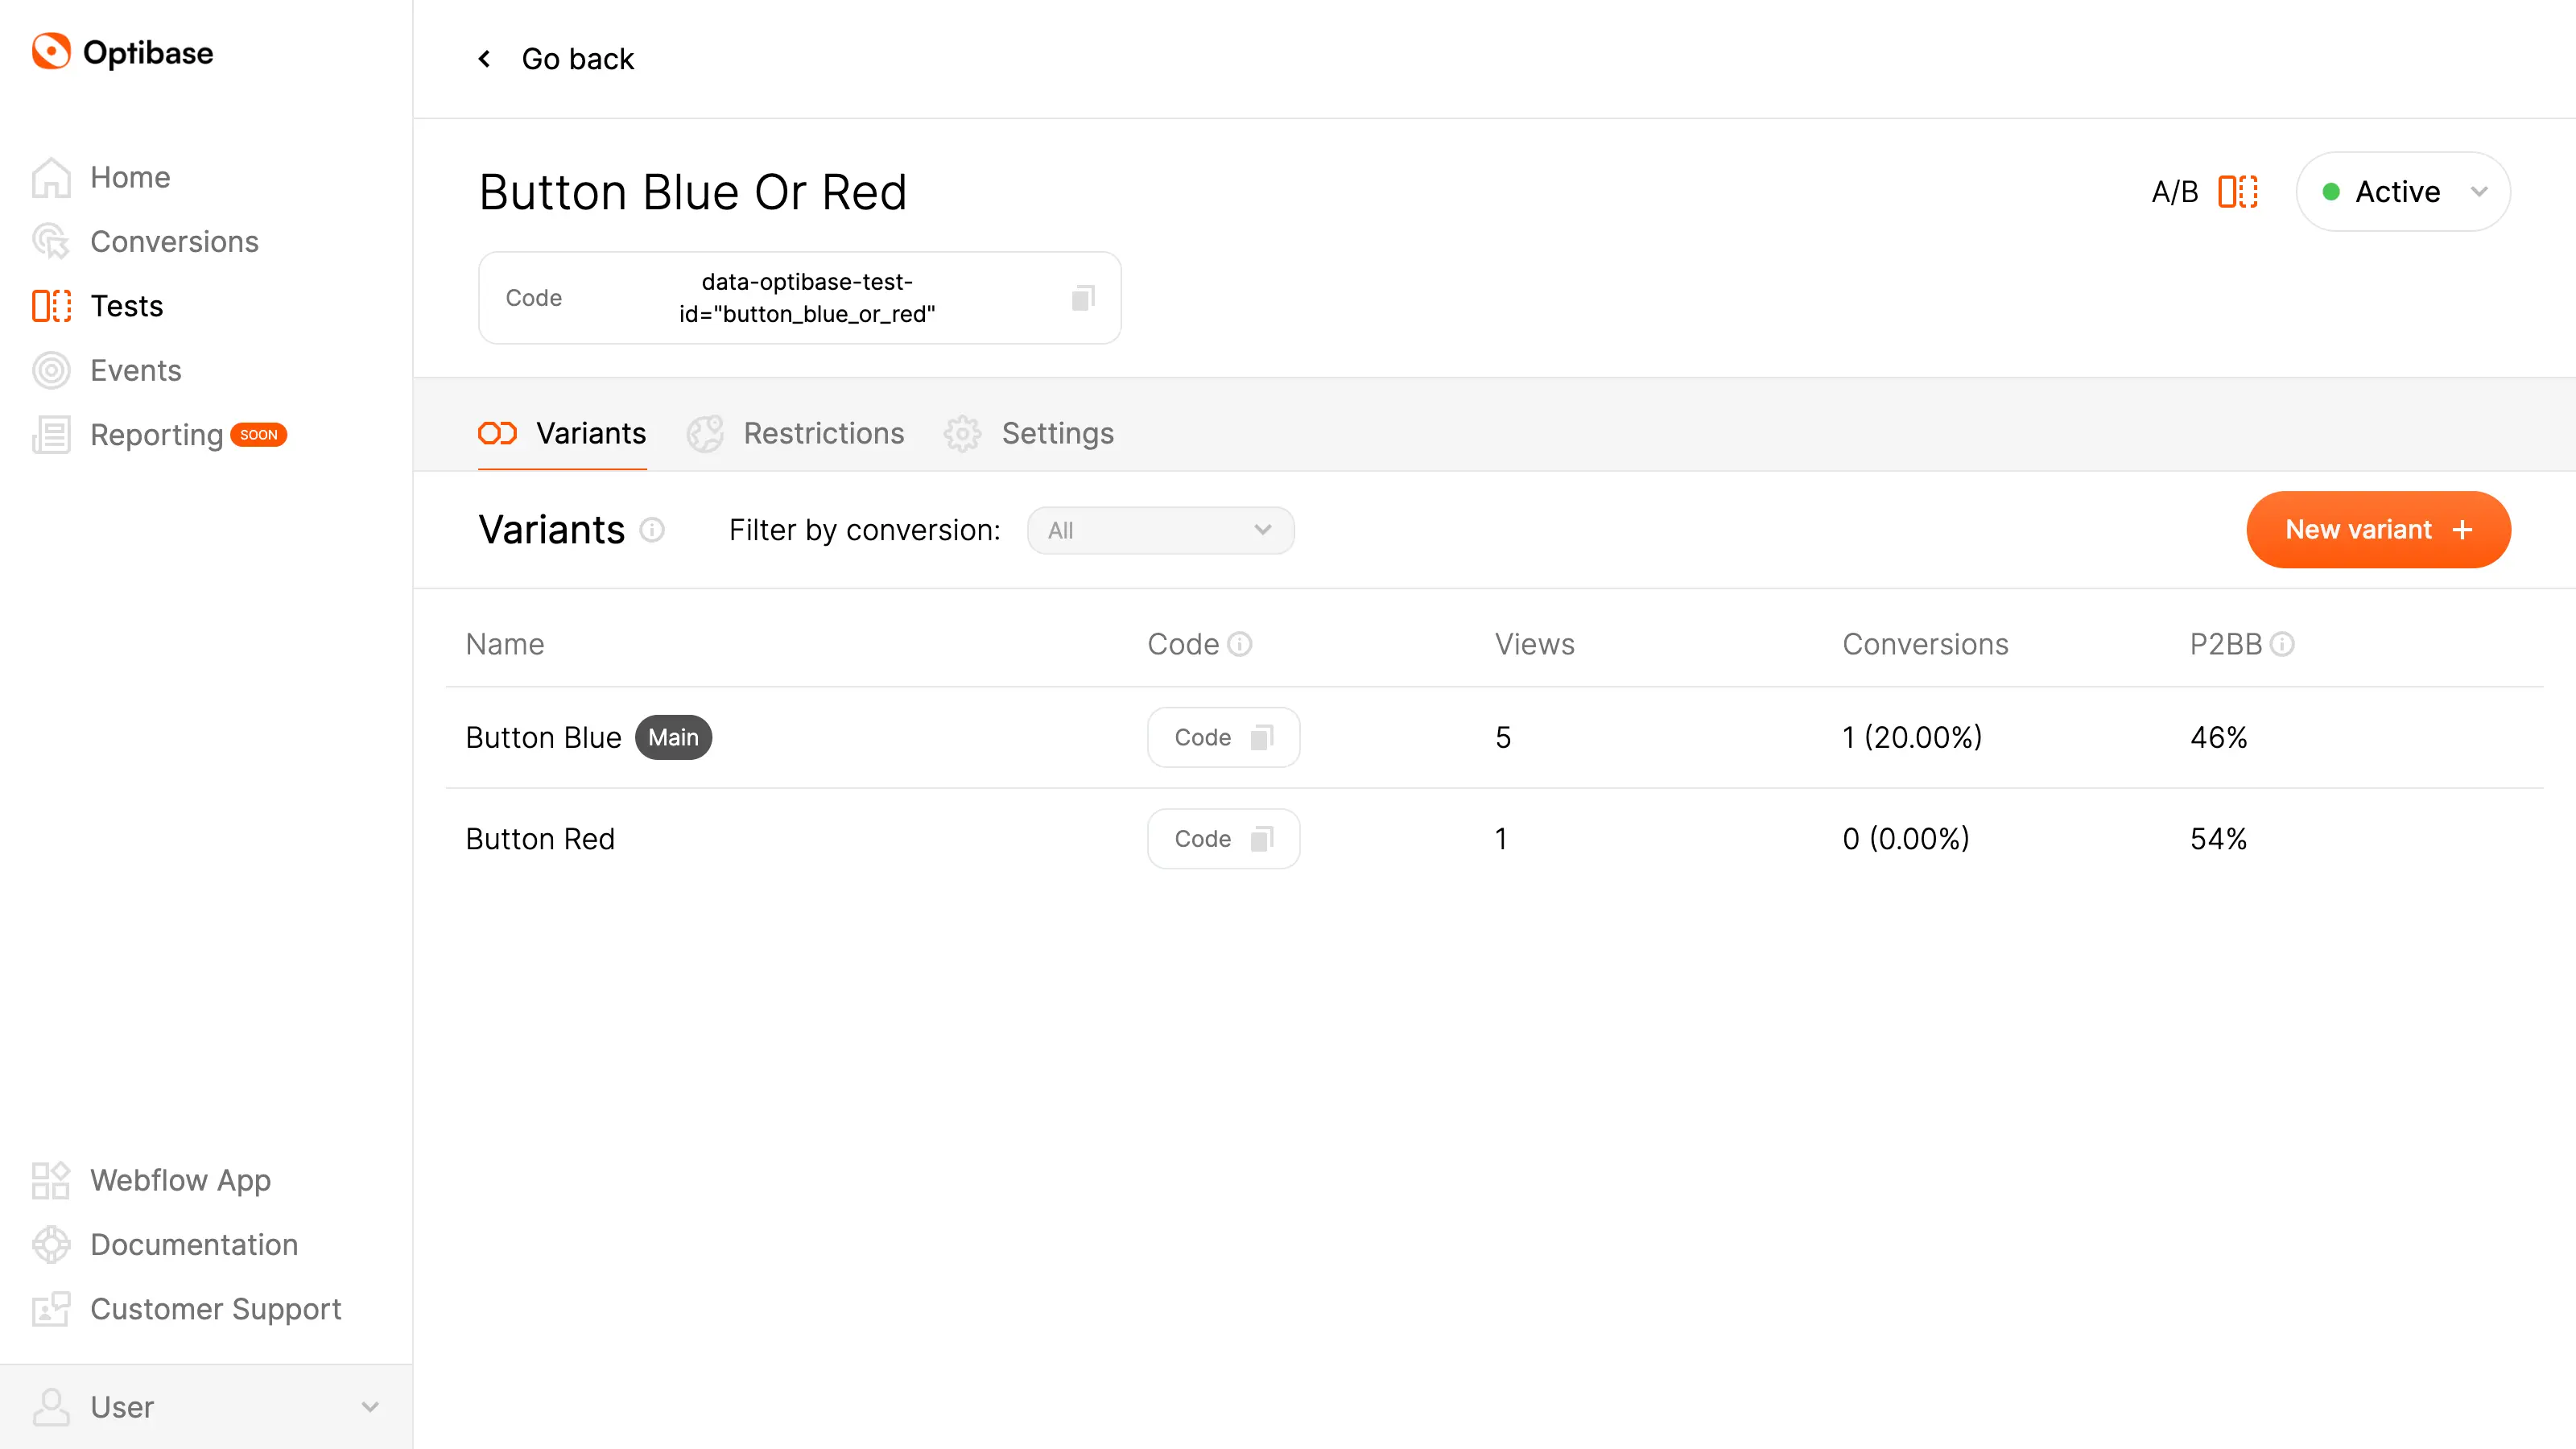
We can give the test a name. For example: Button Blue or Red
Finally, we click on the "Create" button.

Step 4: Setting variants
Now we're going to say which variants exist on my page, and therefore which elements should appear randomly on my page.
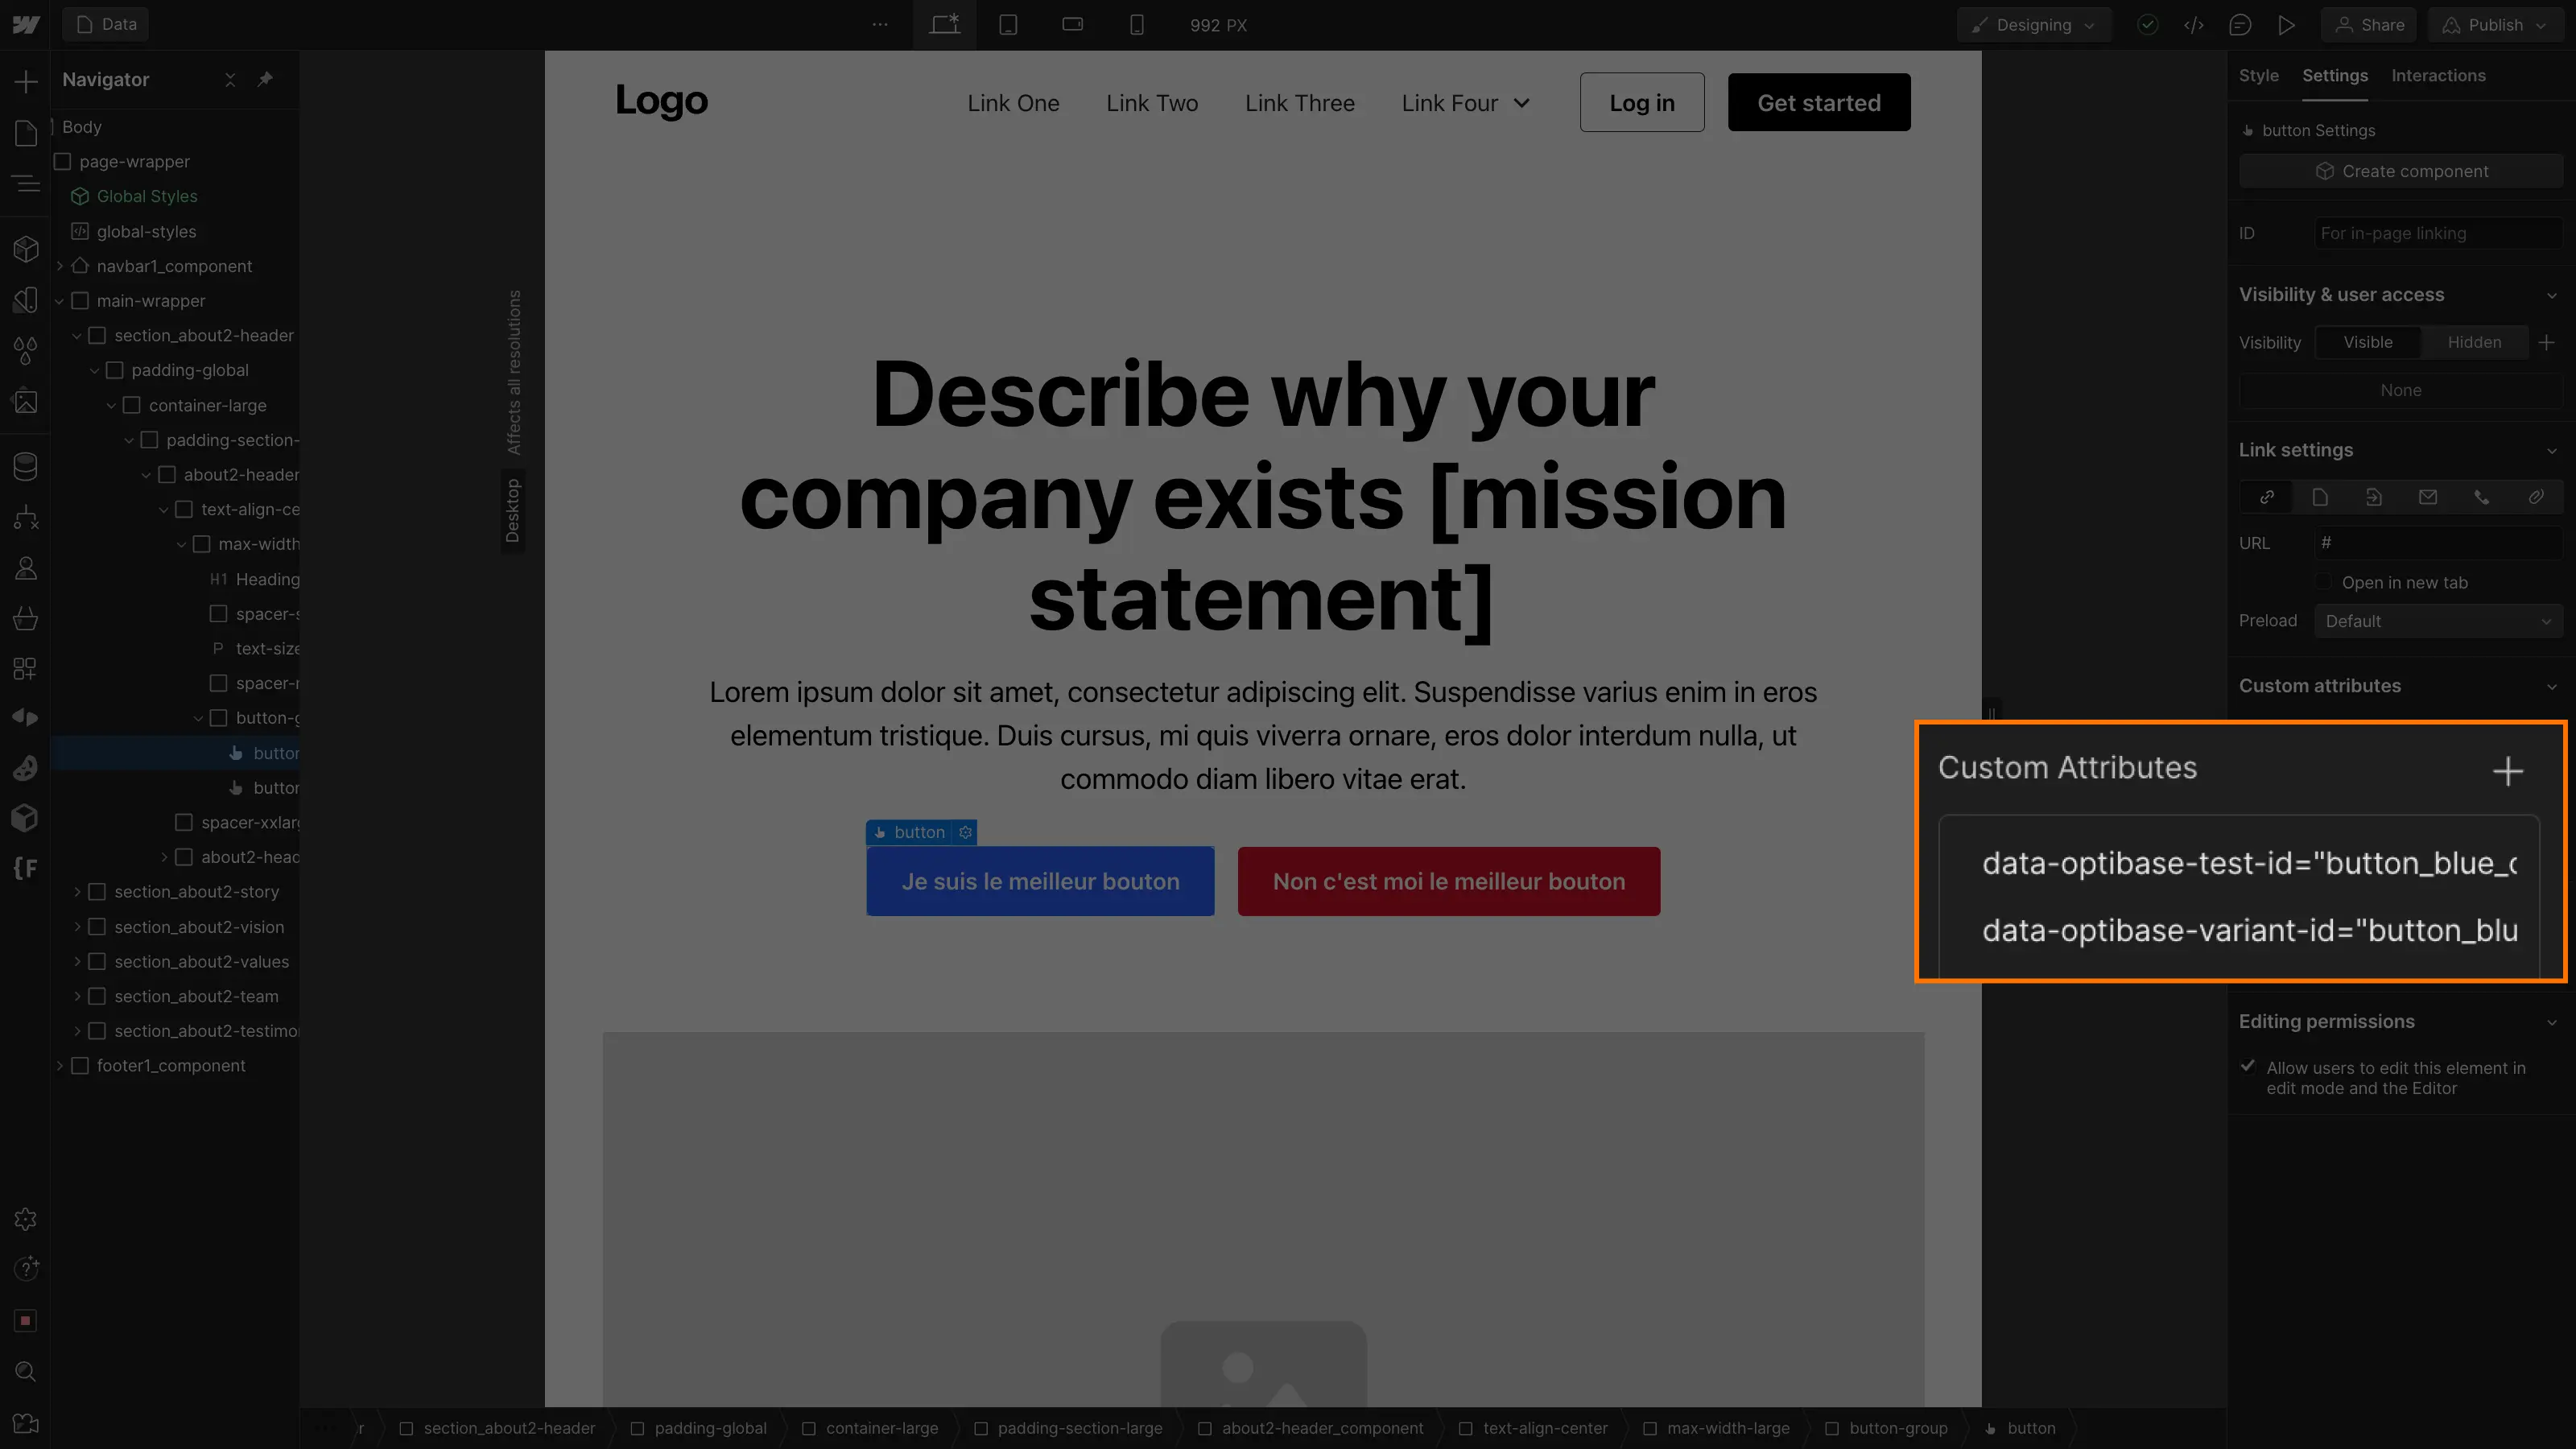
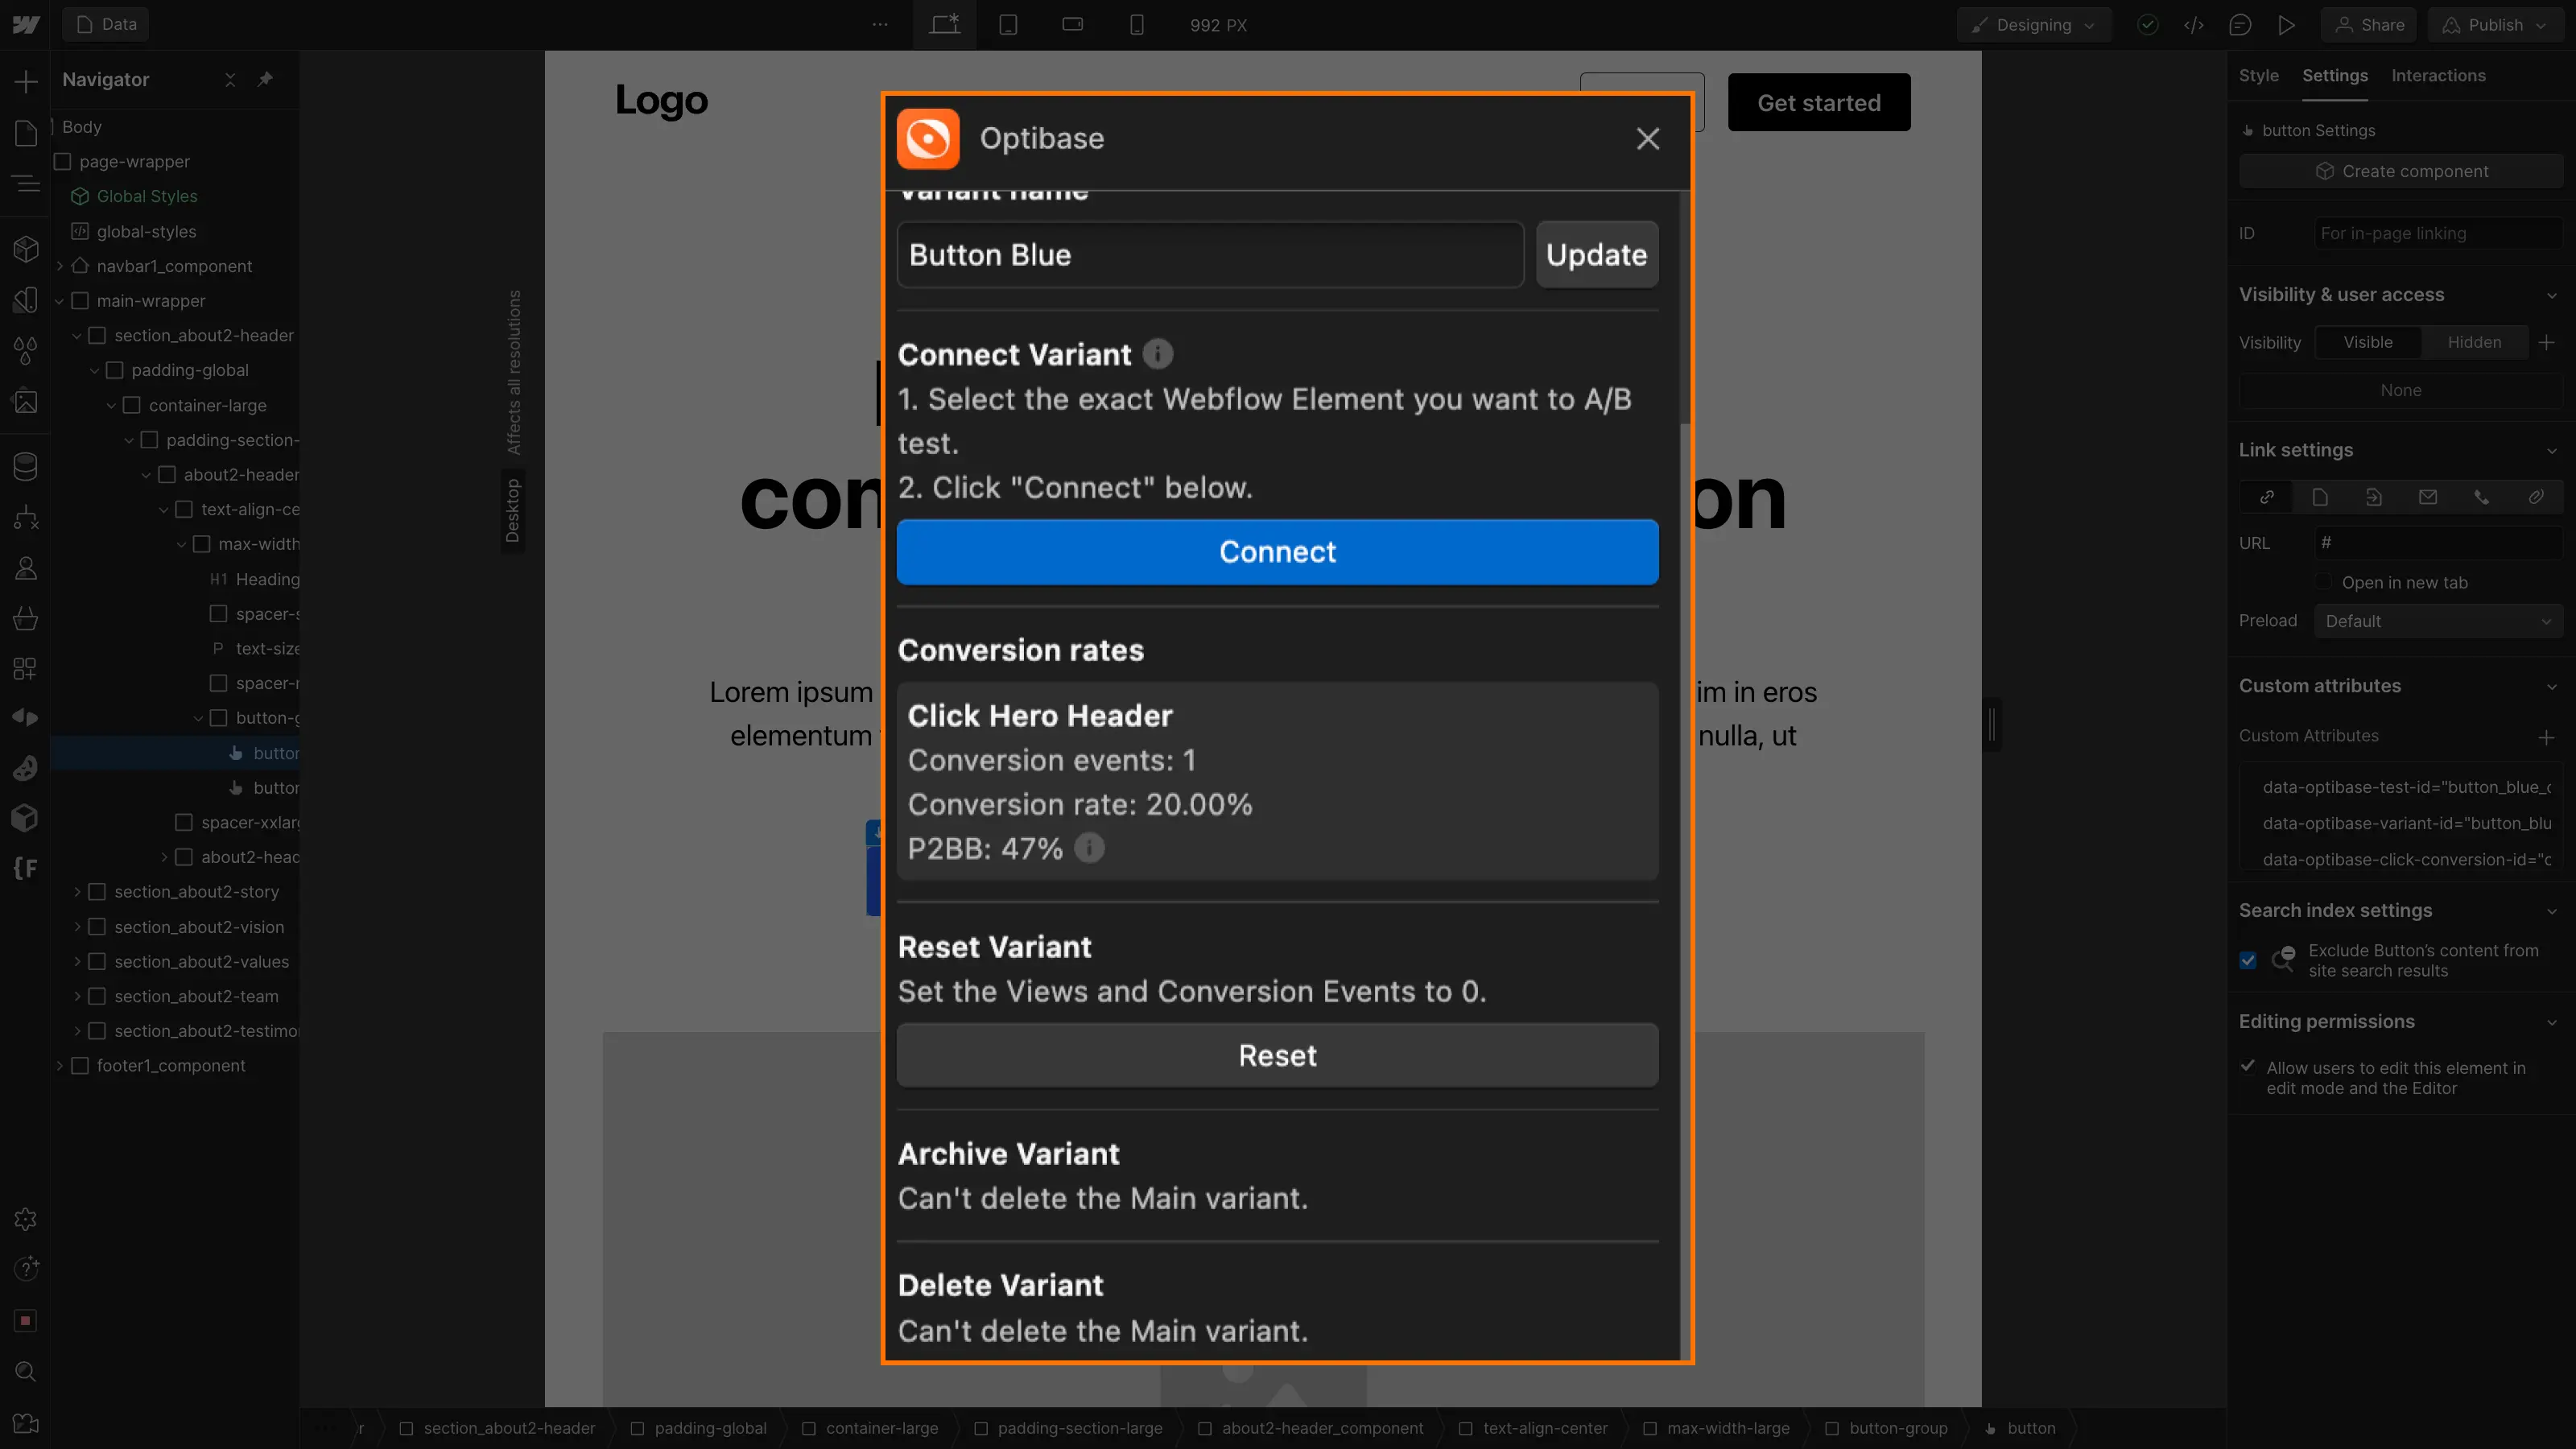
So we go to the app's"Variants" input, give our first variant a name (e.g. "Button Blue"). Then select the element in our associated webflow navigator and click on"connect".
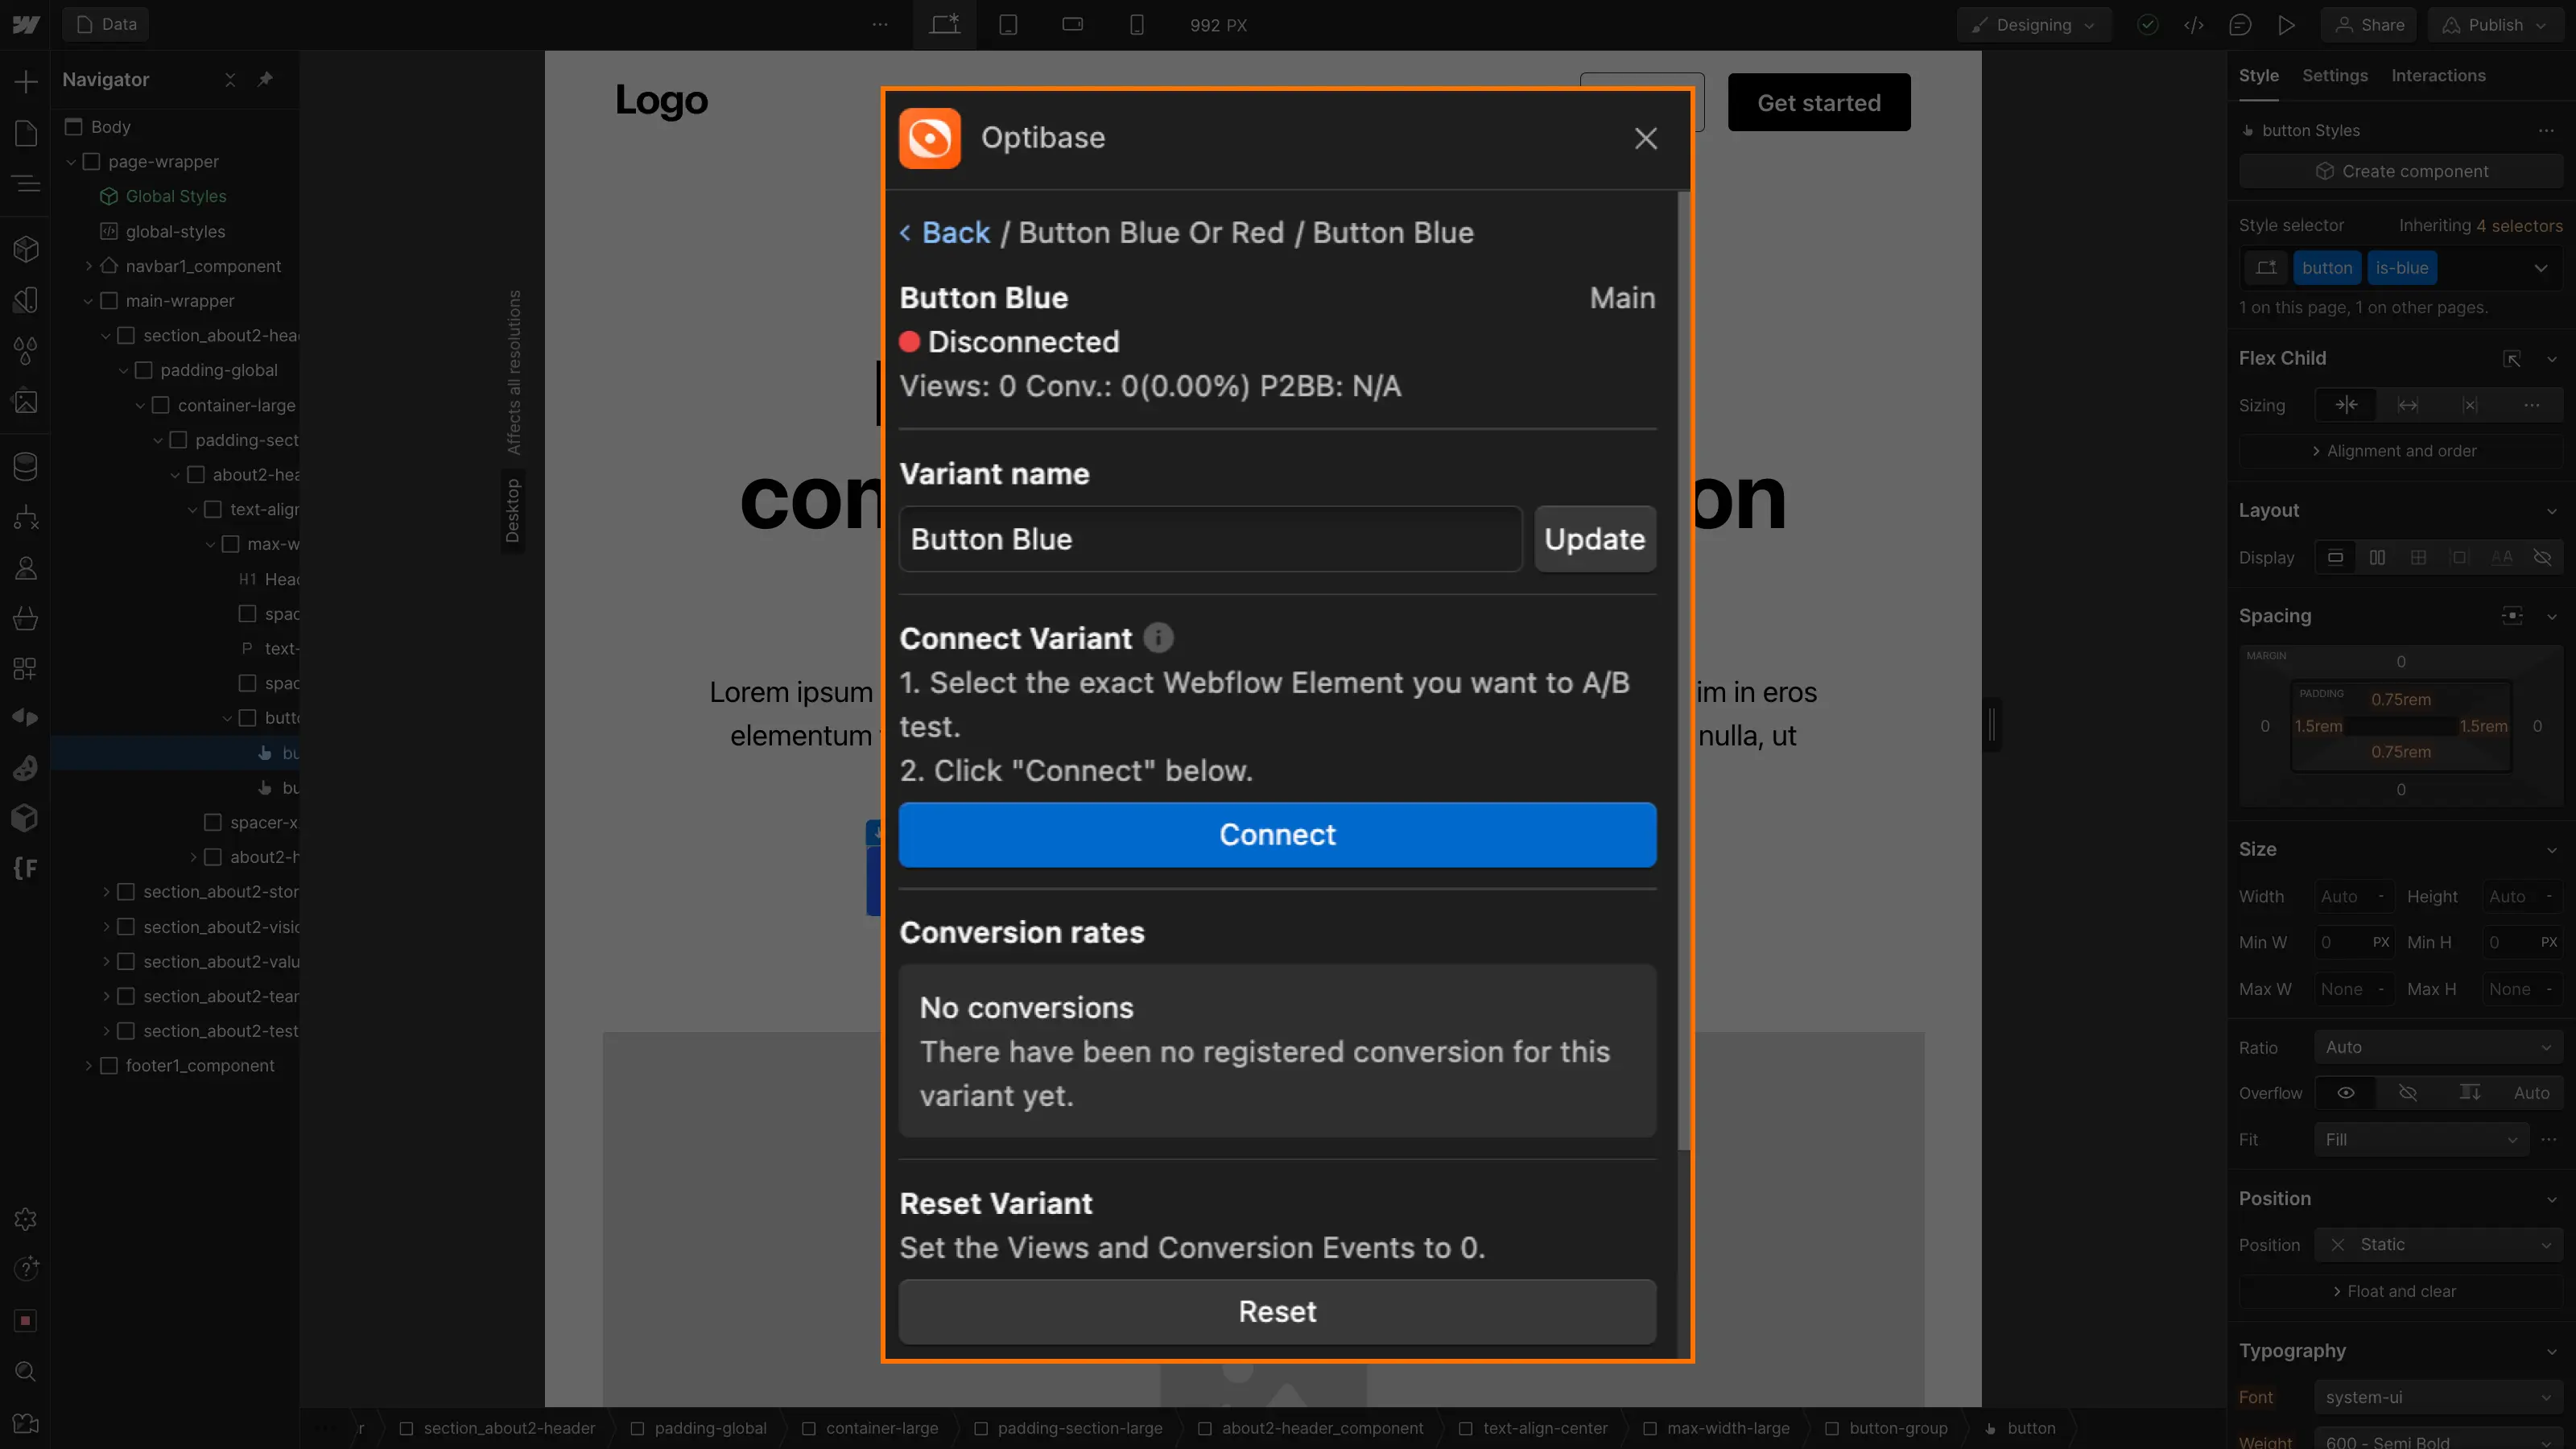
An element is connected when you see the optibase attributes automatically added to it.
You can do the same to add the other variants.
Step 5: Additional options
You can further customize your A/B Test with the following options:
- Select a geographical area: you can activate an A/B test only on a specific region (this can be useful for localized websites).
- Device type selection: You can activate an A/B test only on a specific device type, such as desktop, tablet, mobile or all.
- Persistent variants : If you leave this option checked, then the same user will always see the same variant when browsing the site (variants will only be different between different users). If the option is unchecked, the same user may see different variants when refreshing the page.
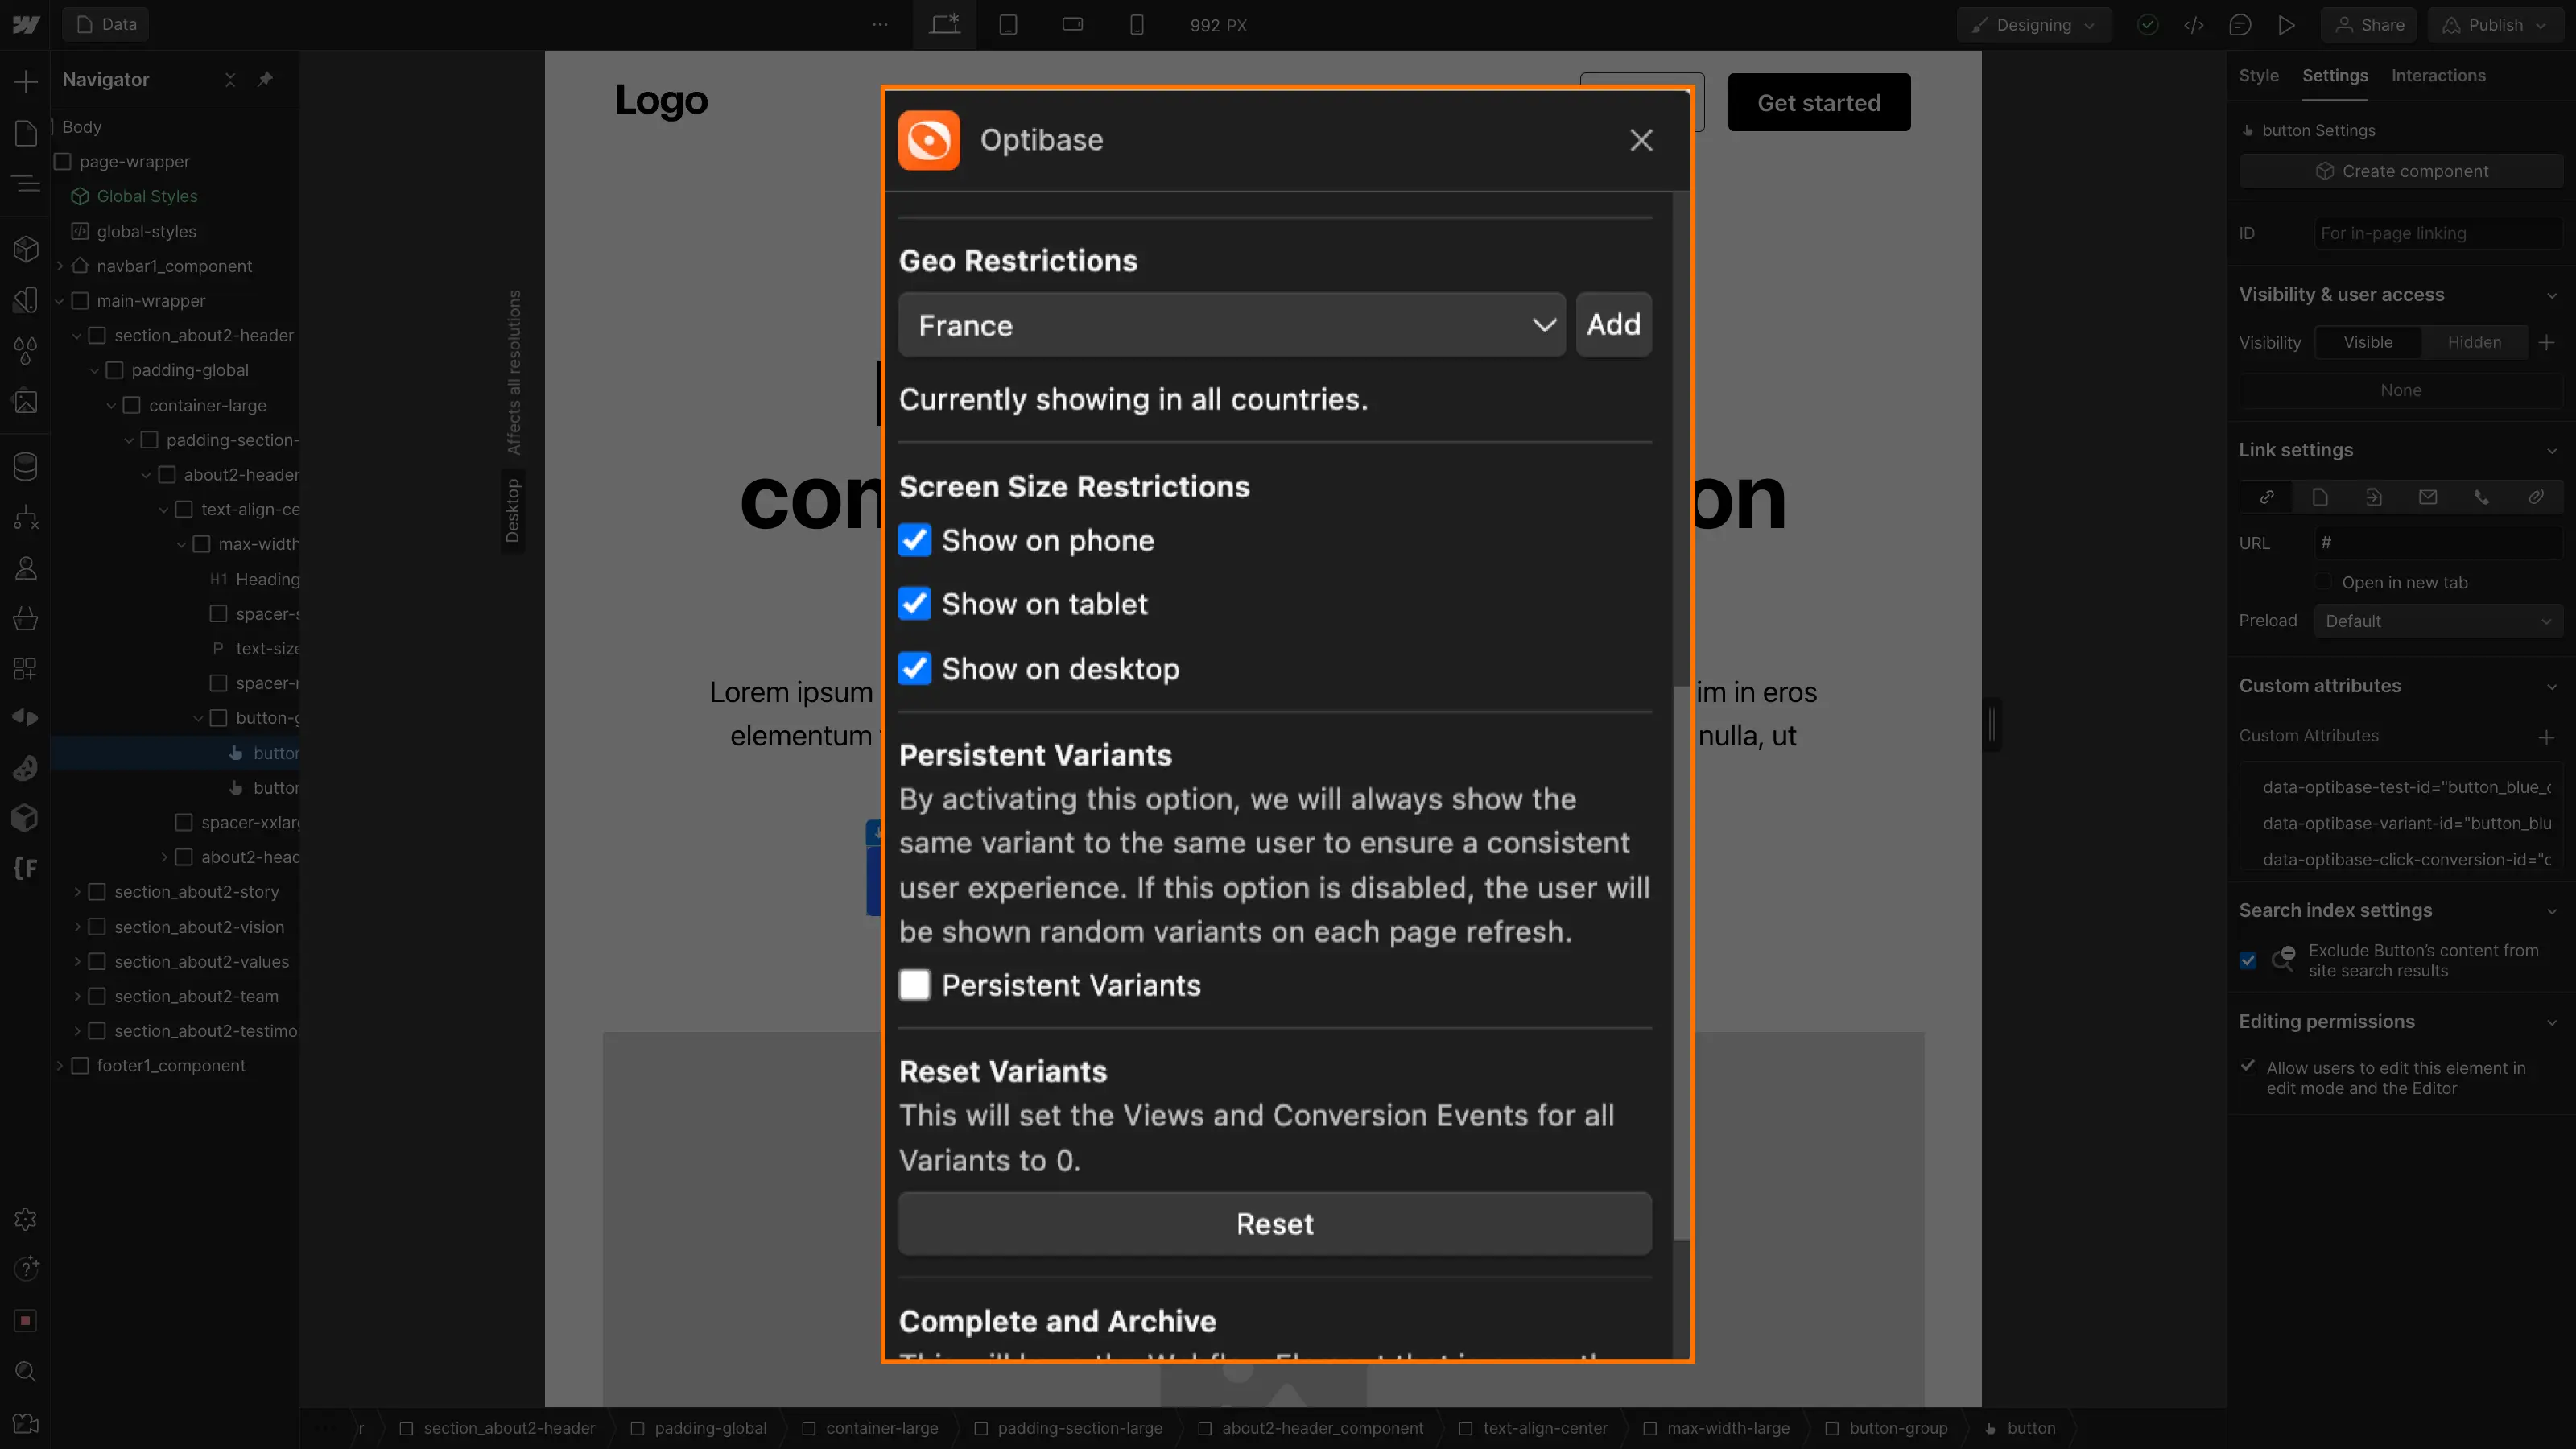
Once the settings have been made, you can publish your project and the A/B Test will be underway (remember to set the A/B Test to "active" status)!
Bonus: Track conversion rates
If you want to track conversions, such as clicks on buttons, you need to follow an additional step.
When you open the app, in the"Conversions" input add a name, then click on"Create".
Next, select the element whose conversion you wish to track and choose between"Click events" if it's a link/button or"Submit Event" if it's a form.
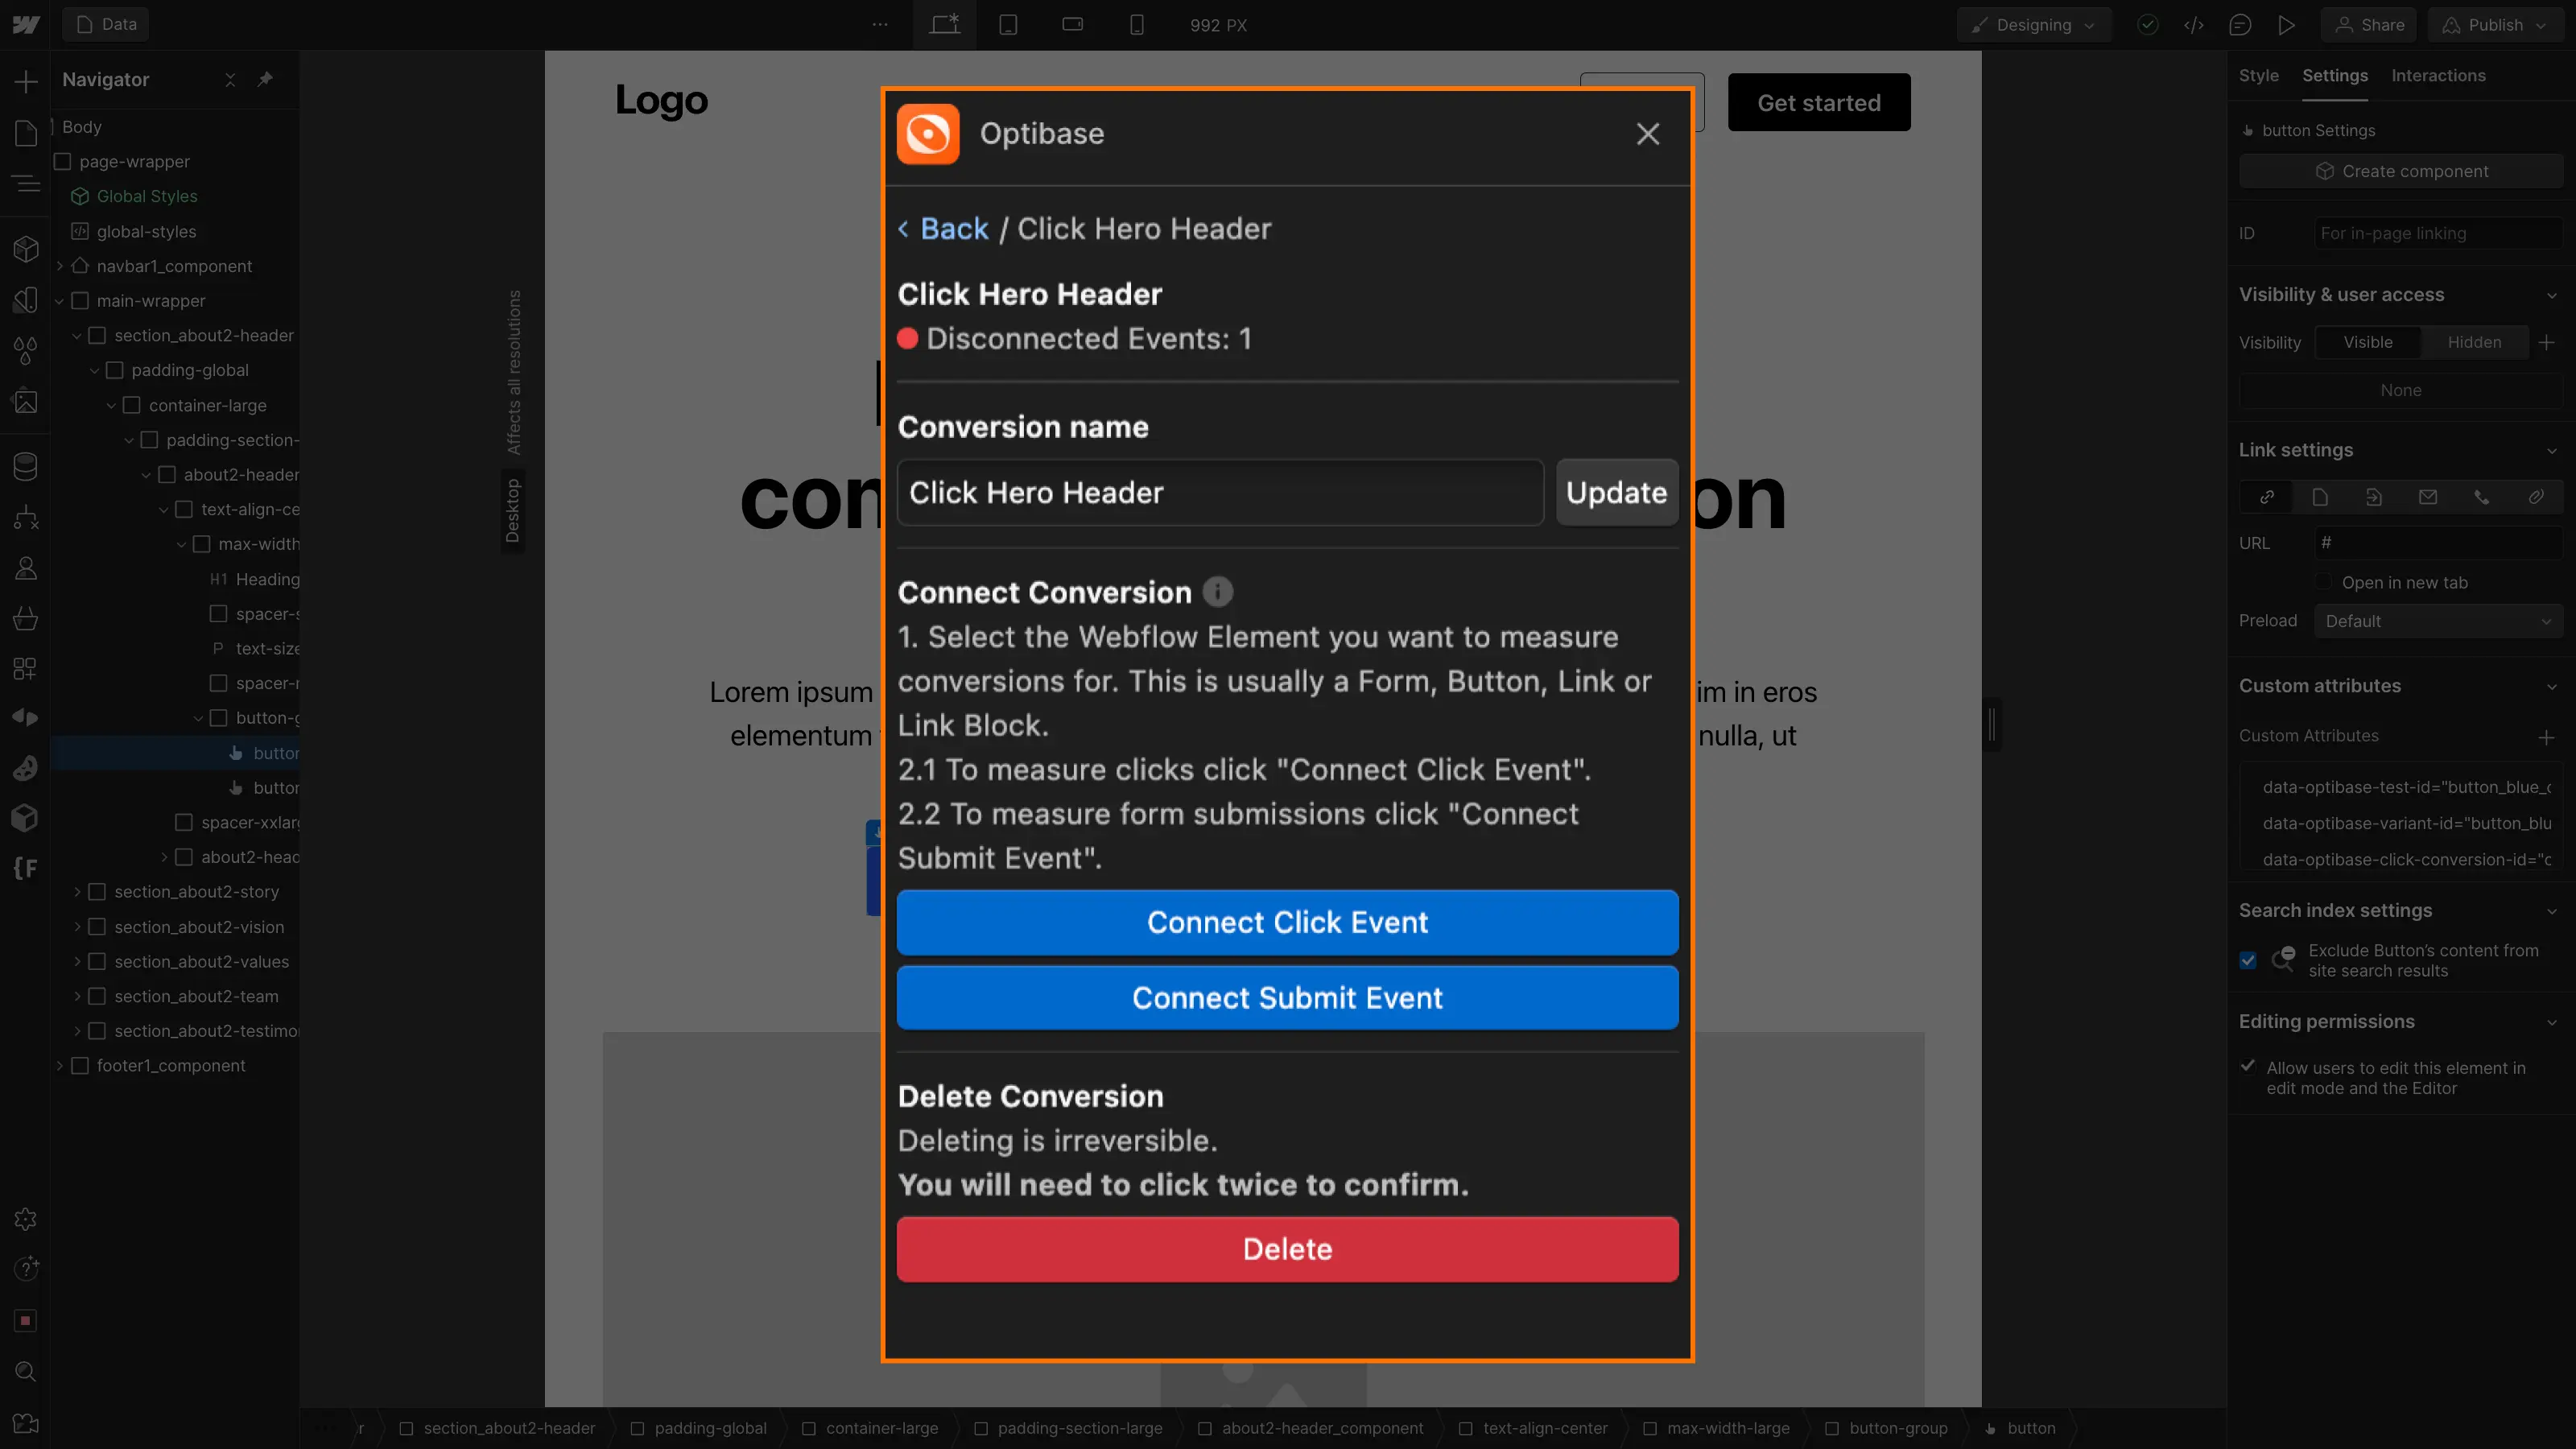
New attributes have been added to your buttons, and you can now get statistics on them.
The web application also provides real-time data.
For a better understanding of how to use Optibase, here's a video explaining how to use it:
In any case, it's never been easier to create A/B tests in Webflow. Optibase is the ideal tool for optimizing your landing page, product page or other elements, and turning your website into a real revenue generator.
See also theHubspot application for Webflow
Ready to take your website to the next level?
Improve your online visibility thanks to Digidop's experience, excellence and reactivity!


.webp)
.webp)

